Release Date:- December 16th 2025
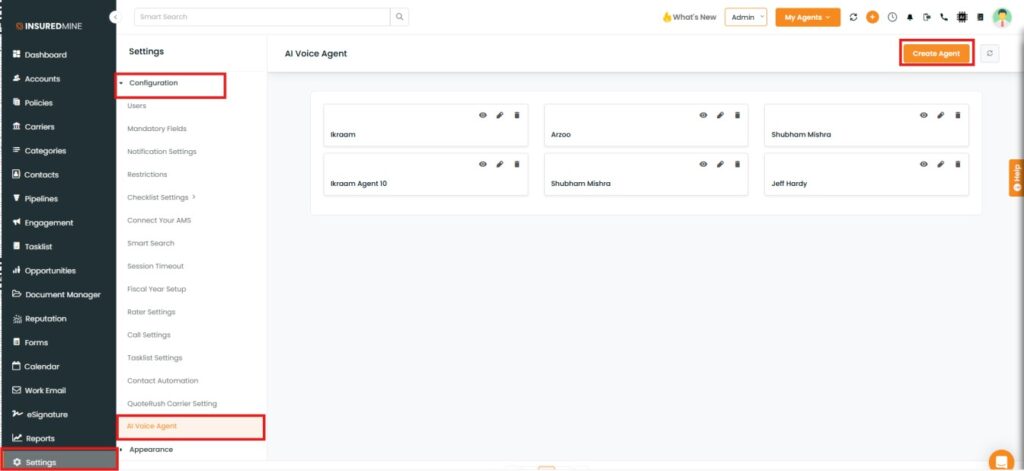
We have introduced a new enhancement under the Settings → Configuration section, where a new option called Voice Agent has been added. Using this feature, agents can create voice messages based on business needs and send them manually to specific clients.
Use Case: Agencies can use voice agents to send outgoing calls for renewal reminders, cross-sell or upsell opportunities, policy updates, important service notifications, and more. Since these calls are manually triggered, agents have full control over message delivery and recipient selection.
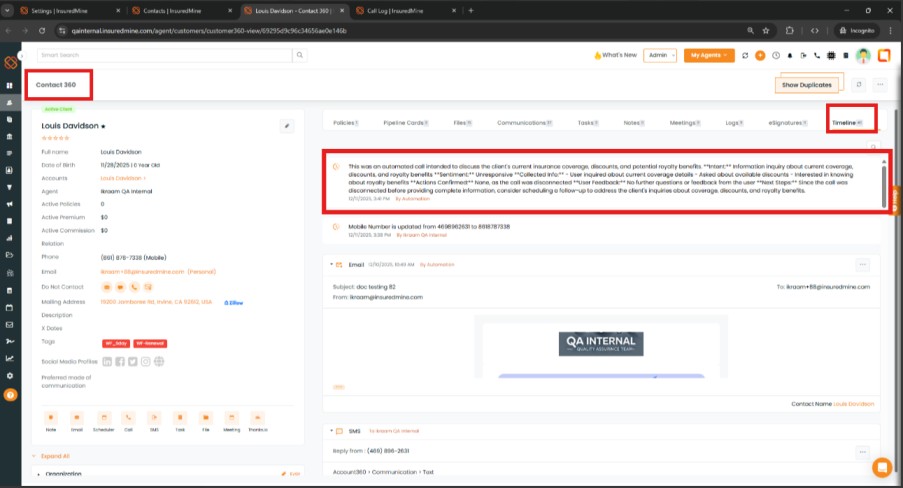
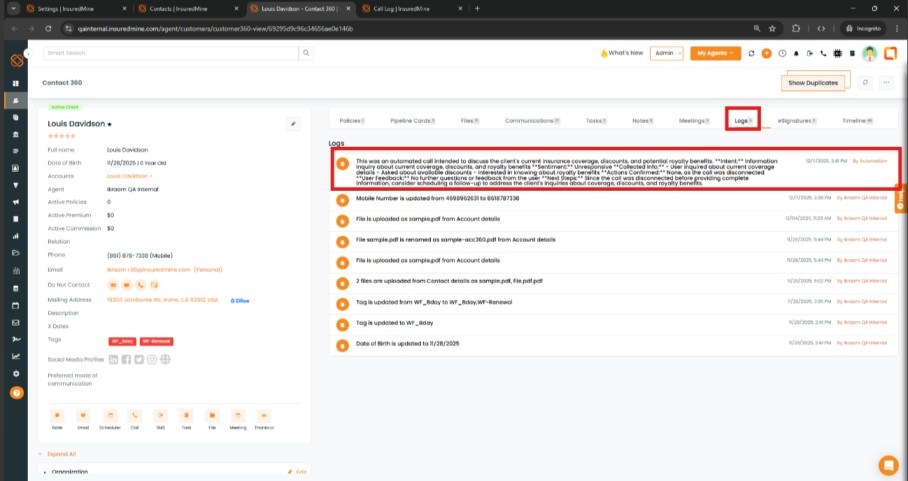
All outgoing calls and conversations are automatically logged in the Contact 360 Timeline and Logs, enabling easy tracking, complete visibility, and effective follow-ups.
Note: This feature is currently available only for Twilio users.
To View the Enhancement:
- Navigate to Settings.
- Click on Configuration, and from the Configuration dropdown select AI Voice Agent.
- Click on Create Agent.
- An Add AI Voice Agent Pop-up appears.
- Fill in the required details as per the message you want to trigger (e.g; Insurance coverage review).
- Click Save.
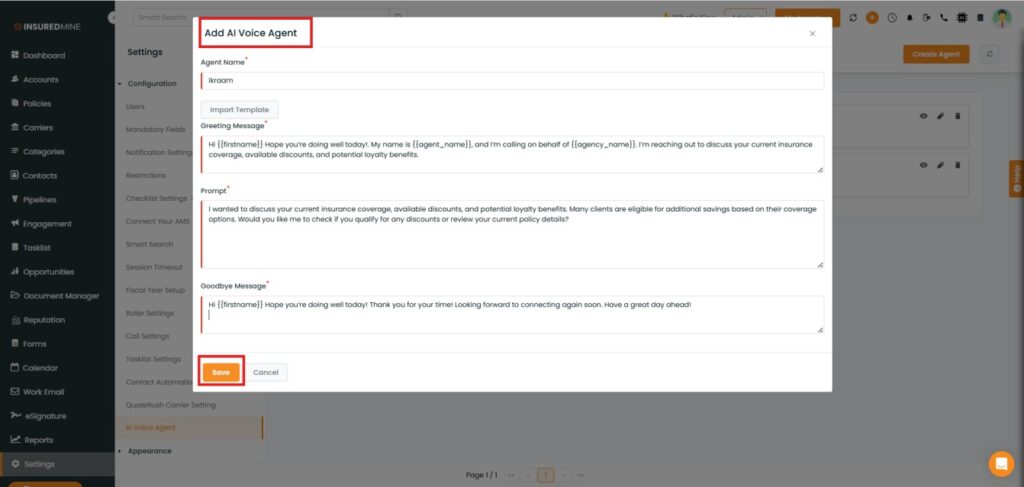
Note: The prompt is the message that the voice agent delivers to the client during an outgoing call, such as birthday wishes, cross-sells, renewal reminders, and more.
Prompt Use Case: The prompt entered by the agent defines the exact message that the voice agent delivers to the client during an outgoing call, such as birthday wishes, renewal reminders, or cross-sell notifications.
A well-configured prompt ensures clear, consistent, and accurate communication, helping the AI Voice Agent convey the right intent and improve client engagement.
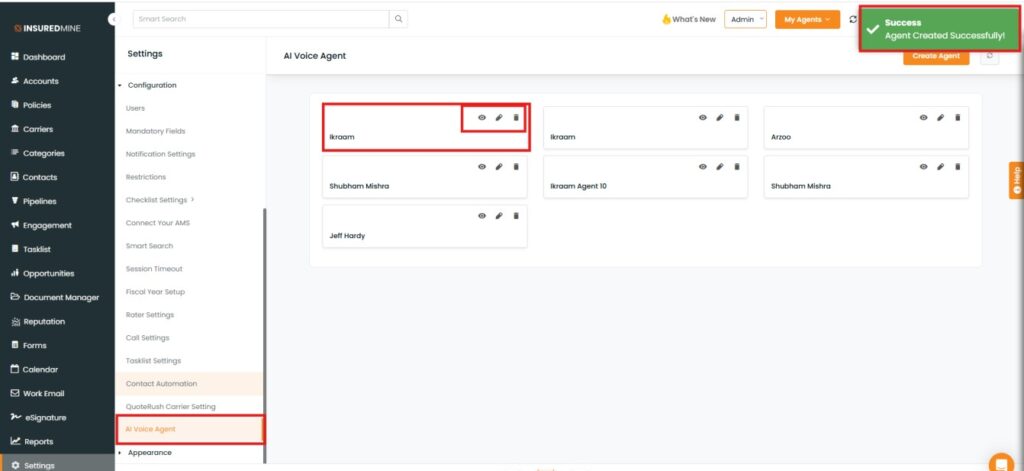
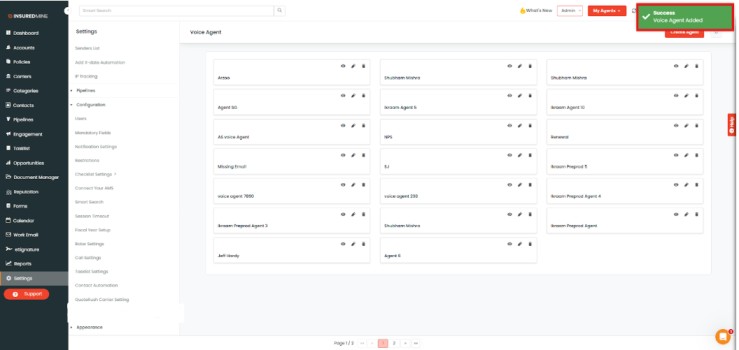
- A success message: “Agent Created Successfully” appears.
- As shown below, the newly created agent name is displayed.
- You also have the options to Preview, Edit, and Delete the message.
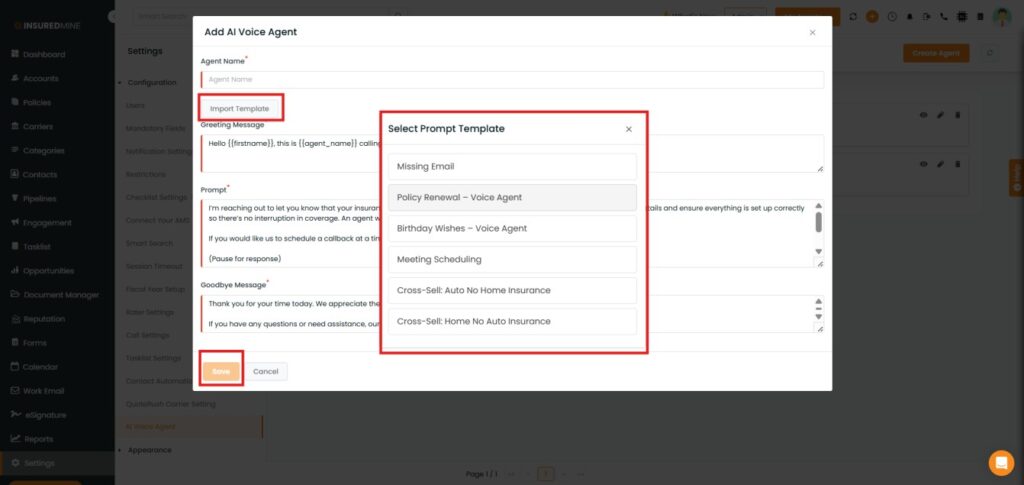
You also have the option to select a Prompt Template for the message:
- Click Import Template to select a predefined prompt template.
- As shown below, the Select Prompt Template pop-up appears with multiple predefined options.
- Select a template to auto-fill the Greeting Message, Prompt, and Goodbye Message fields.
- Modify the content as per your requirement.
- Finally, click Save.
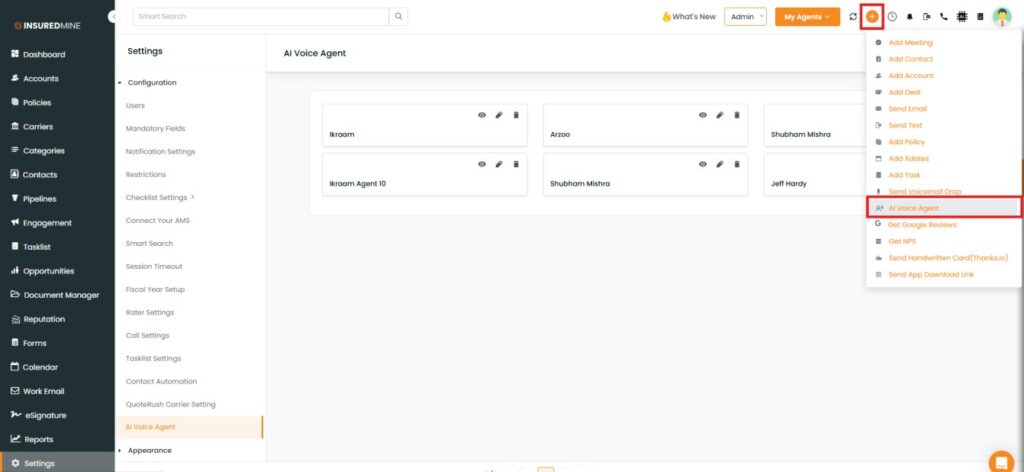
To Send the Message:
- Navigate to the Header.
- Click on Quick Action.
- From the dropdown, select AI Voice Agent.
- An AI Voice Agent pop-up appears.
- Fill in the required details of the contact to whom you want to send the voice agent message.
- Click Save.
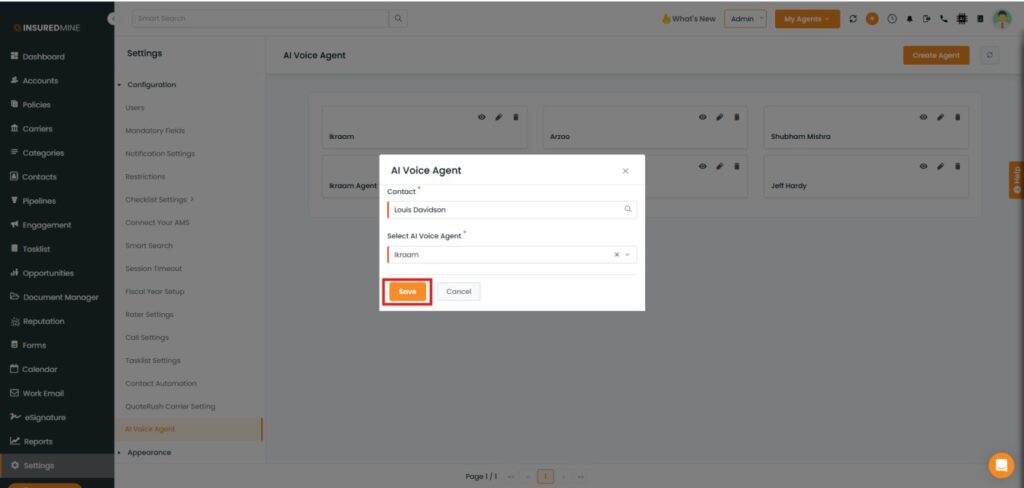
- A Success message: “ Voice Agent Added” appears.
Note: The selected contact will receive an outgoing Voice Agent call with the message you have configured.
Note: As an outgoing feature, the voice agent is manually assigned, and all conversations are recorded in the Contact 360 Timeline and Logs upon conversation.