In the Agency portal, click on Engagement tab —-> then click on Email Templates —-> Select Edit Option from the drop-down list box appearing under the Actions tab. Now you can make changes in your desired template.
Mentioned below are a list of options and their use in editing.
- Formats – It consists of a list box with parameters to design and display the text in a particular way. Each has a distinct function, viz, Headline (Choose from H1, H2, H3, H4, H5, H6), Inline ( Make text Bold, Italic, Underline, strikethrough, superscript, subscript, code), Blocks (Paragraph, Blockquote, Div, Pre), Alignment ( Left, Centre, Right and Justify).
- B/I: Bold and Italics – To emphasize important details in your document Bold and Italics are used. Bold gives a heavier appearance while Italics makes the text appear slightly slanting.
- Indentation – When you want to set off quoted text from the rest of the content, its best to use indentation. You may Increase or Decrease it as you wish.
- Bullets – They help in identifying key areas of information for the reader.
- Alignment – Your template text can be aligned to Left, Right, Centre and Justified setting in confirmation with Images and CTA(Call To Action) button positioning.
- Guest List – You can choose your specific group of contacts for sending the email.
- Text Color: The color of the text can be changed with this tool. This helps in maintaining consistency with the default color palette of your organization.
- Background Color: This feature accentuates text importance by highlighting it.
- Other Features – These help you Print or Preview your email template. You can also add source code to it.
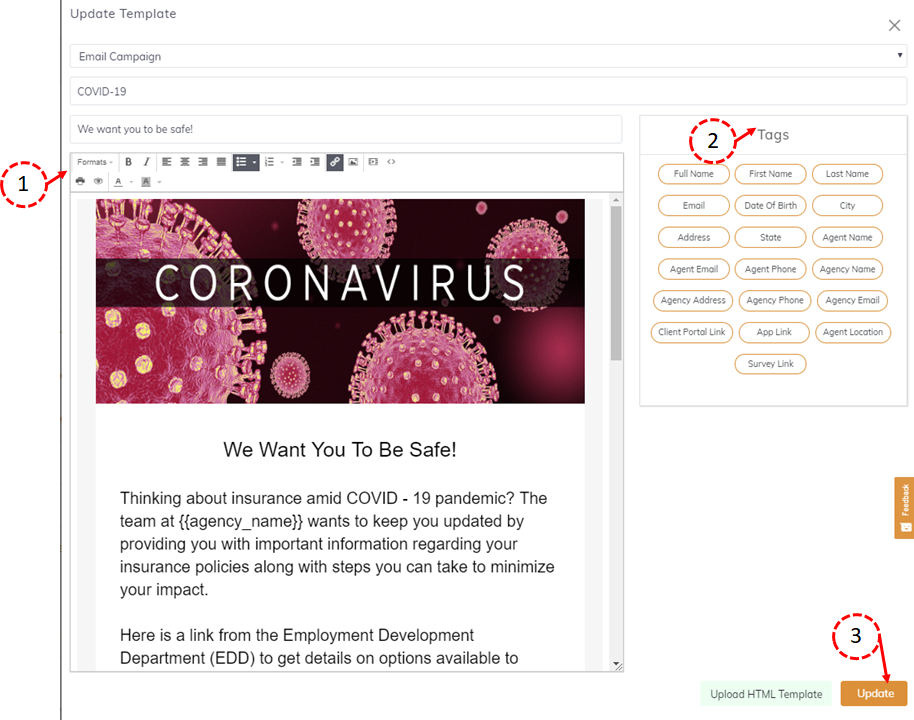
Updating an existing Template: You may choose to edit an existing template and modify it, to correlate with your agency requirements.
- A click on the formatting tool allows you to alter the text appearance to your liking.
- Create or select Tags from the Tags section to organize your contacts. Tags enable you to compile more data about your contacts so you can send it to your target group at an appropriate moment. You can tag specific contacts or groups of contacts distinctly.
- Click Update to save all the alterations in your template.
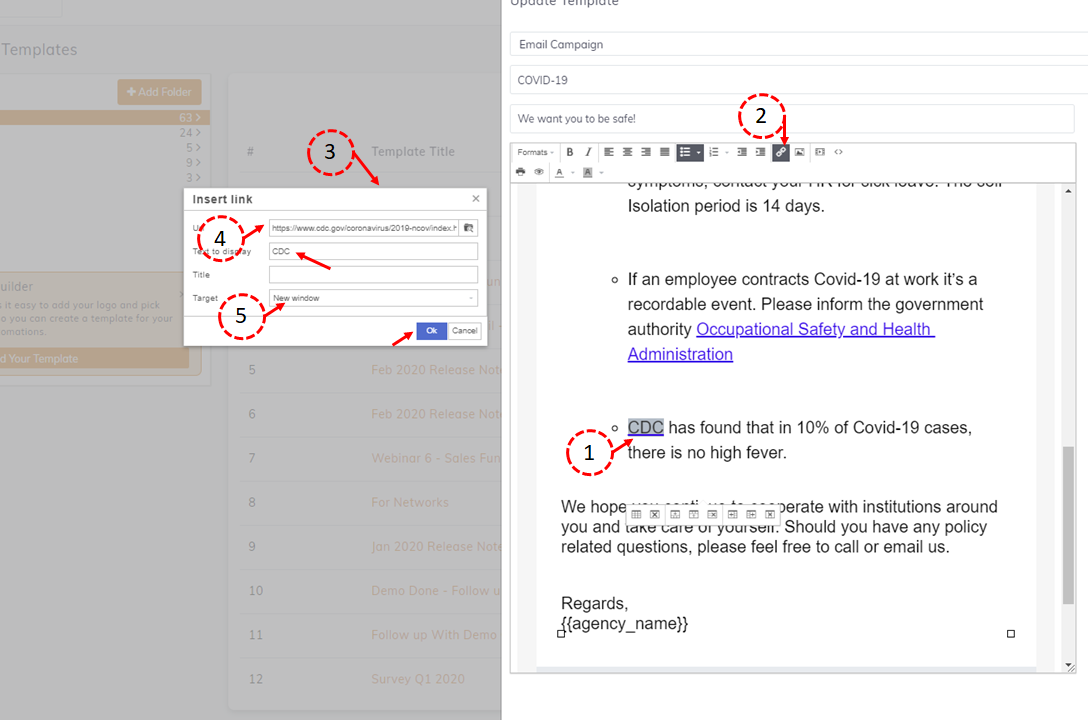
Adding a link to an article: To add a link to an article please follow the steps mentioned below.
- Select the text for adding the link.
- Click on the link tool button as shown in the image.
- The Insert Link Dialog box appears
- Add the URL, Text to display, and the Title in the input box.
- Select New Window in the Target segment and press OK.