InsuredMine’s eSignature module offers an easy and secure solution for managing digital signatures. This feature allows agents to easily upload PDF documents, add and request signatures, and efficiently track the status of each document. By facilitating eSignatures, the eSignature module reduces the need for physical paperwork, accelerates transaction times, and enhances overall document management. Agents can customize the signing process by adding signers’ information, placing signature fields, and choosing signature styles.
Use Case: Quickly obtain secure digital signatures from clients on insurance documents, reducing paperwork and accelerating transactions.
To View the Enhancement:
UI Enhancement for eSign (Dec 2024):
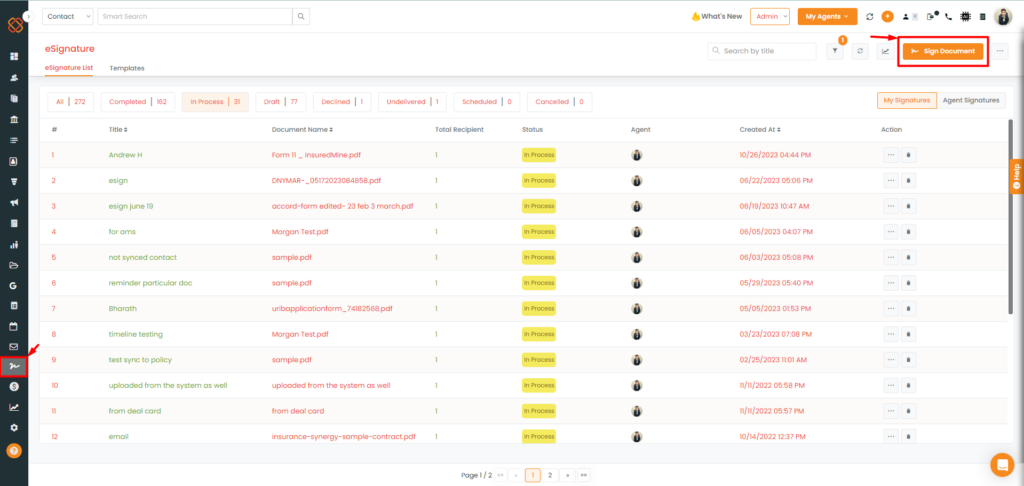
Click on the eSignature module.
Then, click on the Sign Document button present in the top right corner.
Now, follow these four easy steps to add the eSignature of the agent and get it signed by the recipients/signers.
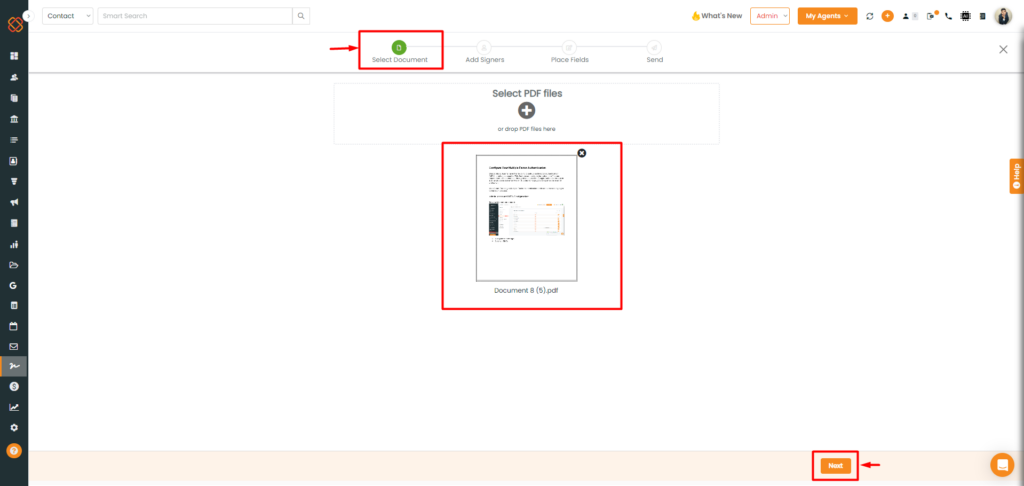
Now, How to Add a Document?
Click on select PDF files to add the document or you can drag and drop the file.
Now, wait for some time till the document is uploaded.
Note: Only PDF forms of documents are supported.
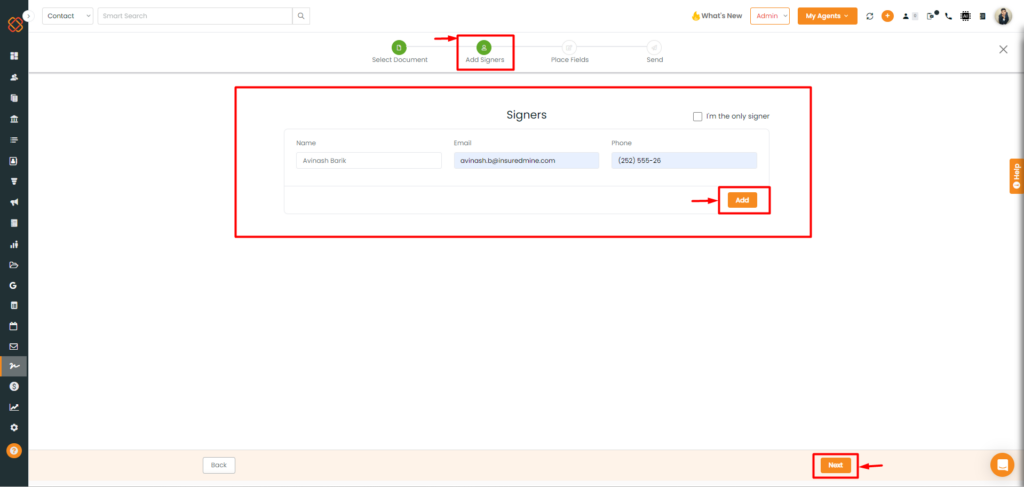
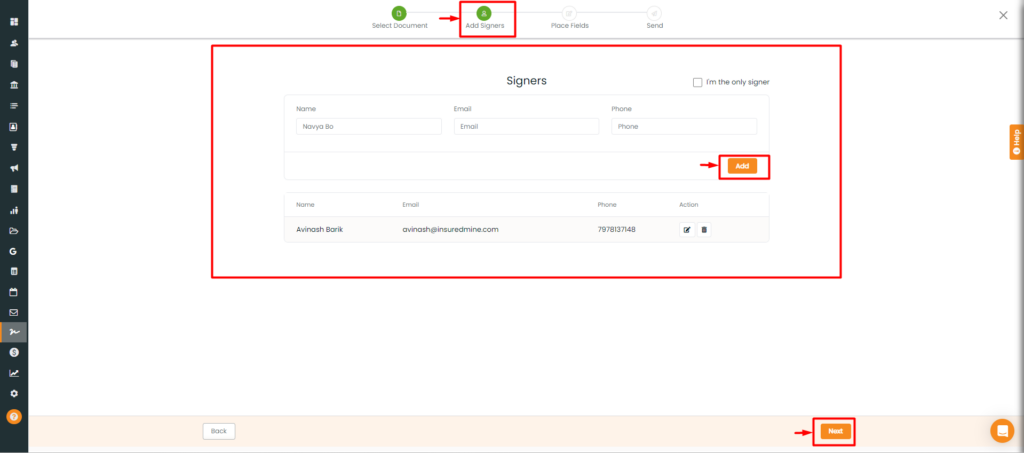
Add the Signers’ name, email, and phone.Then, click on Next.
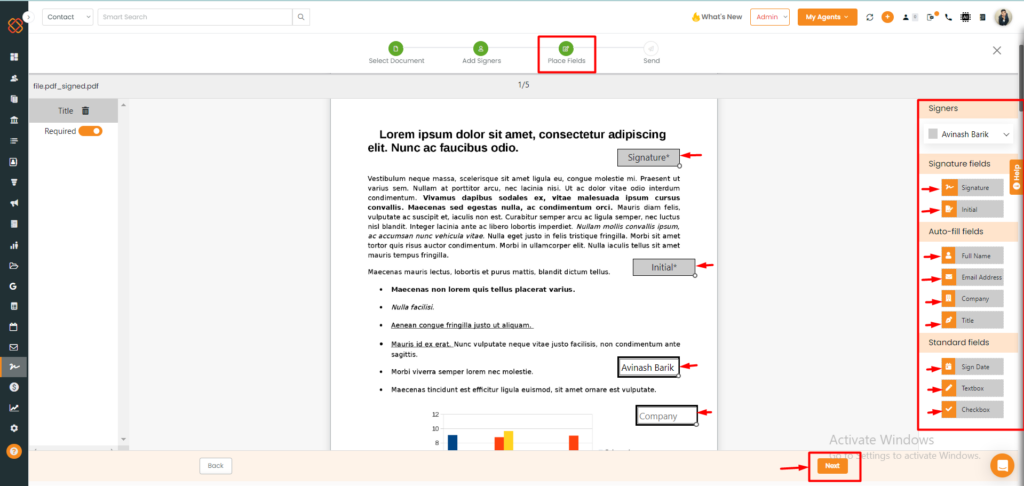
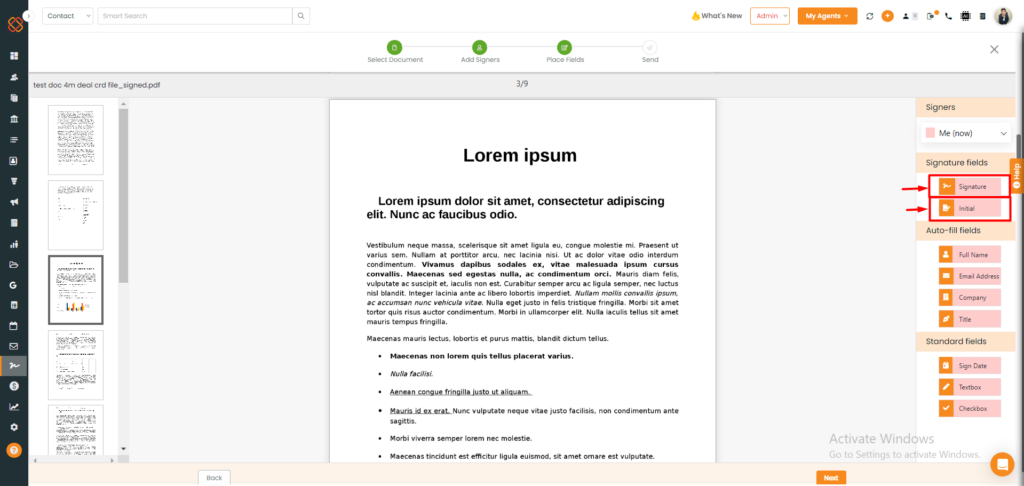
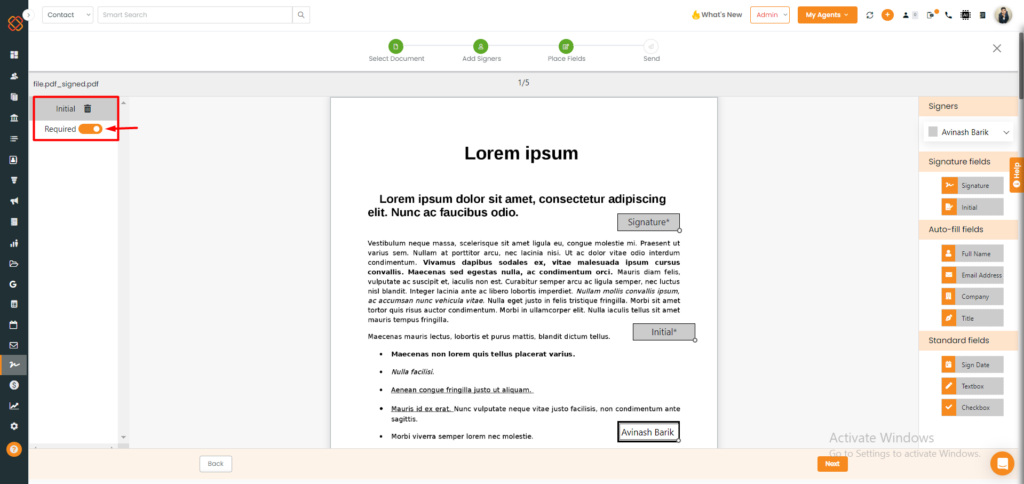
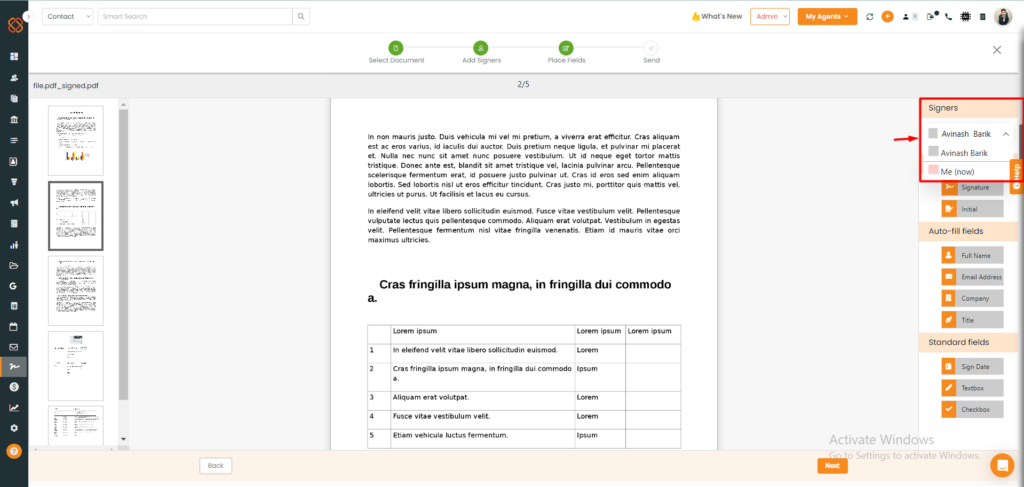
Then, click and drag the signature fields for the recipients to sign the document.
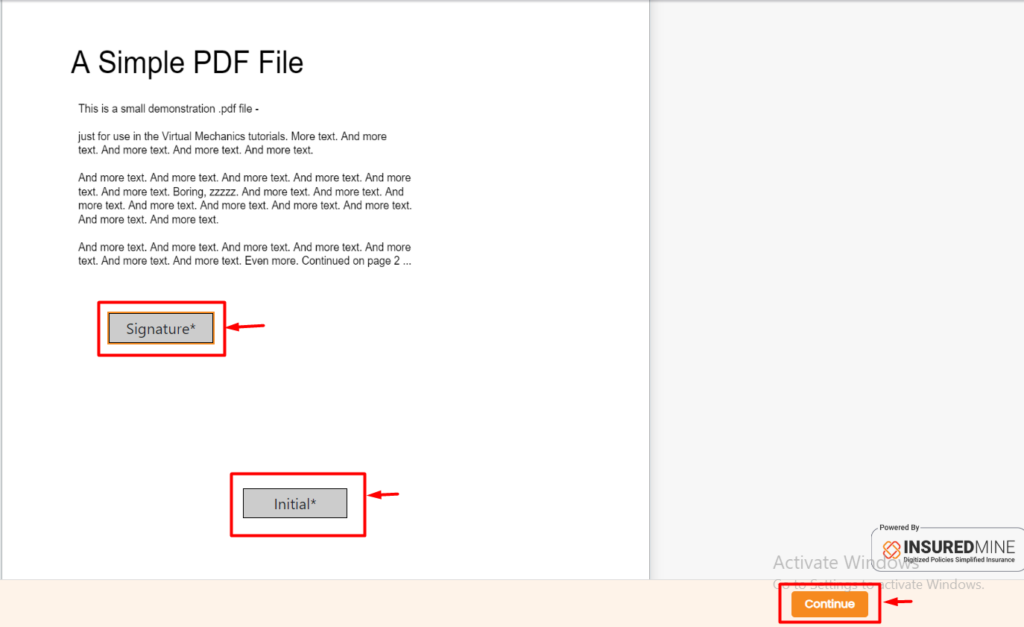
The available fields that you can add to the pages are Signature, Initial, Full Name, Email address, Company, Title, text box, payment field, check box, and Sign Date. You will be able to drag and drop the fields into the page. You can add these fields on one page or different pages of the file you have uploaded.
Click on Next.
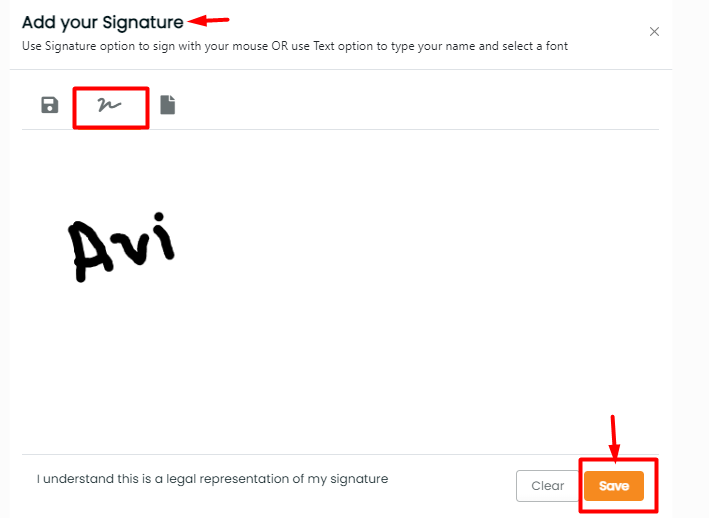
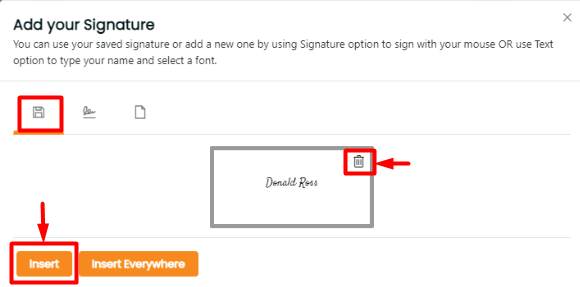
The signature can be added in three ways:
Type to sign using a font of your choice.
Or, Strike to Sign using your mouse.
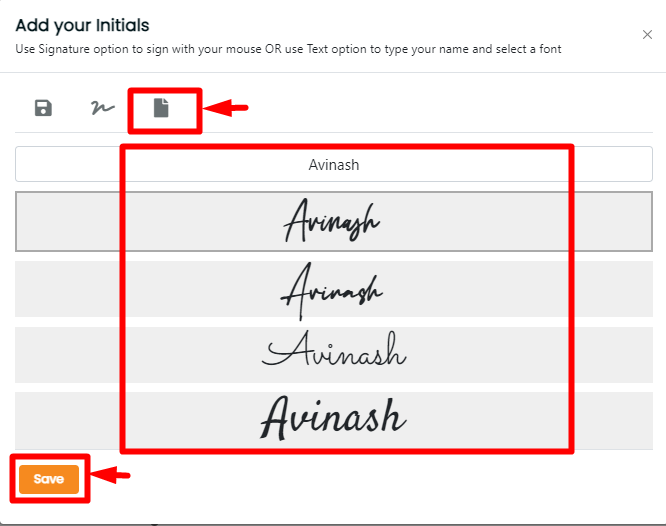
To add your Initials, Click on the document icon to add your name.
Type in your name.
Choose the font for your initial.
Then, click on “Save”.
Note: You can use the previously saved stroke signature or can delete it, you can also create a new one again by clicking on the stroke sign or typing in your name in the desired font available.
You can also remove any eSign fields by simply clicking on the field you want to delete.
Next, you can mark any eSign fields as mandatory by clicking on ‘Required’ or ‘Not Required’. When the signer signs the document, it becomes mandatory for them to sign the required fields.
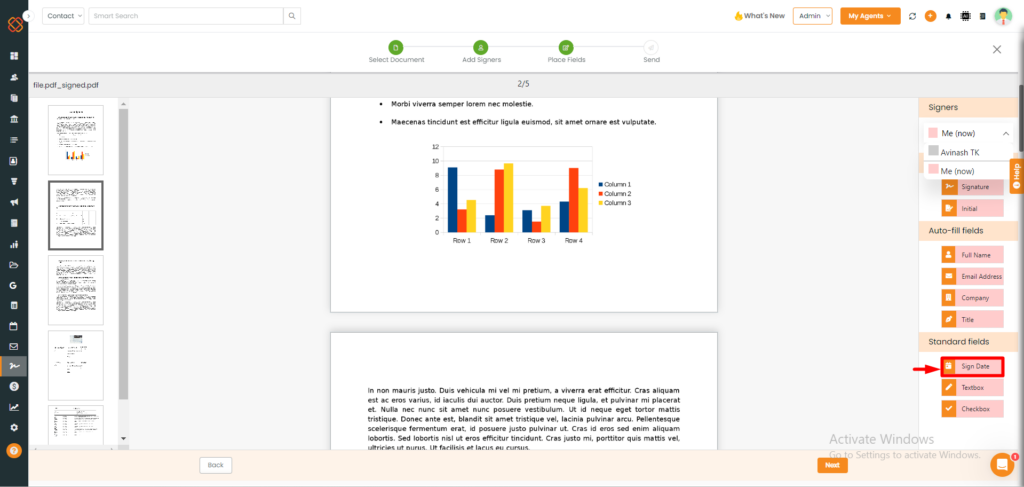
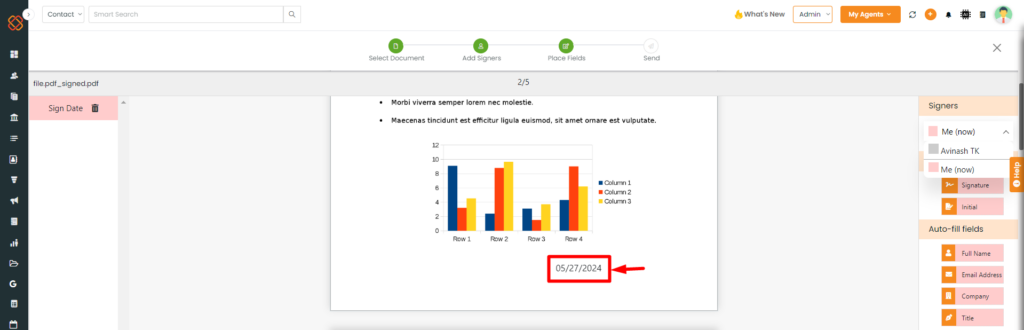
How to add the Signing date for the Agent?
Drag the “Sign Date” field to include the signing date.
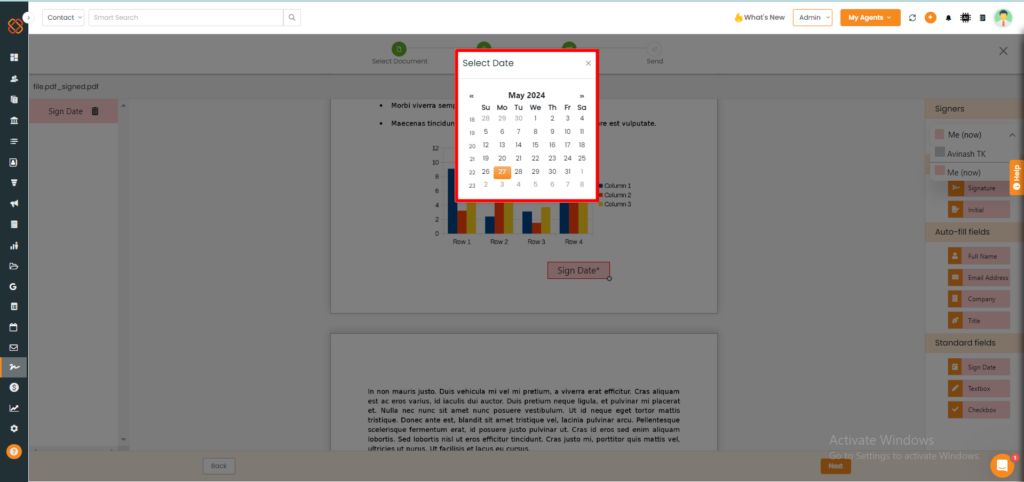
A calendar will appear for selecting the signing date.
Choose the desired date from the calendar interface.
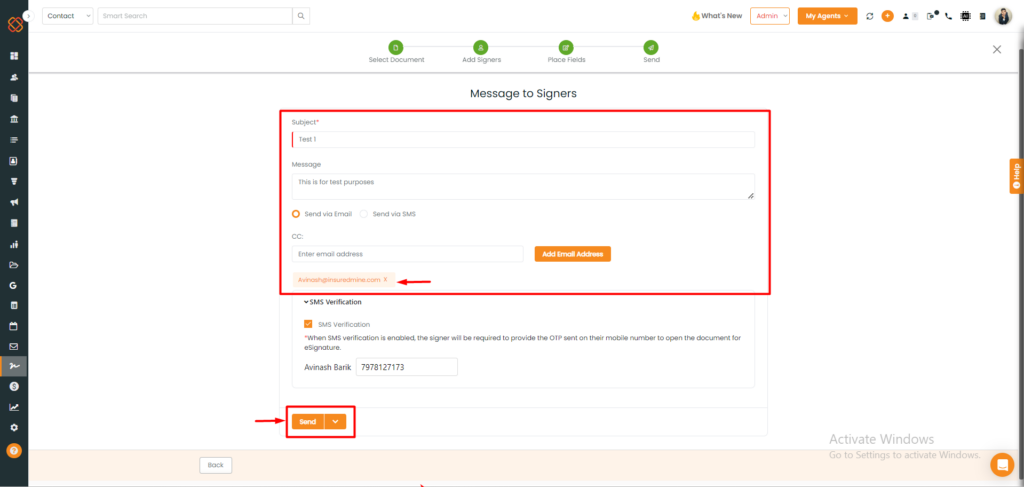
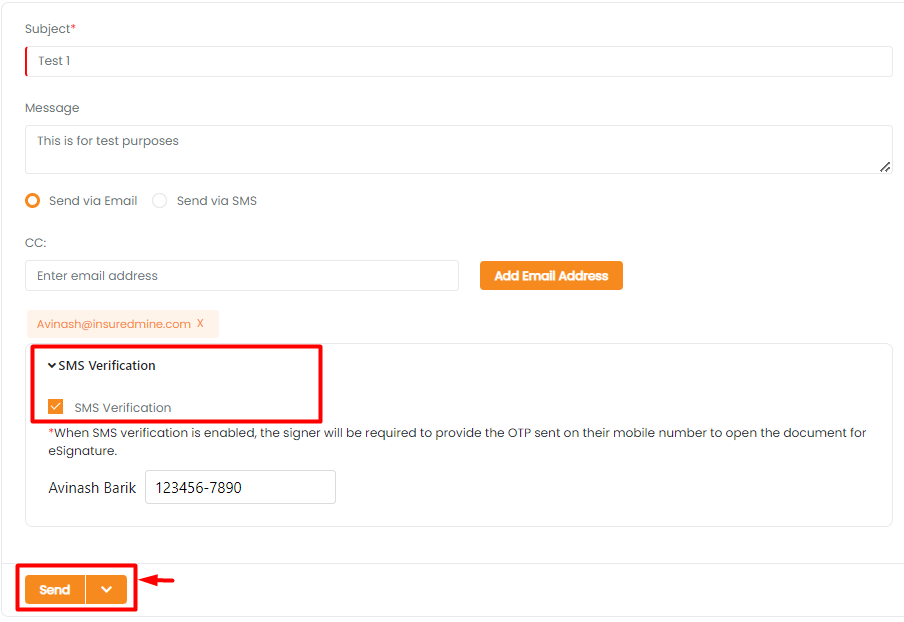
Lastly, add the mandatory fields such as subject, and fill in other details.
Choose whether you want to send it via email or SMS.
Next, add your email address.
If you enable SMS verification, the signer will need to provide the OTP sent to their mobile number to open the document for eSignature.
Click on Send.
The date will then be added to the document.
Note: While you will try to add a signature for yourself, (i.e. the logged-in agent) it will ask you to add your signature.
Note: If the agent fields are present, they must be filled. If they are not filled, an error message will be displayed. If the agent fields are not present, no action is needed.
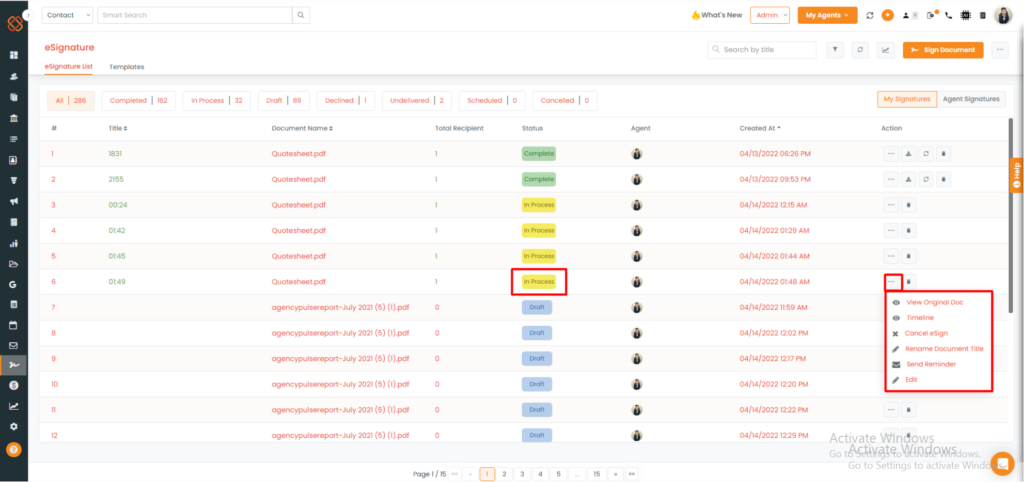
Once you send the document, you will be navigated to the e-sign list. In this list, you will find the details of the documents you have sent, the total recipient/signer details, and the status of the document (if it is in process or completed).
You can also delete the document by clicking on the delete icon below the action.
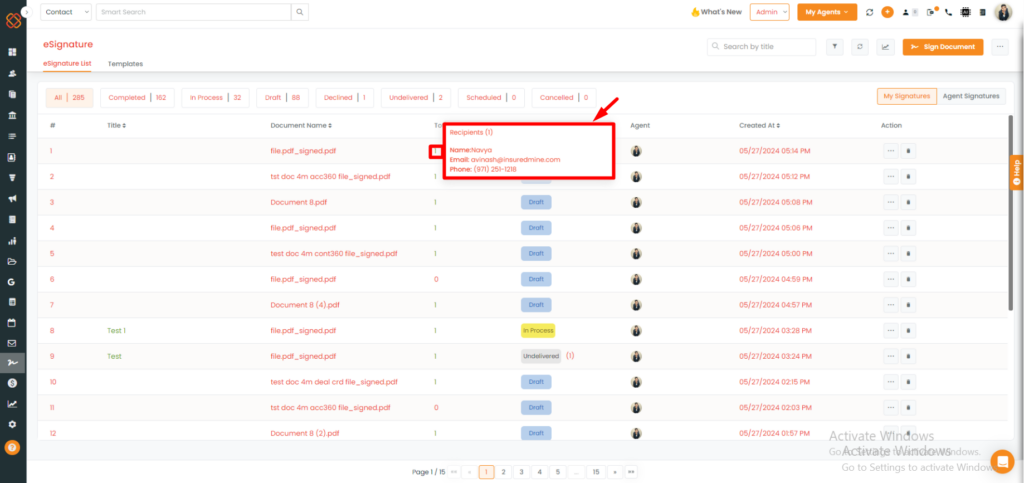
To view the name and email of the recipients/signers, click on total recipients and the details will open in a pop-up box.
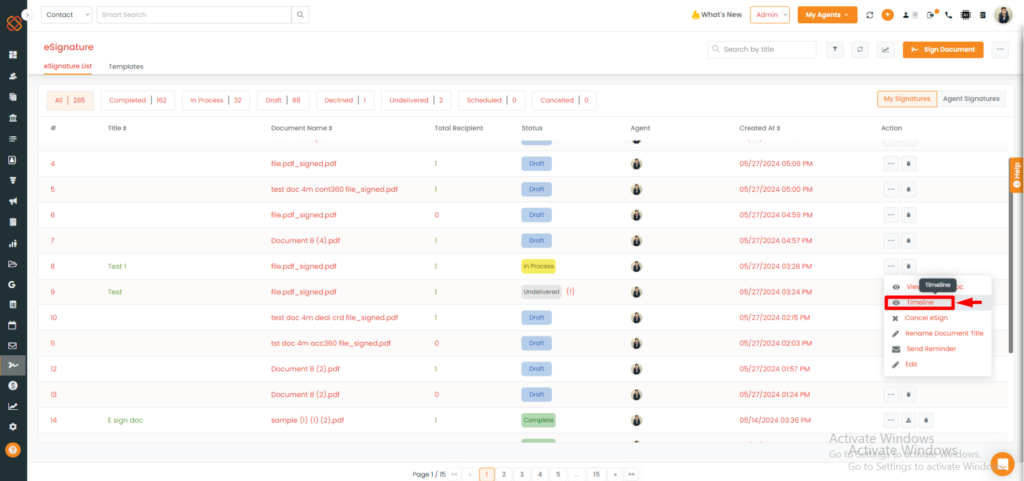
Click on the action button of the esign doc.
Click on the timeline view.
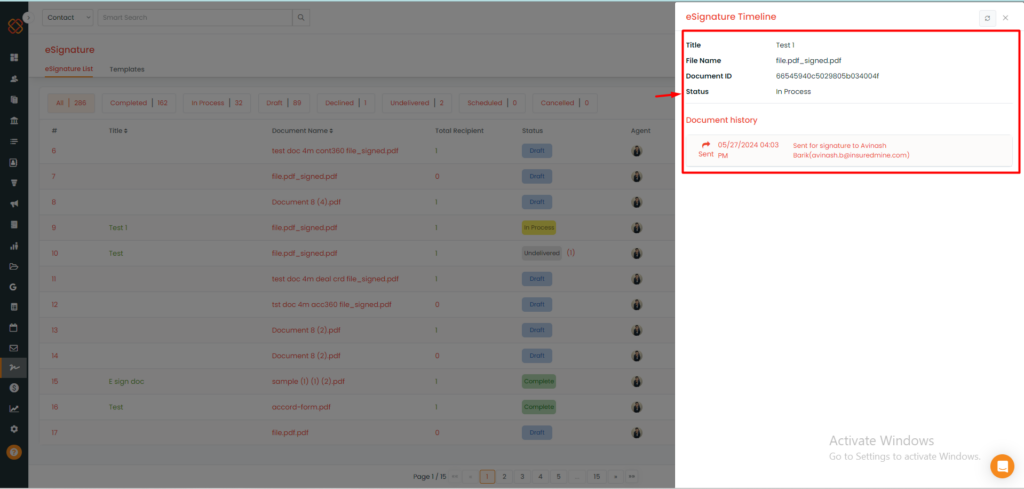
You can view the document history in the eSign Timeline.
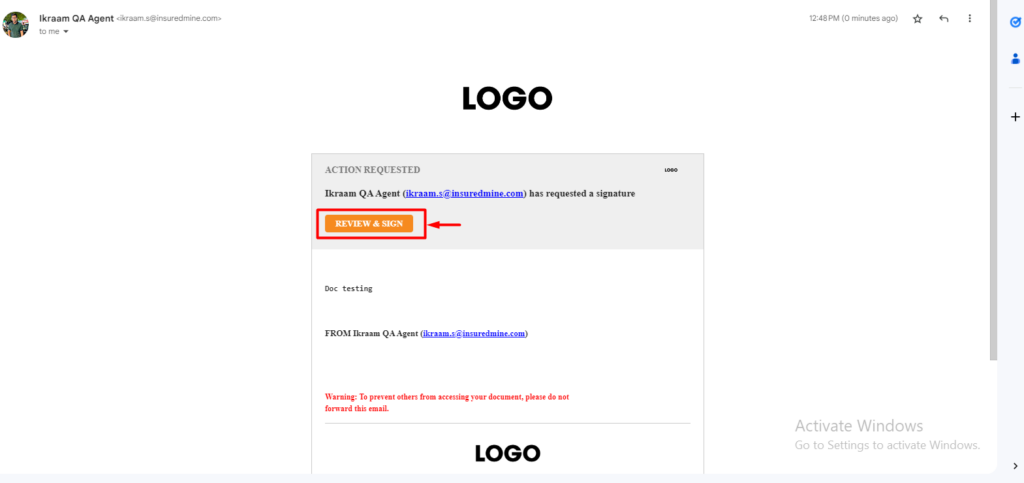
How will the Signers/Recipients receive and sign the document?
Once you send the document via email, the signer/recipient will need to open the email and click on Review and Sign.
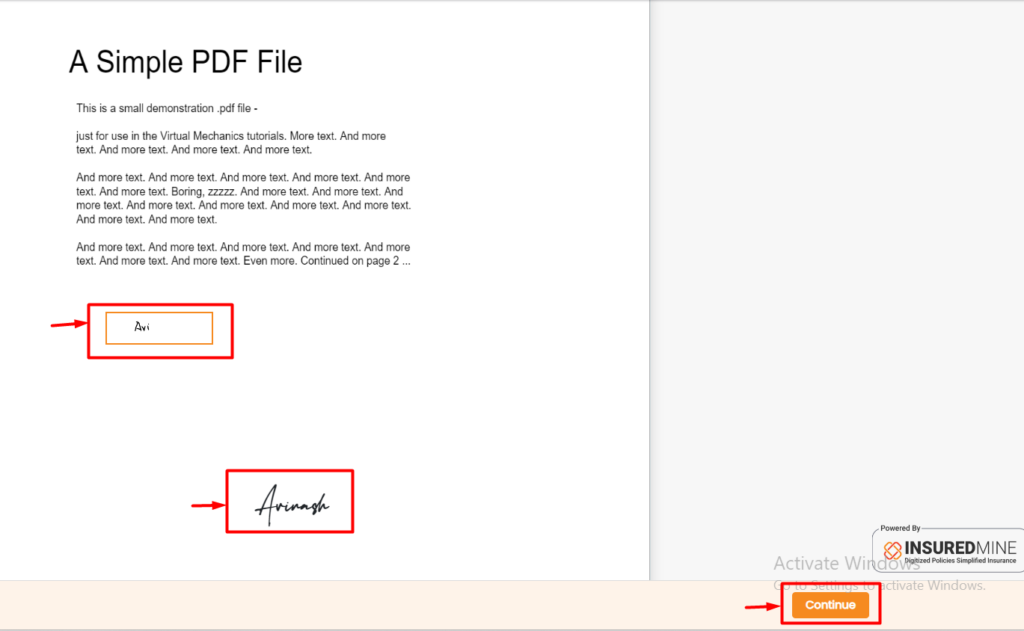
When signing the document, the signer can add a signature as text or a stroke, but remember while signing, the stroke signature and text signature will be saved for future use.
Then Click on Continue.
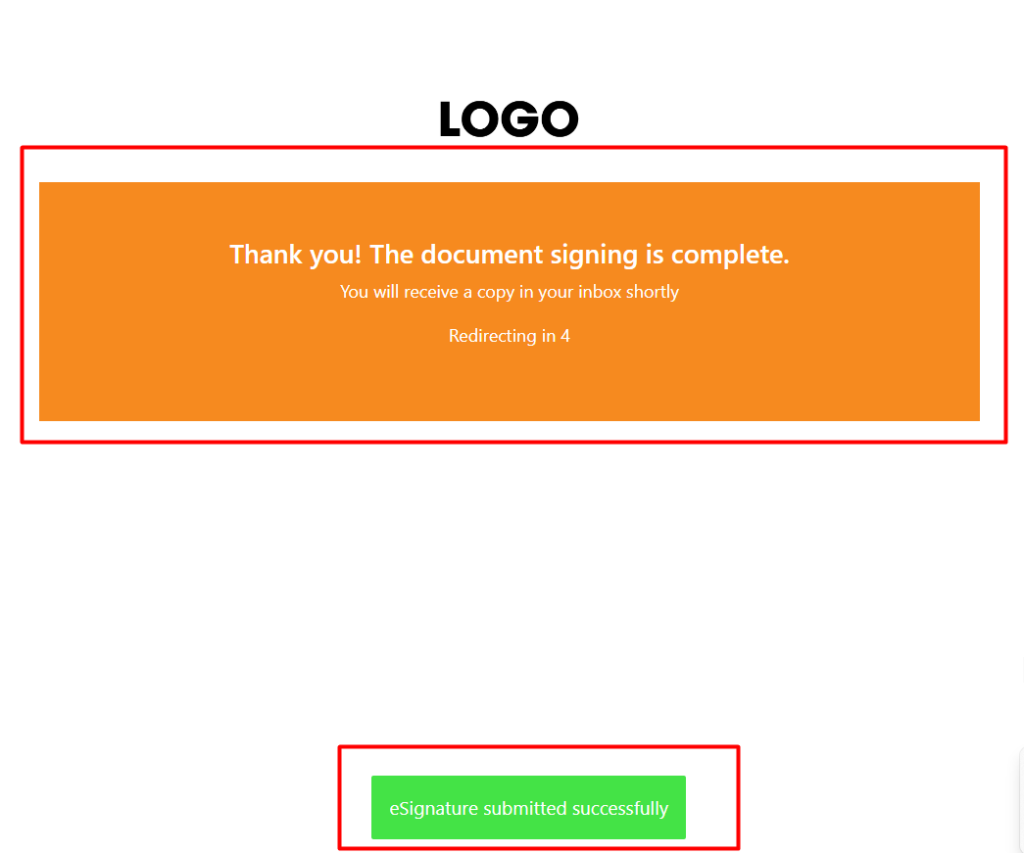
Next, Click on “I Agree.”
You will then receive a success message: Thank you! The document signing is complete.
Note: You can add multiple recipients or signers to the document. Each recipient will have the ability to view and fill out the mandatory fields. Let’s suppose the mandatory fields are signature, initials, and date; they are then required to fill them out.
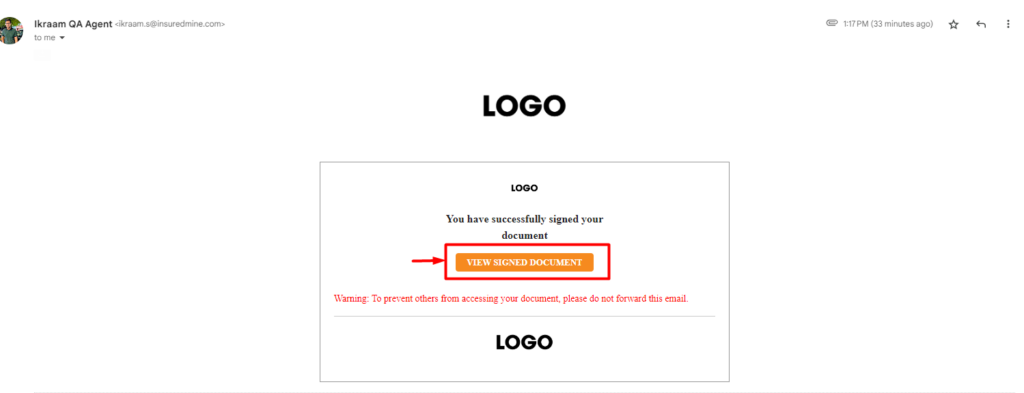
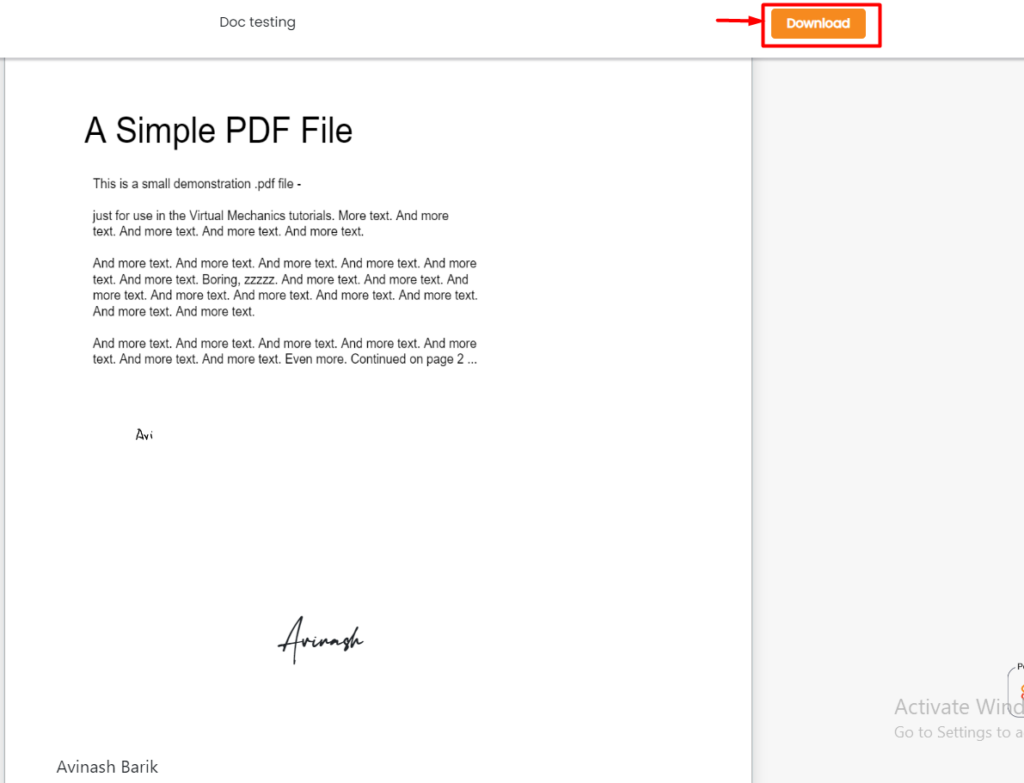
After signing you will receive an email to view your signed document.
Next, you can download the file and save it to your desktop.
An eSign doc that has a status in the process means that is yet to get signed by the signer.
For this, you can take actions like:-
Viewing the original document.
Viewing the document’s updated status in the Timeline.
Canceling the eSign if you don’t want to send it to the recipient.
Renaming the document title.
Sending the recipient a reminder.
Editing the recipient’s name, phone, or email.
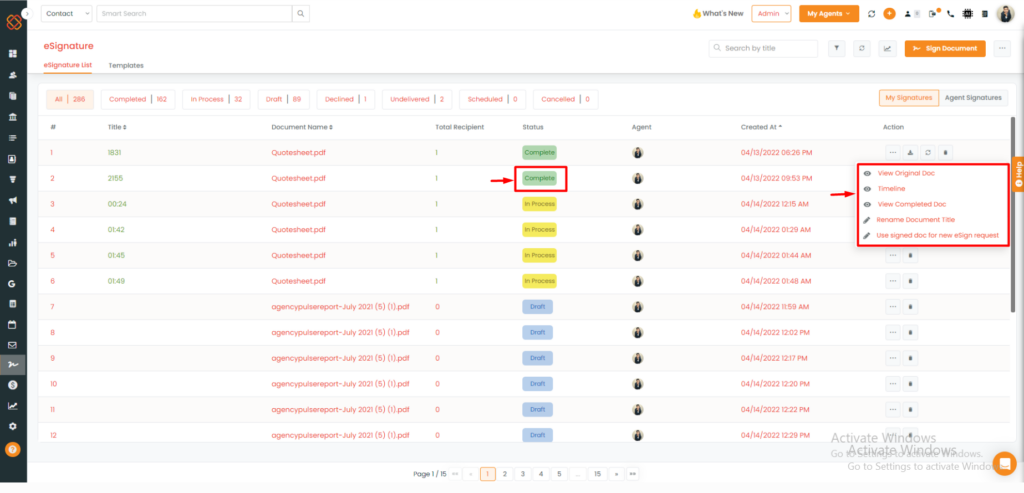
An eSign doc that has a status of completed means that the signer has already signed the document.
For this, you can take actions like:-
View Original doc.
Viewing the document’s updated status in the Timeline.
View Completed Doc.
Renaming the document title.
Use signed doc for new eSign requests
To Know about latest UI changes on eSign: Click Here