We have introduced a new enhancement under User Management. Admins now have the option to create a new group, choose how many users to include in that group, and restrict modules or specific features for those users.
Use Case: An Agency Admin wants to create a specific group and add users who specialize in a particular task or department—for example, Claims, Sales, or Marketing.
By grouping these users together, the admin can clearly segregate teams, avoid confusion, manage permissions more efficiently, and ensure that each group only sees and uses the tools relevant to their responsibilities.
To view the enhancement:
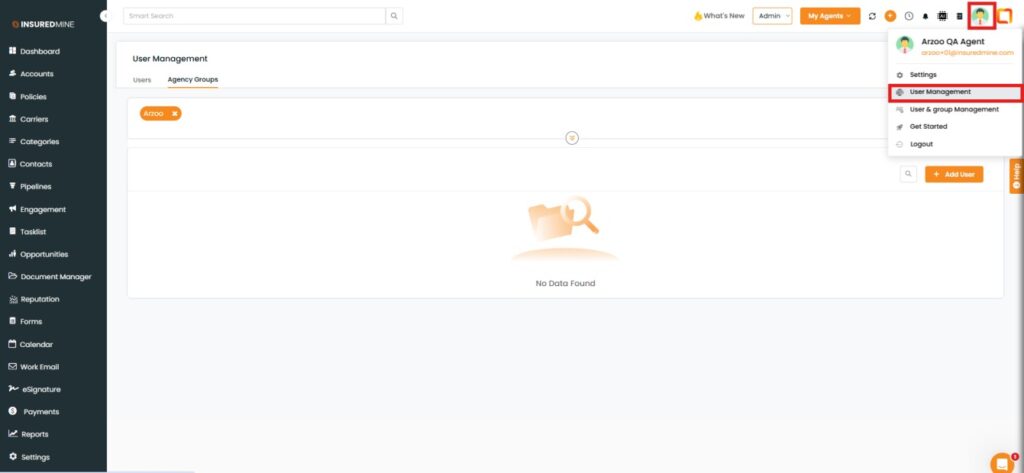
Go to Profile.
Click on User Management.
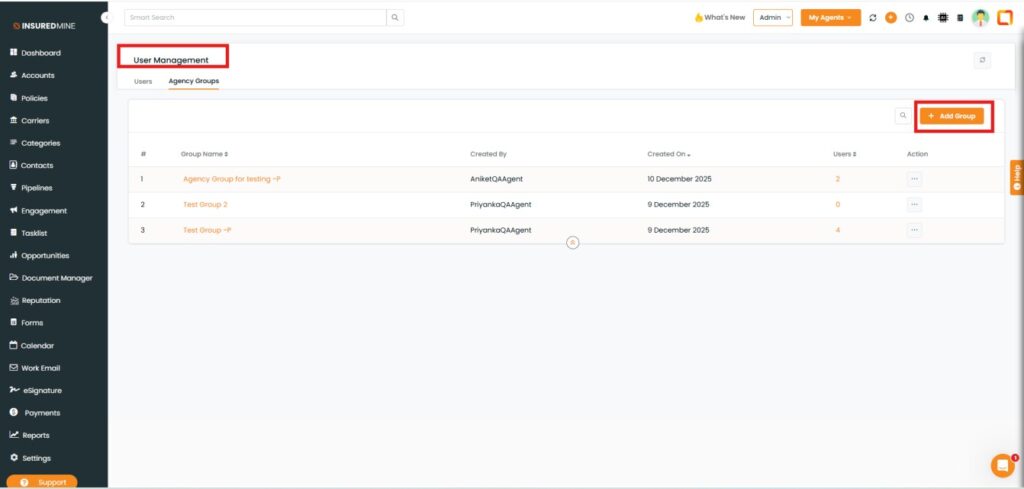
You are redirected to the User Management page.
Click on Add Group.
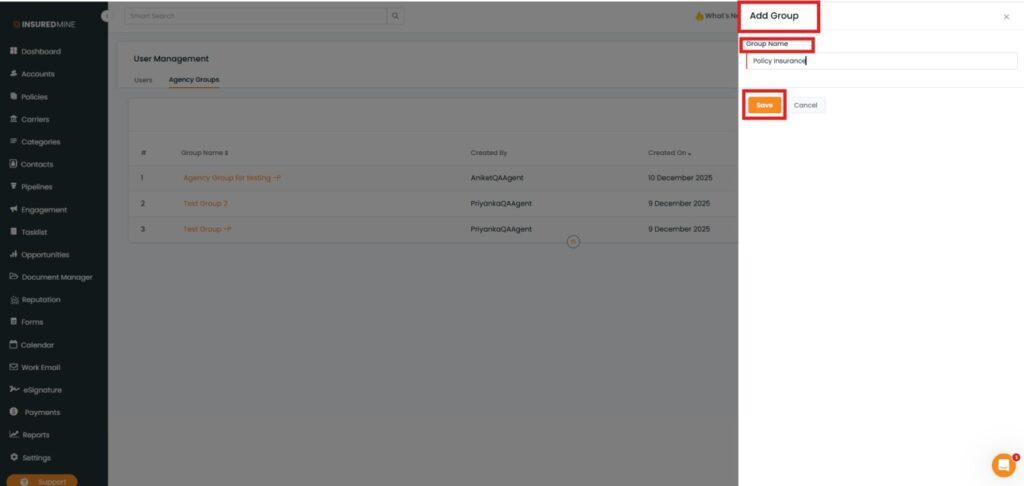
An Add Group panel appears.
As shown below, enter the preferred Group Name.
Click Save.
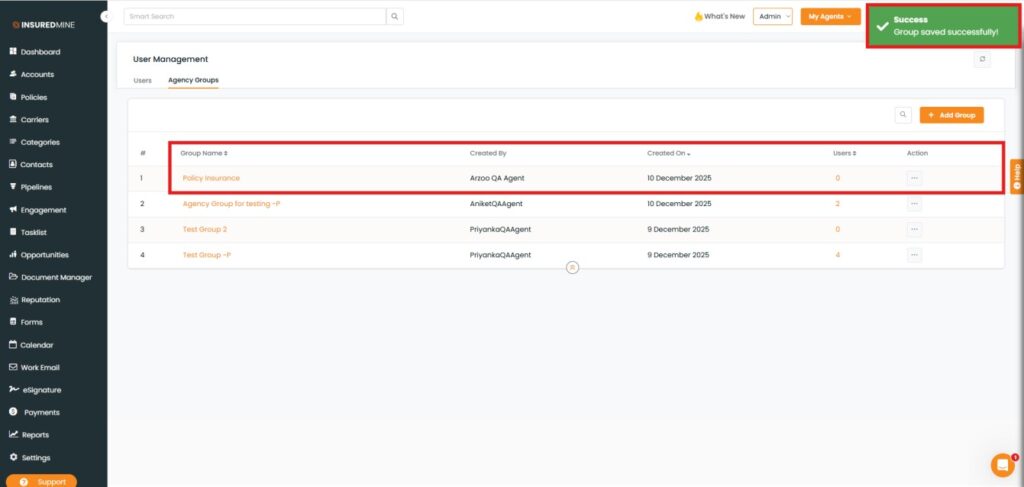
A success pop-up ‘Group Added Successfully’ appears.
As shown below, the Group Name added by the Admin is visible.
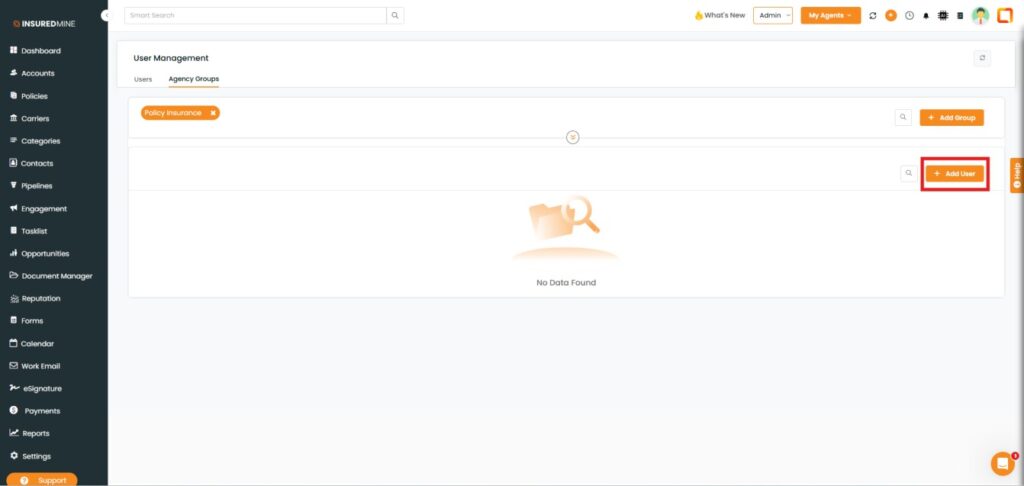
Click on Users (0) to add users of your choice.
You are redirected to the User Management page.
Click on Add User.
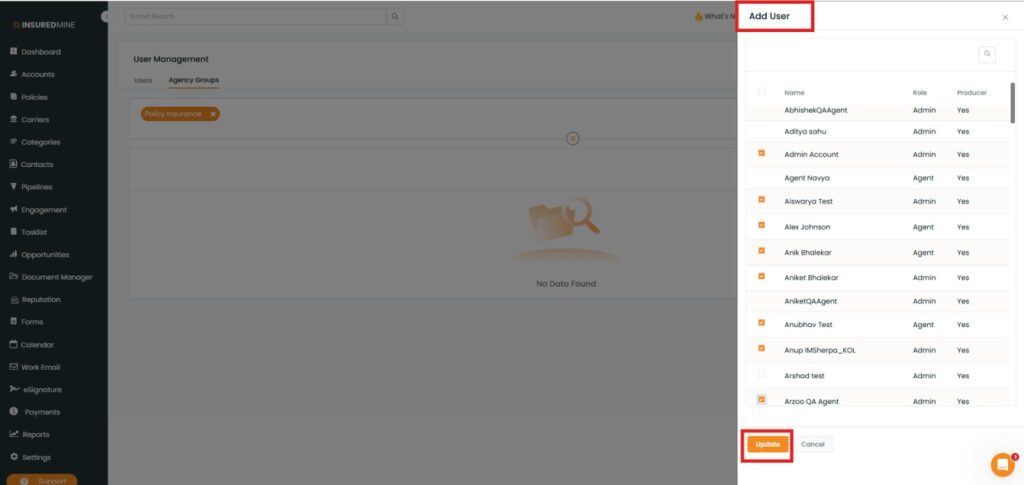
An Add User panel appears.
Select users by checking the box next to their names.
Click Update.
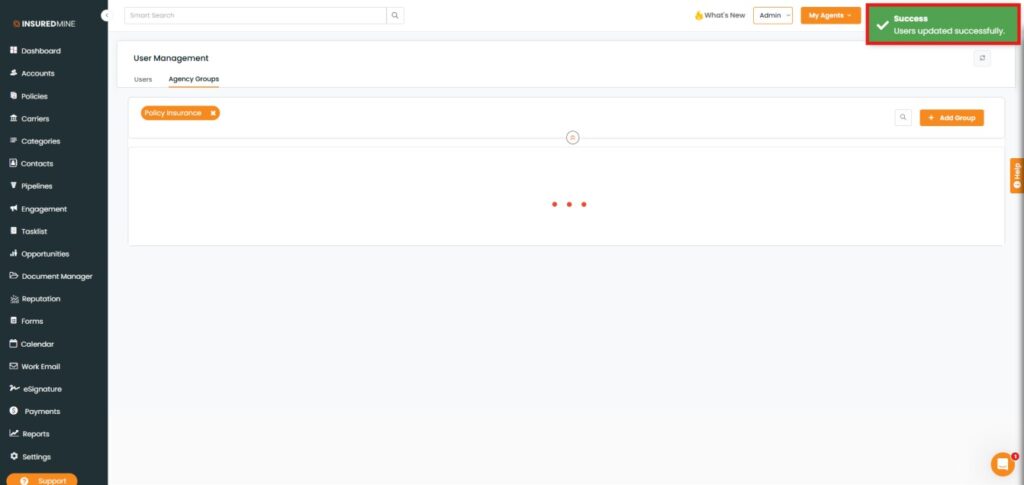
A success message ‘Users updated successfully’ appears.
To View and Manage Group Settings:
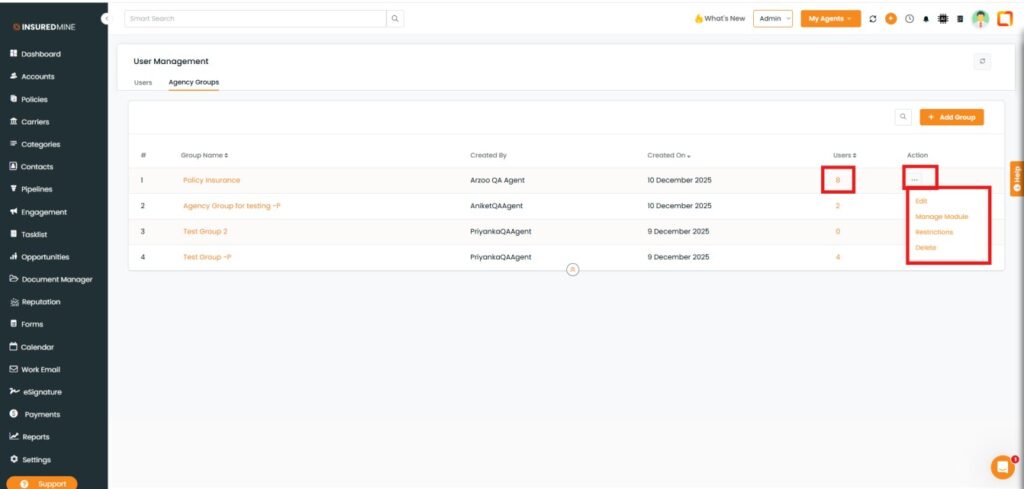
Navigate to Agency Groups.
As shown below, all information related to that Group will be displayed.
Click on Users (e.g;8) to view the added users.
As shown below, click on the three dots (⋮). A drop-down appears with options ranging from Edit to Delete.
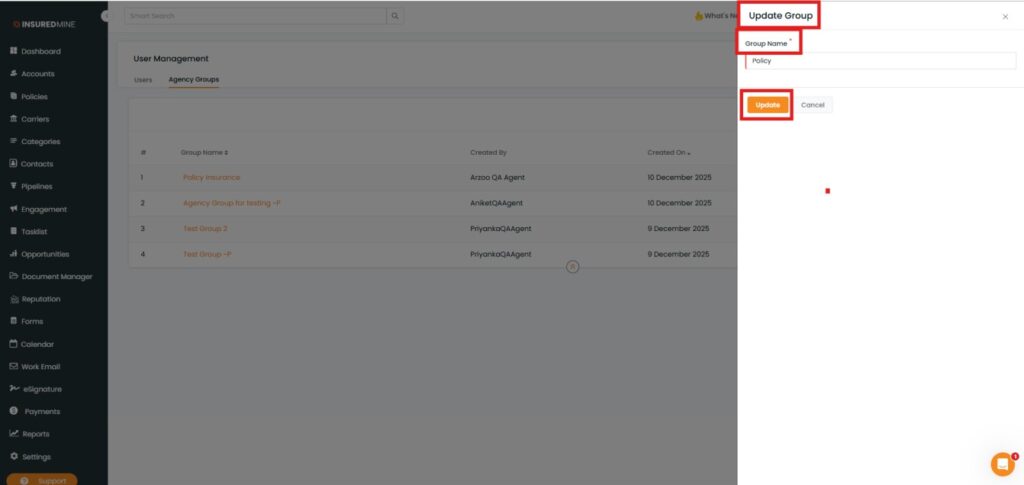
Click on the Edit.
An Update Group panel appears.
Update the Group Name by preferred name.
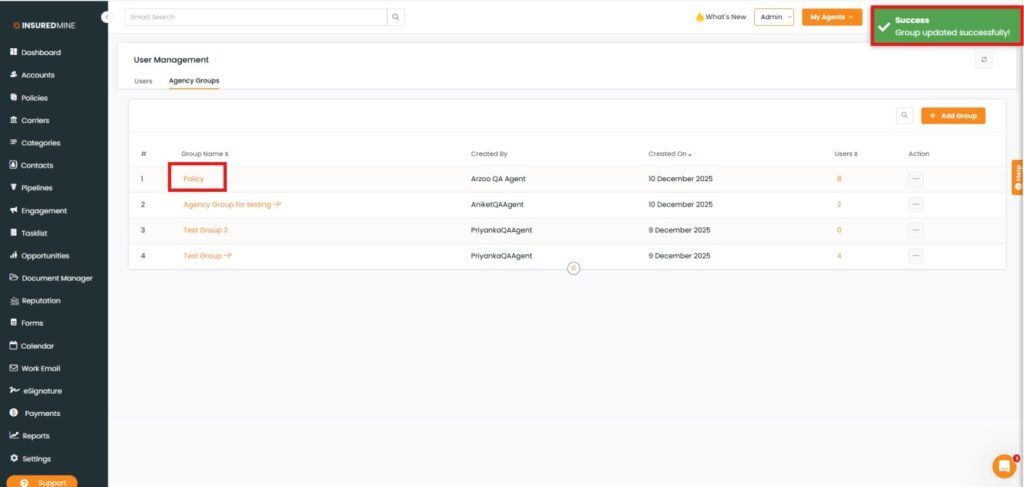
Click Update.
A success message “Group updated successfully” appears.
Note: For every action performed from the drop-down, a success message appears accordingly.
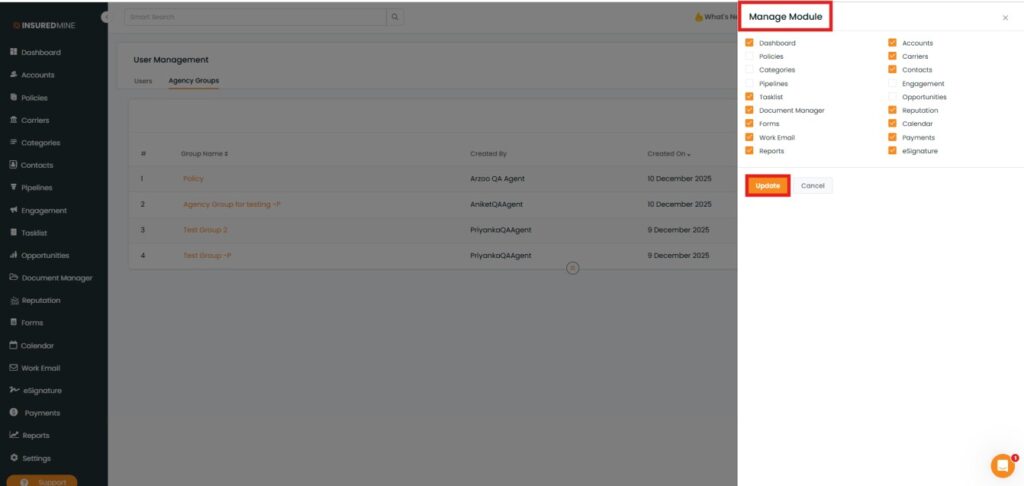
Click Manage Module from the drop-down.
A Manage Module pop-up appears.
Uncheck the box beside any Module Name to restrict users in the group from accessing that module.
Click Update to save the settings.
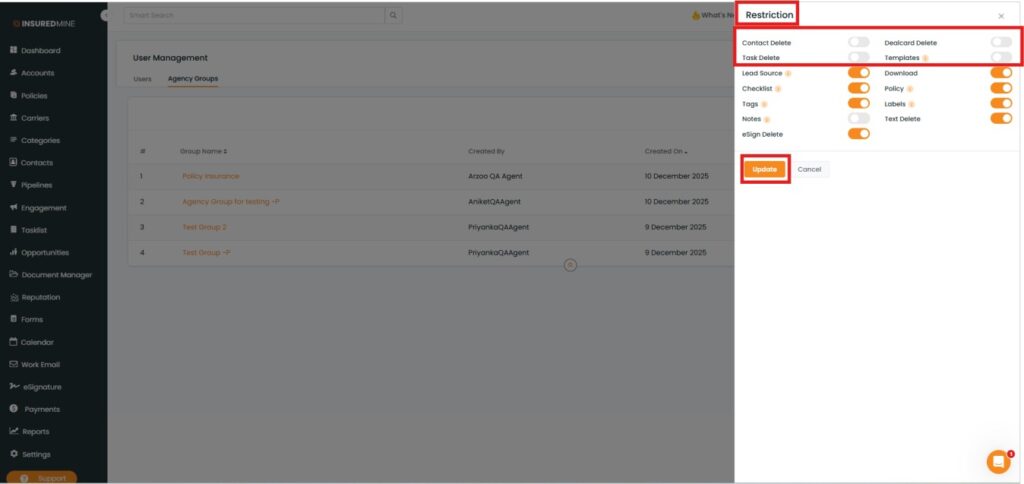
Click Restriction from the drop-down.
A Restriction panel appears.
Switch off the toggle (e.g., Contact Delete → Notes) to restrict users from specific actions.
Click Update to save.
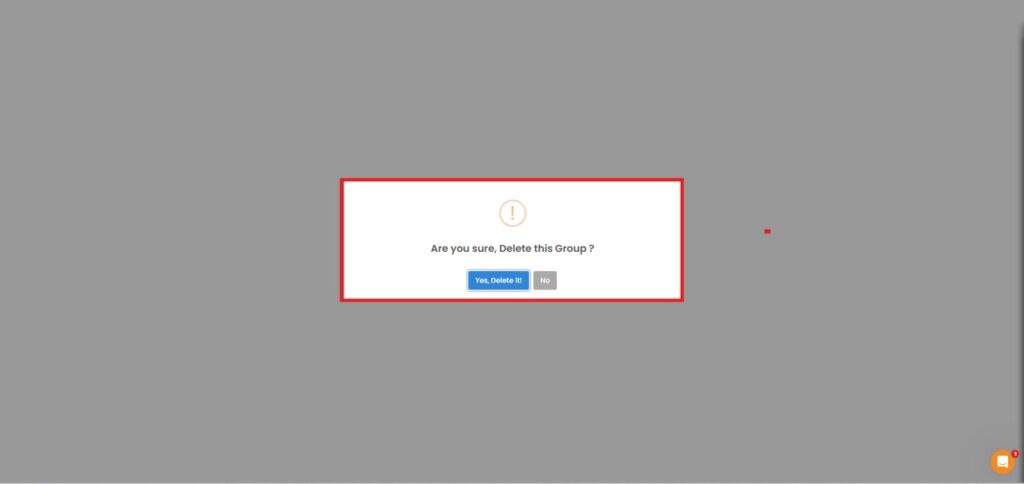
Click Delete from the drop-down.
A confirmation pop-up “Are you sure you want to delete this group?” appears.