With the work email feature, you can sync your work email address with your agent portal. This feature will enable you to send and receive emails without switching to your actual email service provider.
Use Case: Send and receive emails directly within your InsuredMine portal that saves both your time and effort.
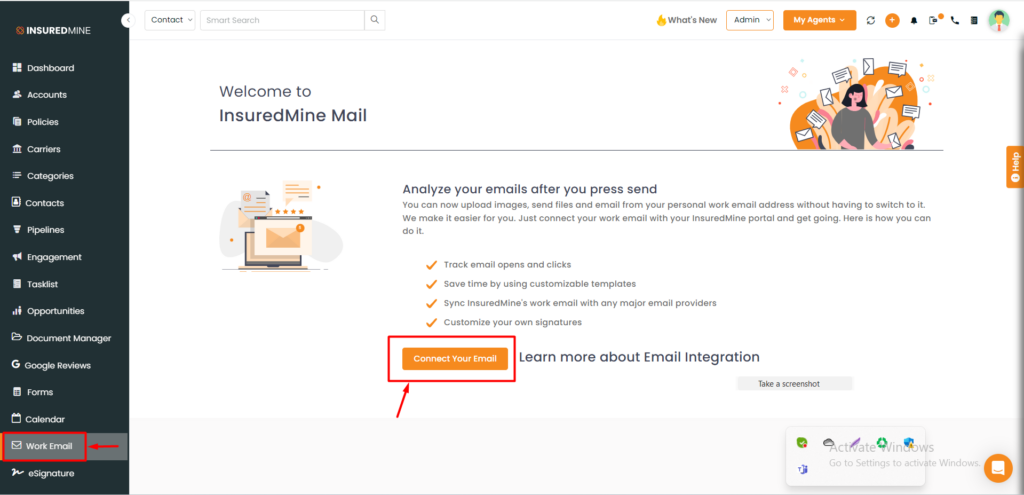
To start accessing your work email, you need to connect your email with the InsuredMine portal.
To connect:
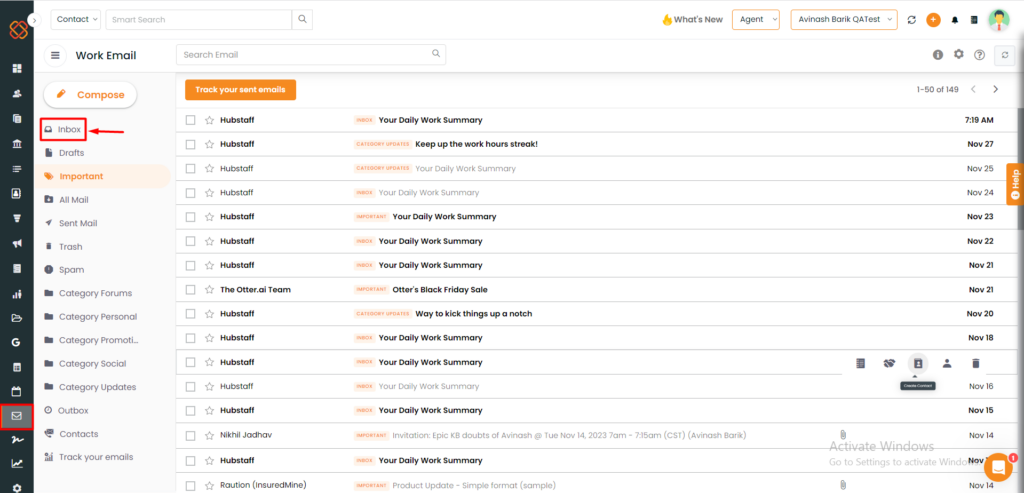
Navigate to work email.
Click on connect your email.
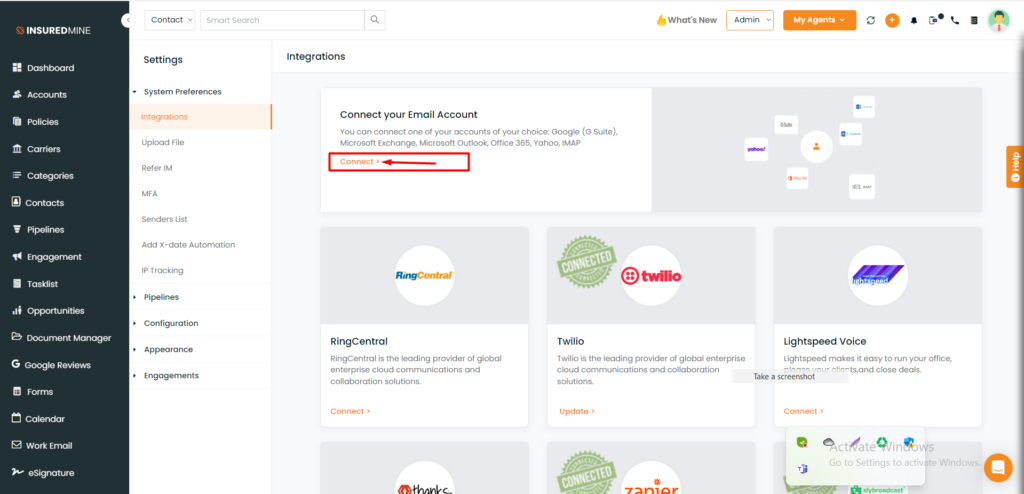
You will be then redirected to the settings page where you will need to click on connect your email.
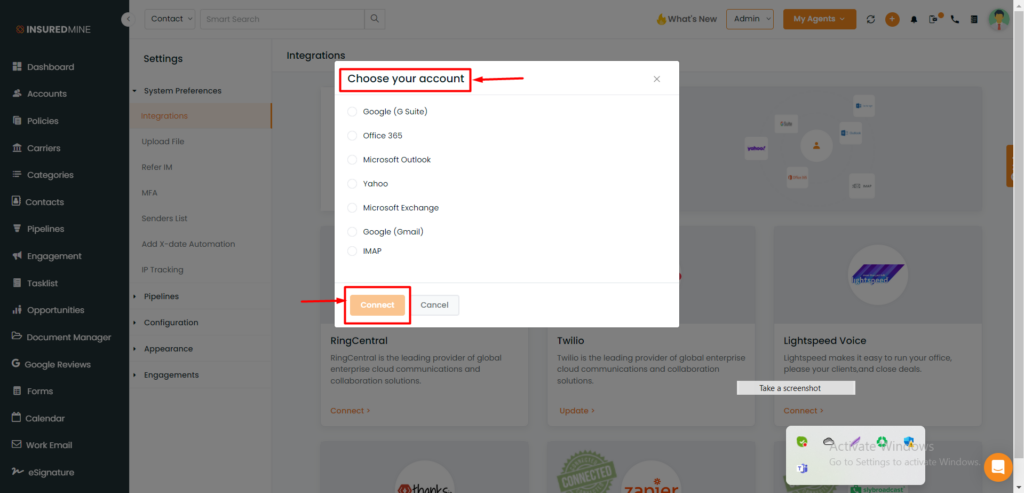
Update your email ID for which you want to connect your work email and click on sign in.
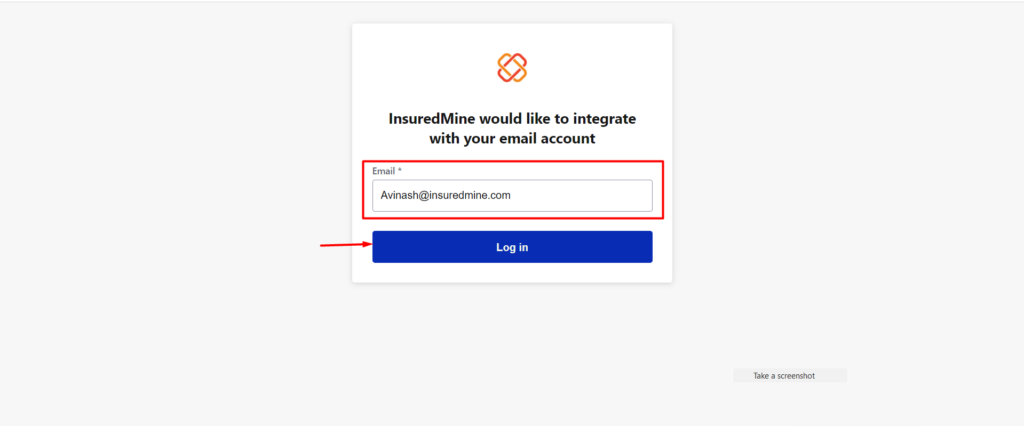
Insuredmine would like to integrate with your email account.
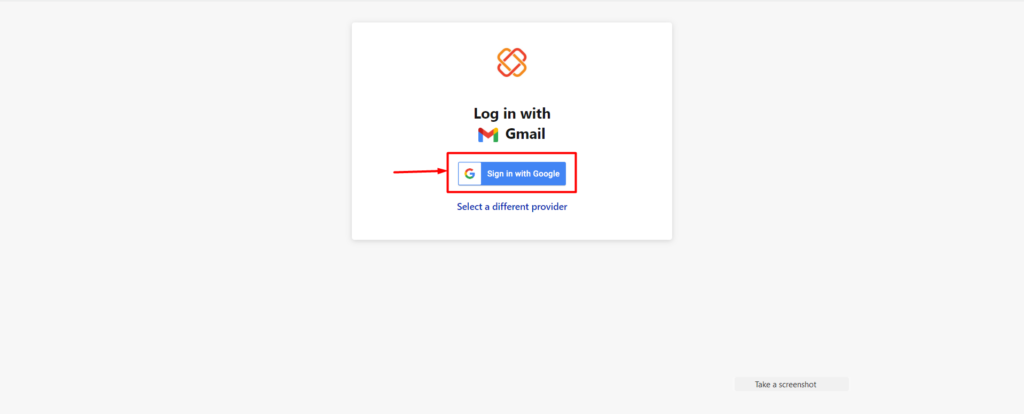
Log in with your Gmail account.
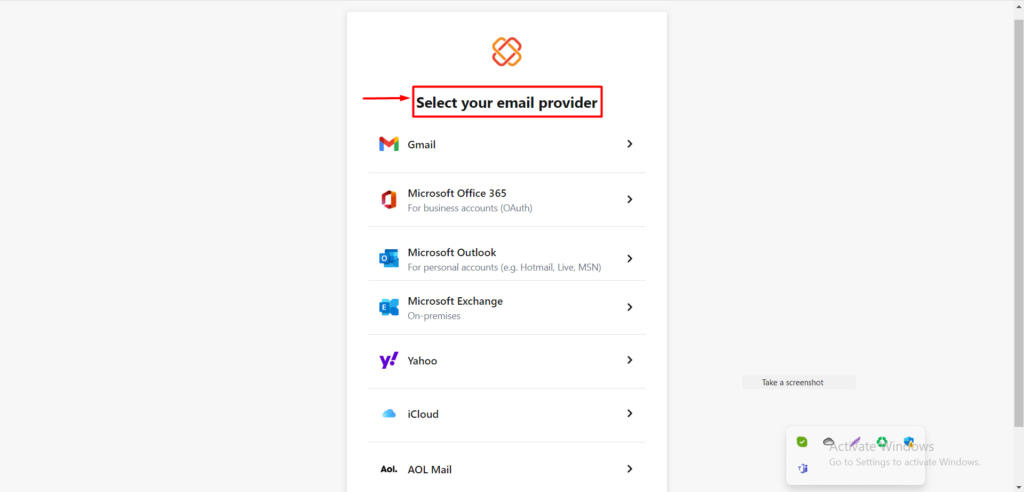
Or you can choose a different email provider according to your preference.For instance, we are using Gmail.
Grant the required permissions to access the email. If it shows the app isn’t verified, then click on advanced or go to nylas.com.
This feature works exactly like your inbox.
What all you can do?
You can use pre-designed templates while sending emails to your clients.
Search throughout your inbox
Mark any email as important.
Mark any email as read/ unread.
View attachment in Email.
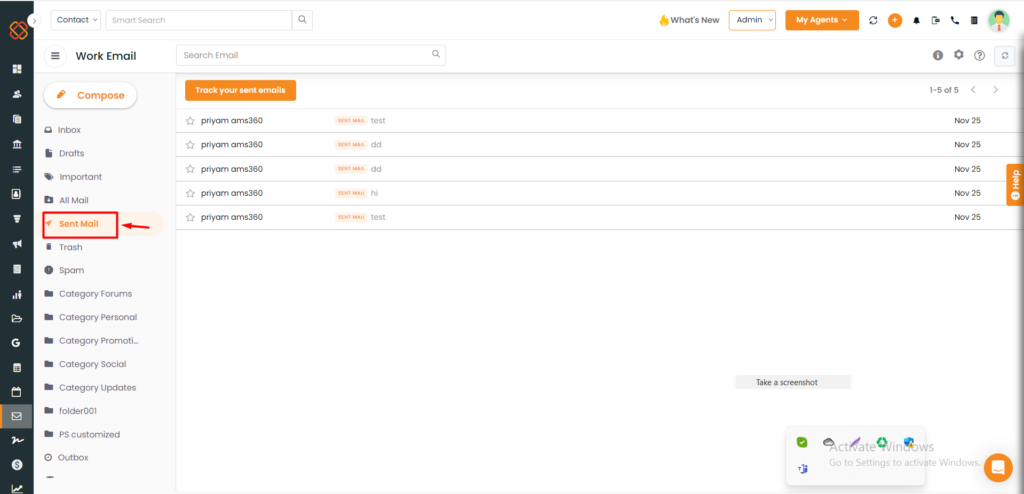
Track your sent Emails.
Note: To use this feature, make sure you have connected your email to your agent portal.
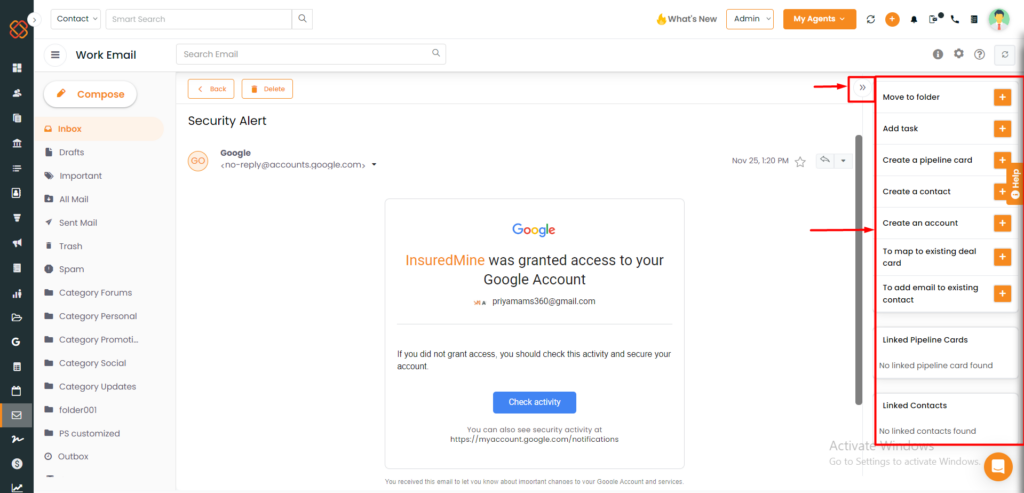
Functionalities within work email
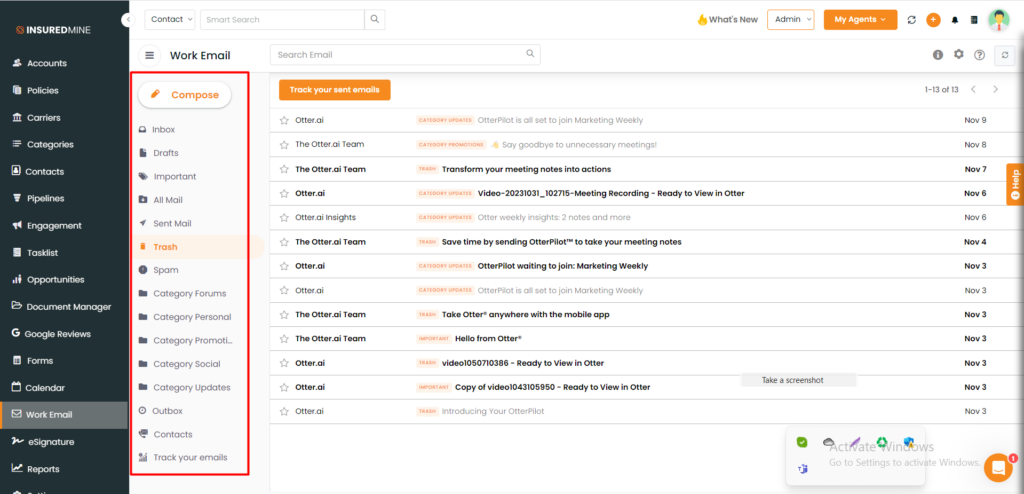
Navigate to the work email module.There, you will find following options related to: compose, delete items, drafts, inbox, trash, sent mail, outbox, contacts and track your email.
Once you have selected an email, the functionalities that can be performed from each message will be on the right side panel.
Click on the add task button to add a task.
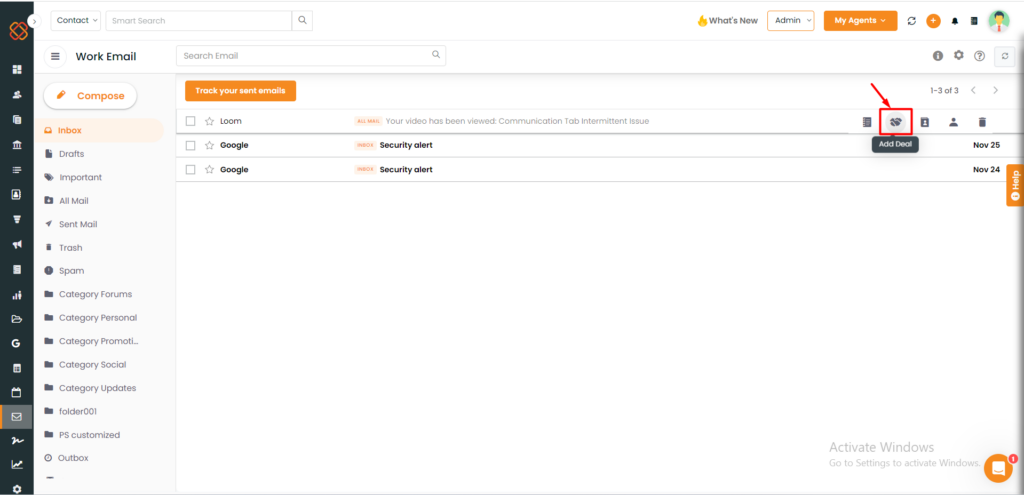
Click on create a deal to find an existing contact to create a deal or create a new deal.
Click on map email to save email to an existing deal card.
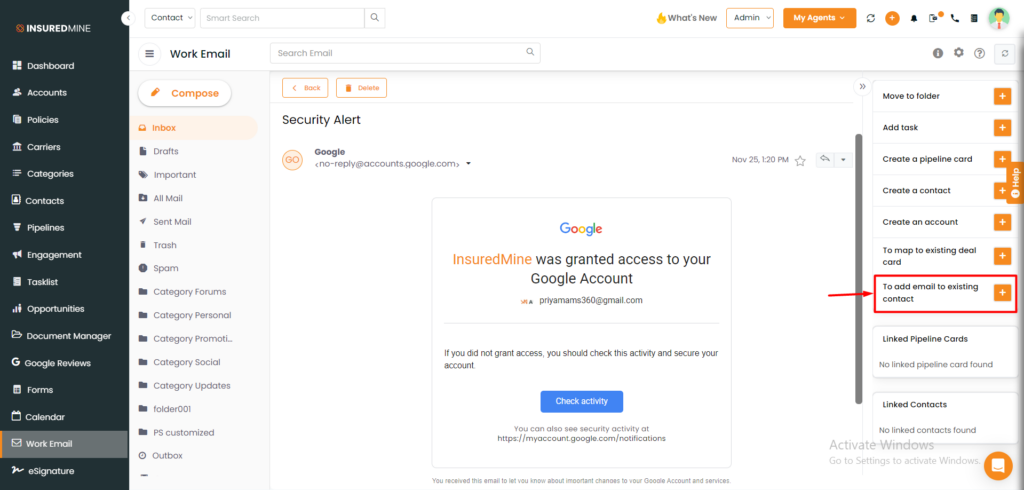
Click on one of the options available from the right sidebar to add email to existing contact as shown above.
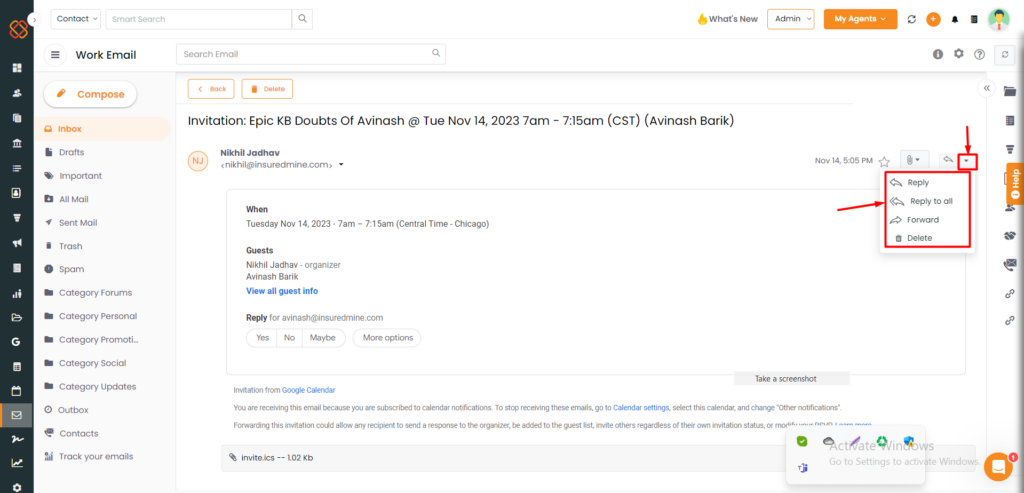
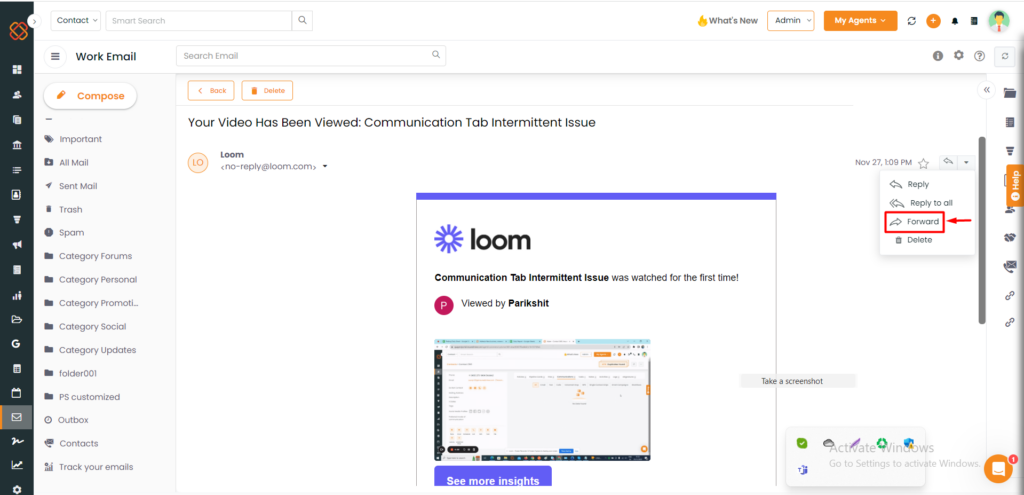
Click on the 3-dots icon, to reply, reply to all, forward and Delete.
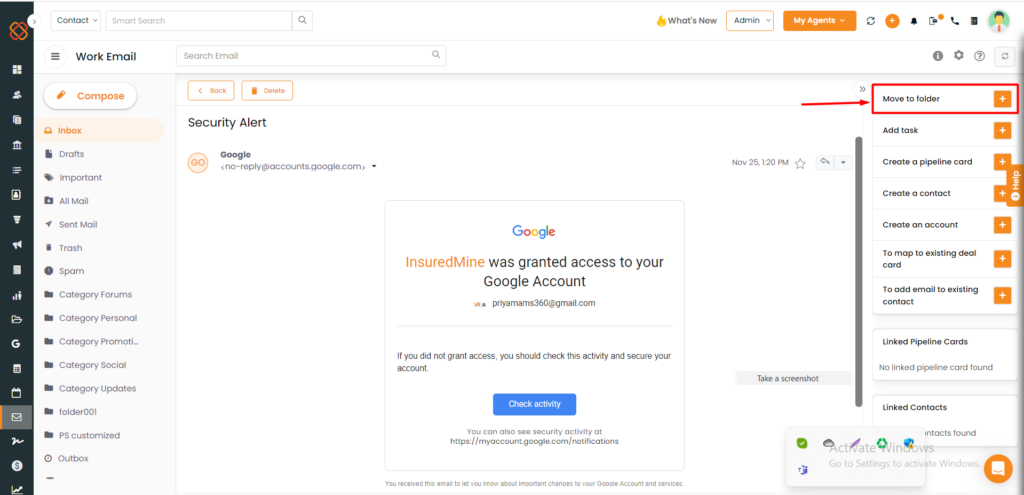
Use the “Move to Folder” option to transfer any email from your inbox to your preferred folder.
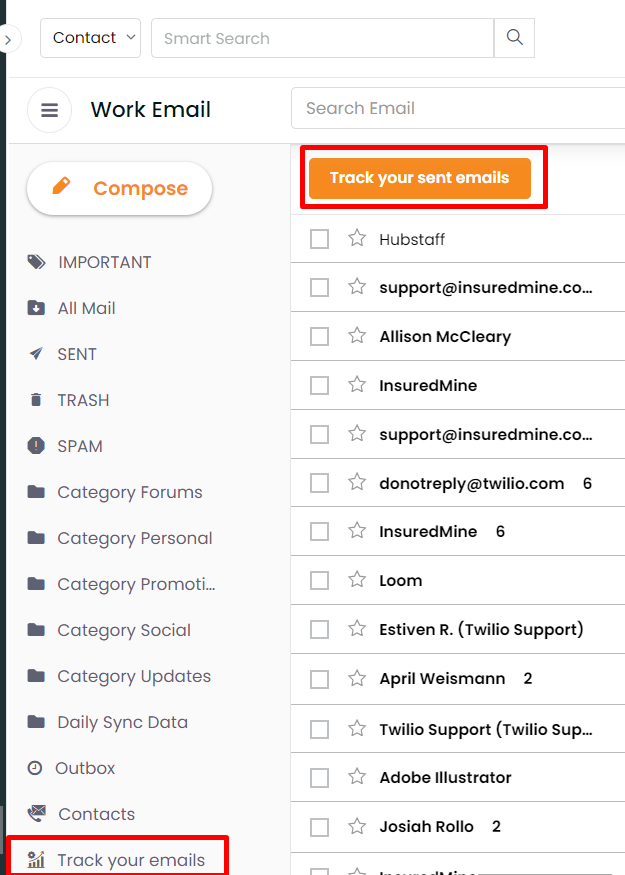
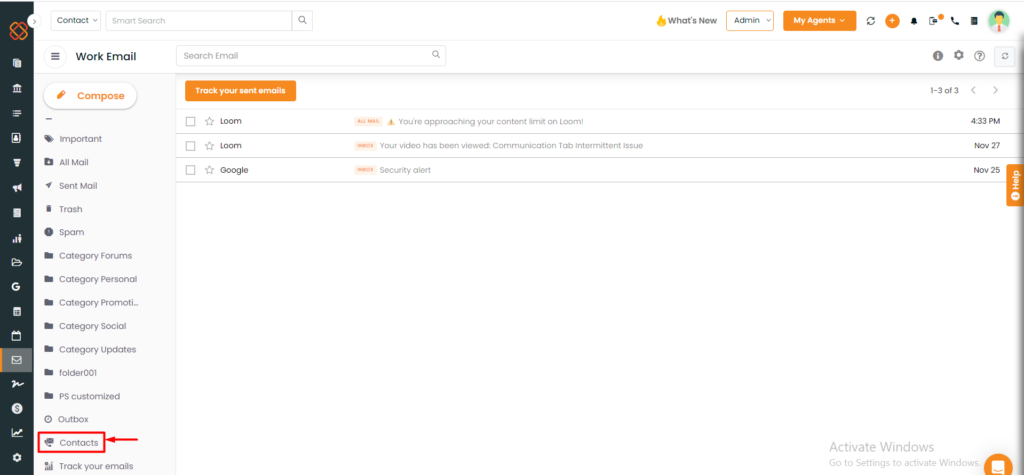
Track your sent Emails
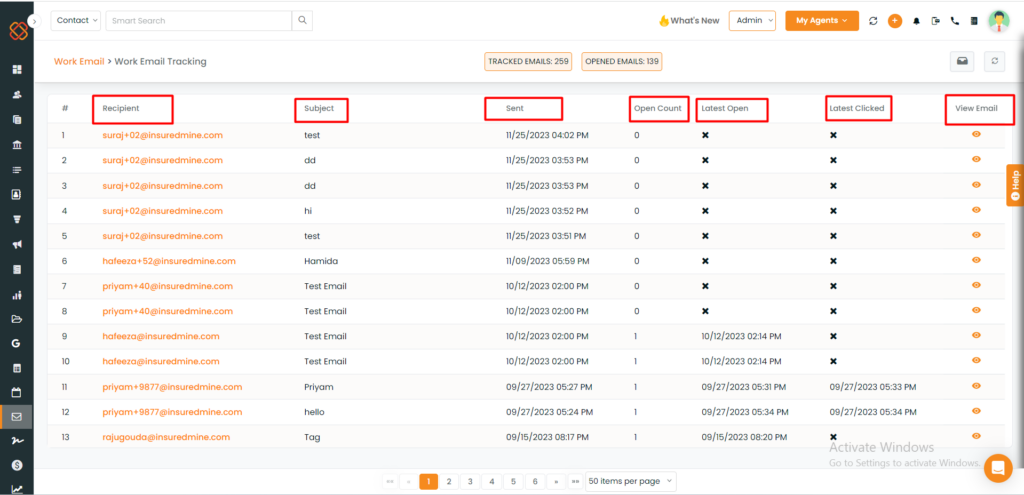
You can track your sent emails from the track your emails option as shown in the screenshot.
The email dashboard will open with all the details of sent email- Recipient, Subject Sent, Open Count, Latest Open, Latest Clicked & View Email.
Add Deal into Pipeline from Email
To add a deal, simply click on the options located on the right side of the email interface.
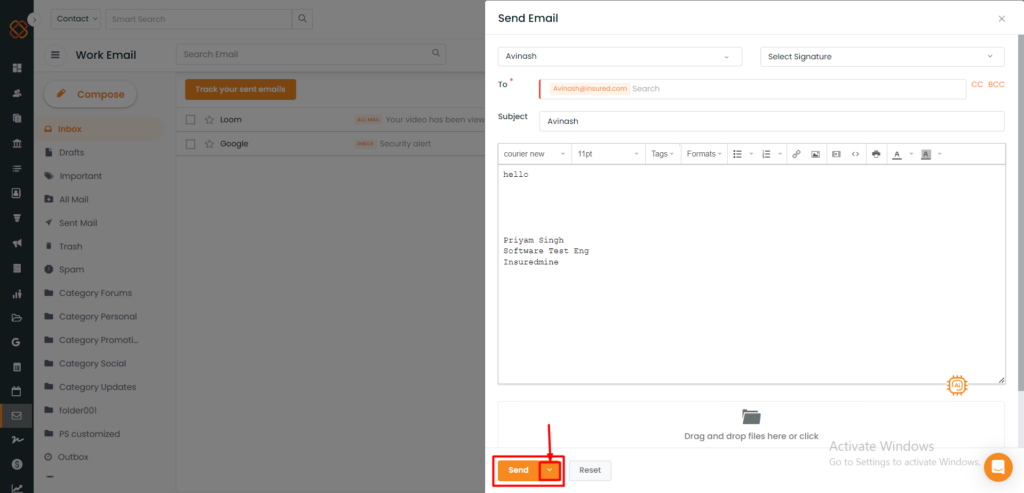
Forward emails from work email
On the ‘Send Email’ screen, simply make the edits you want, add recipients, and then click ‘Send.’
Work Email Contacts Sync
Connect your work email contacts to InsuredMine for easy communication and deal management. You can quickly add deals, check details, and communicate better with everything in one place. Your work contacts are visible in the Contacts section of InsuredMine, making it easy to find and use email addresses when you need them.
“Add contact” option in work email contact section
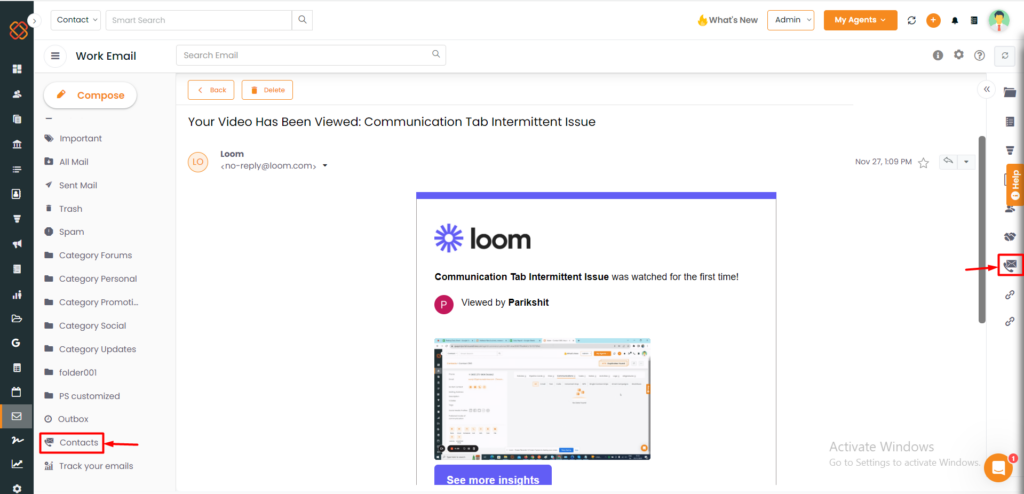
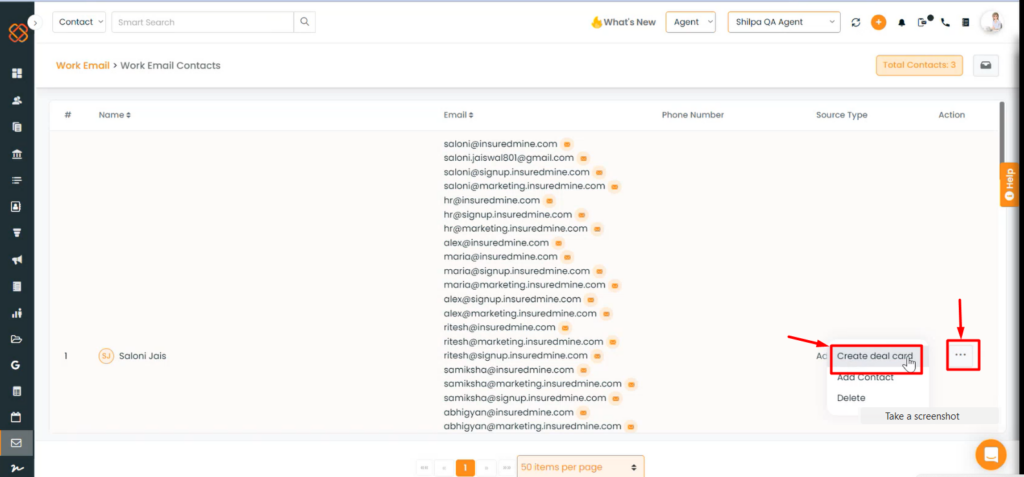
Click on Contacts.
Click on the 3-dots icon (…) under the Action section beside the contact you select.
The add contact window will open with all the pre-filled fields.
Create Deal from Work email contact
Note: InsuredMine’s work email feature lets you connect your work email to your agent portal. This means you can send and get emails without having to switch to your regular email provider.
To Create a Deal:
Click on the work email contacts.
A dashboard will then appear as shown in the screenshot. Click on the 3-dots icon of a specific work email contact.
From the drop down select “Create deal card.”
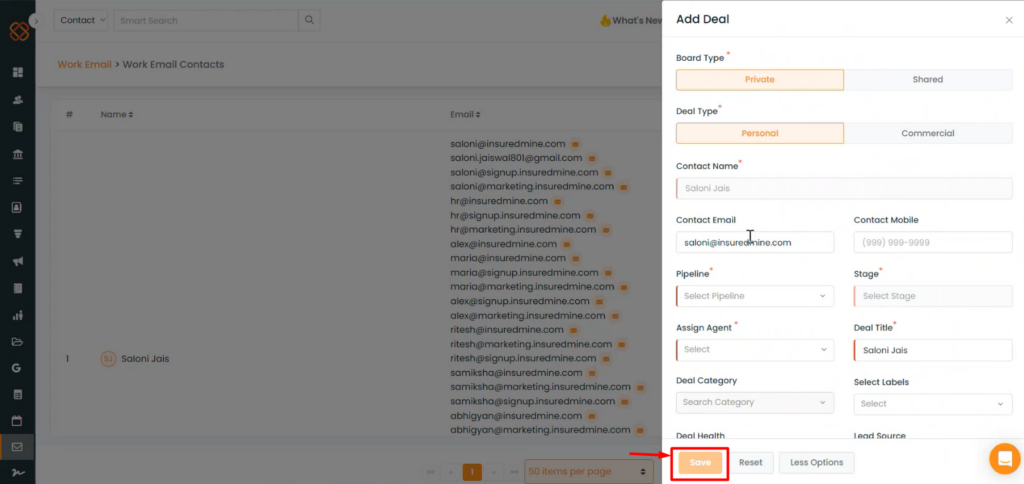
Click “Save” after adding the following details.
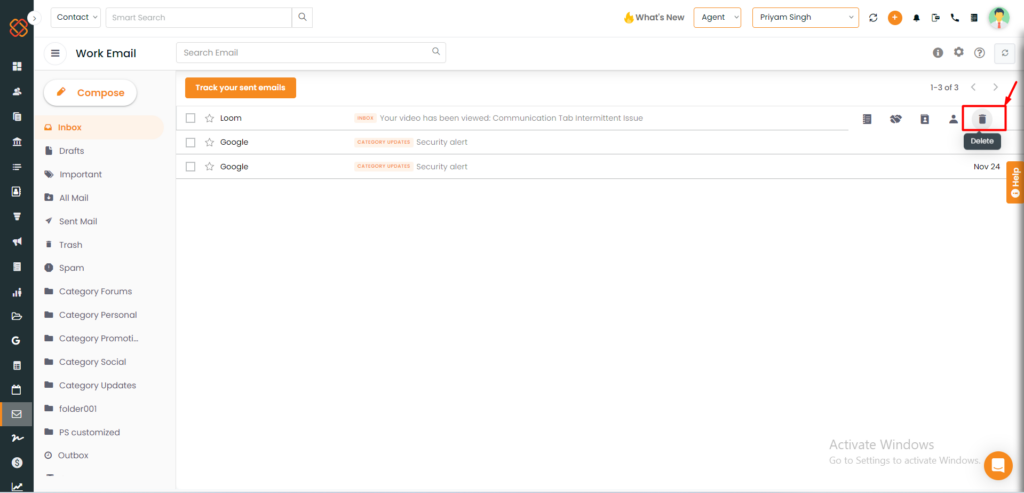
Delete unwanted email
The delete option in your work email on InsuredMine helps you get rid of emails you don’t need, making your inbox less crowded with things you don’t want.
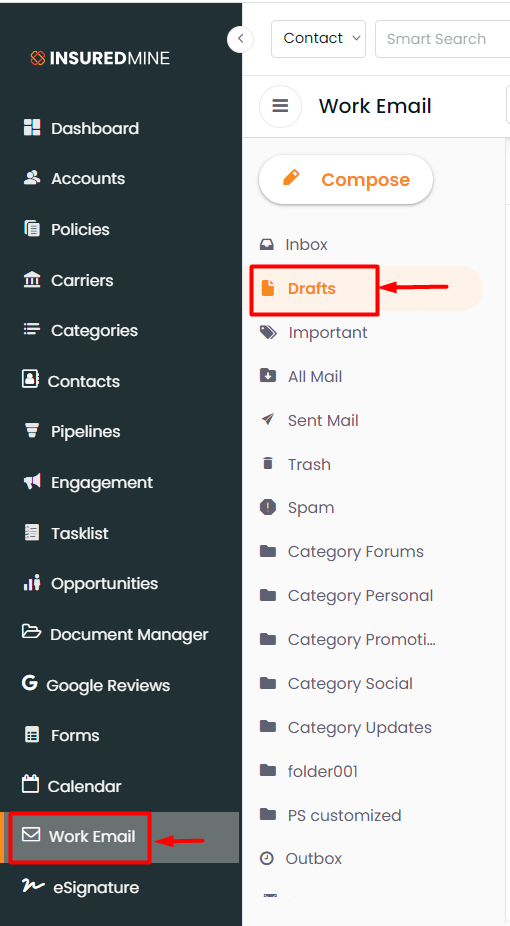
Auto-saving of Work Email Draft
Now your email draft gets auto-saved even if you need to navigate to any other section of the portal until you refresh/ reload the page.
To check this enhancement:
Navigate to work email.
Click on the Draft email option.
Select the email id and write the subject line and mail body.
Close the page.
Navigate to any other tab of the portal.
Get back to the email section following the same process, you will find the draft where you left off.
You will locate the email in the draft area once you have drafted it, specified the email address to send it to, and scheduled it.
You will find the email draft, so you can pick up from where you have left.
Work Email Tracking
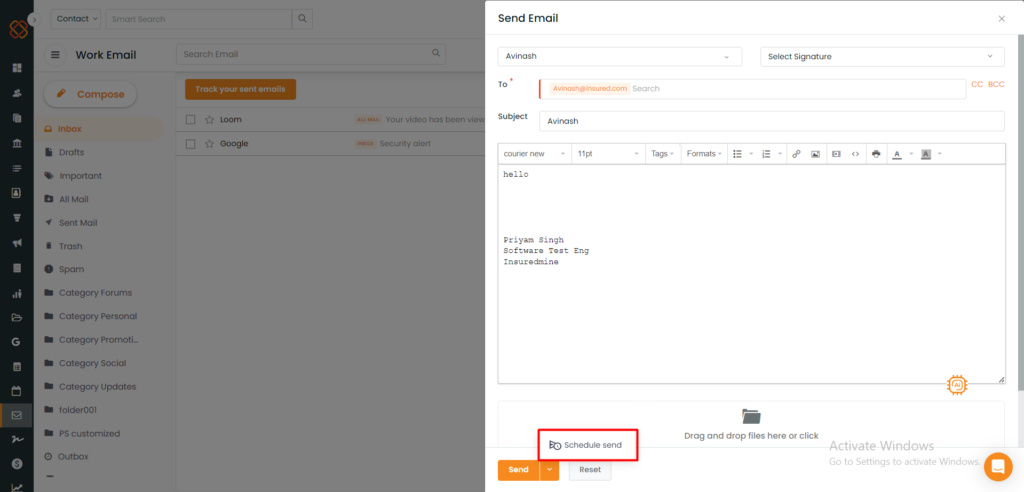
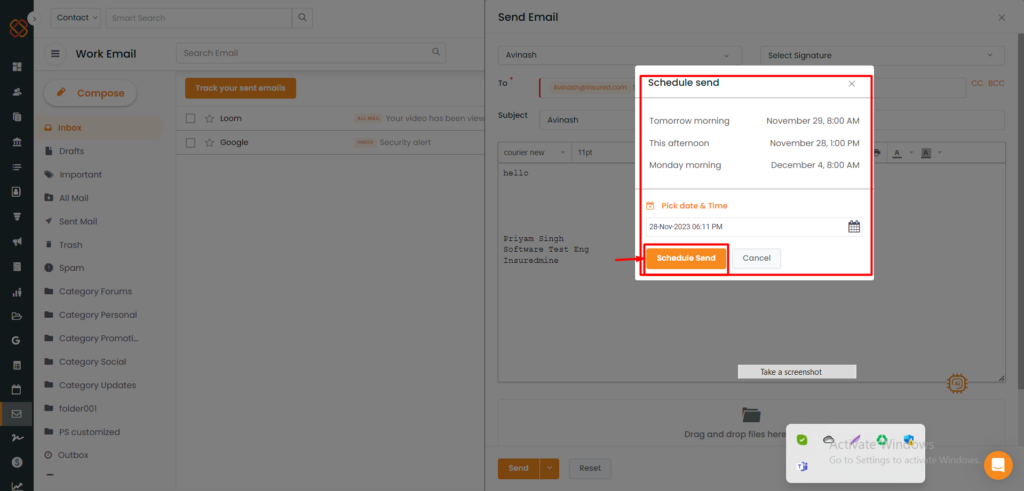
Scheduling an Email
Scheduling an email means setting it up to be sent at a specific date and time in the future. This is useful if you want to plan ahead and send an important email later. You can do this by clicking the “add” button or from a deal card.
To view the enhancement:
Click on the arrow mark near the send button.
Now select the option schedule send.
A pop-up window will open where you need to pick the date and time.
Either you can select from the given options or can pick the desired date and time.
Click on schedule send.
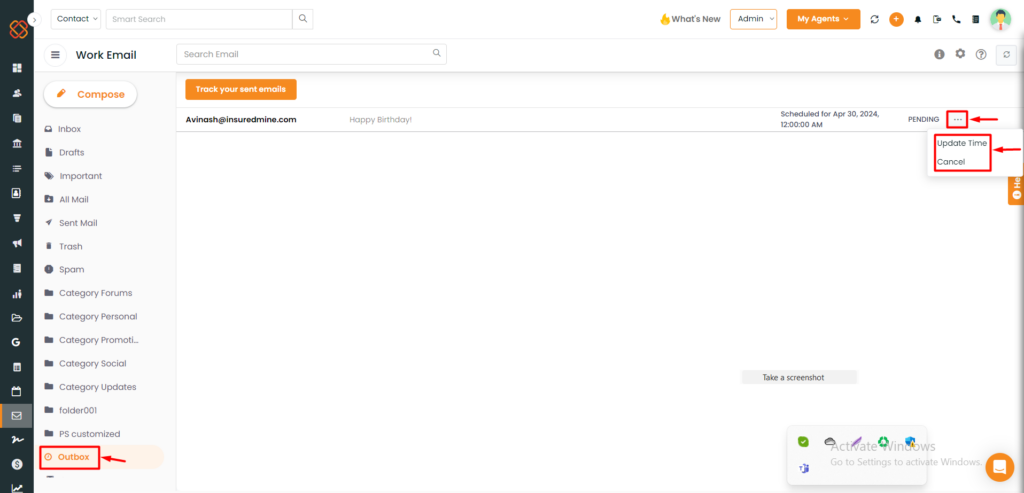
To view, update or cancel the scheduled email:
Navigate to work email.
Click on outbox, you will find the scheduled email.
Click on the 3-dots icon where you will get the option to update time or to cancel.
You will also get the pending status as the email is scheduled.
When the email will be sent, it will be available in the sent email folder.
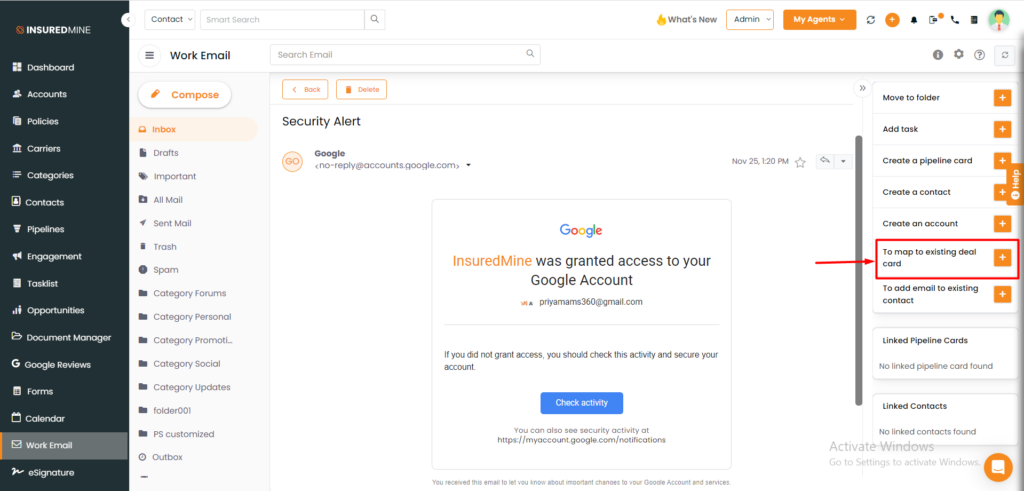
Map email to the existing deal card and existing contact in Work Email
Select any email from your inbox and open it.
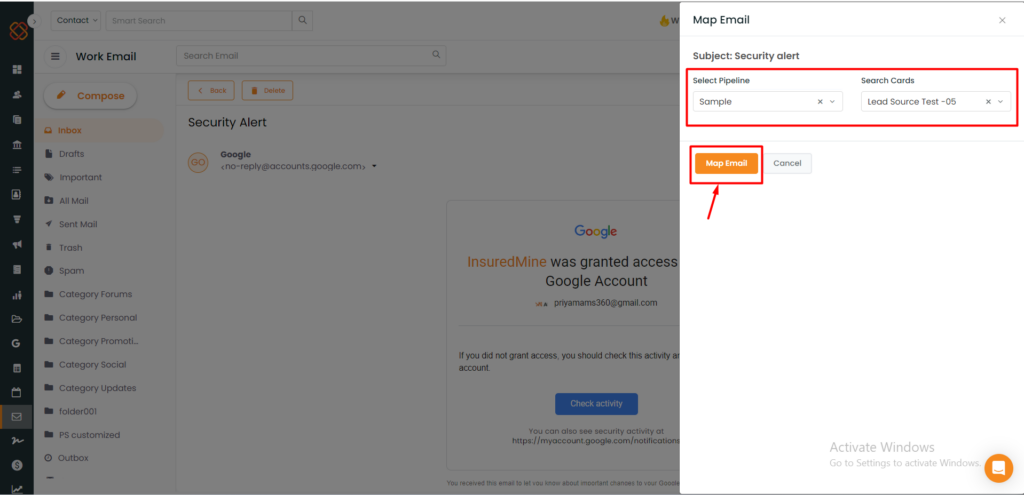
Click to map to the existing deal card.
Select the pipeline and search the card.
Click on map email.
Add Email to an existing Contact
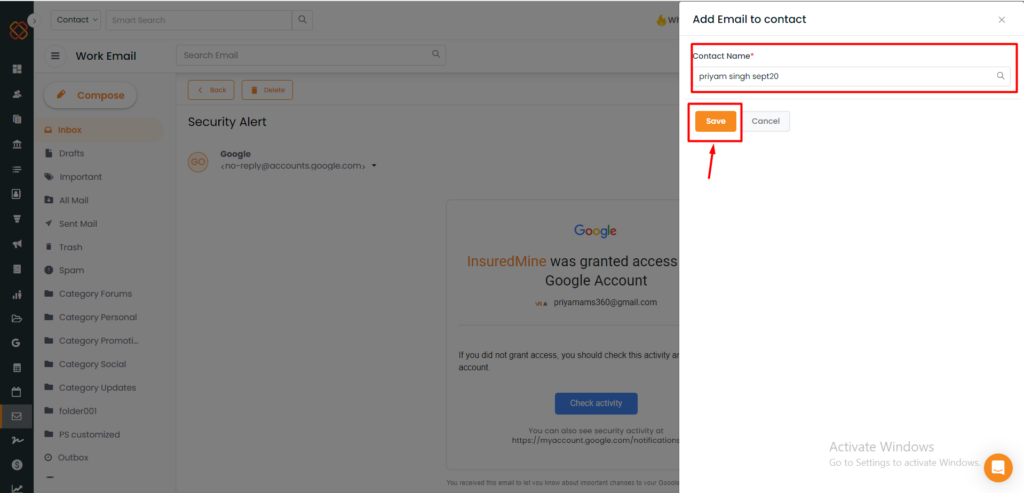
Choose any mail from your inbox and then select Add email to existing contact from the bar on the right side.
A minimized window will then appear. Type and select the name that you want to add.
Click on Save.
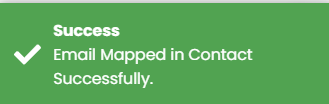
Once done you will get a notification saying Success.
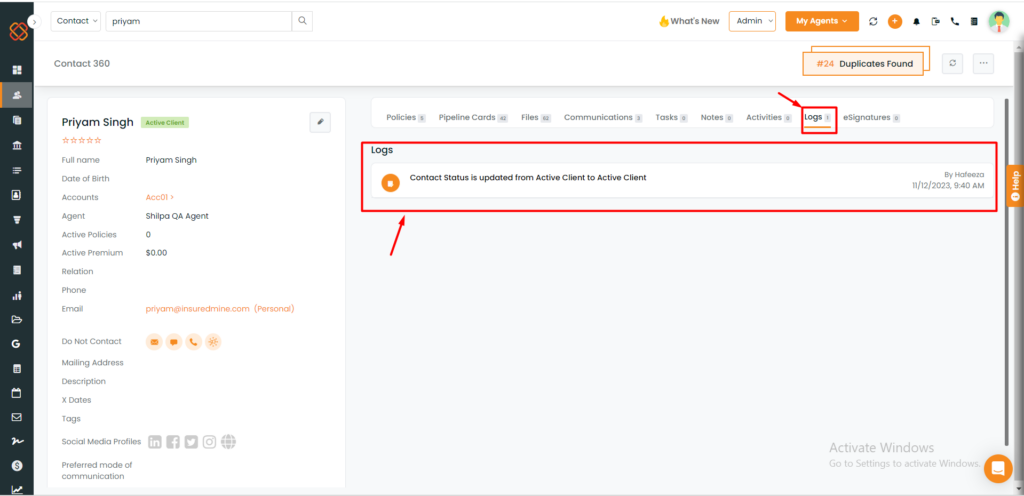
Navigate back to Contact 360
In the Logs section, you can view the email that has been mapped.
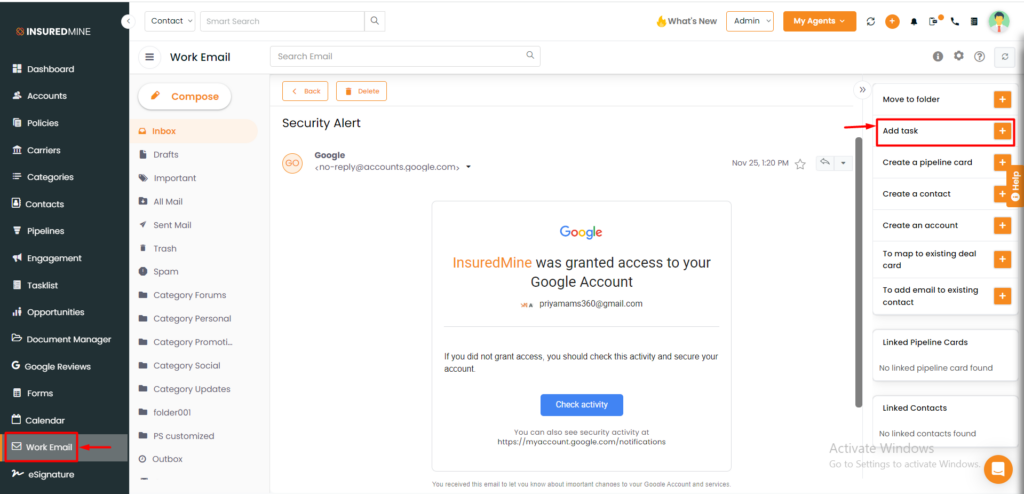
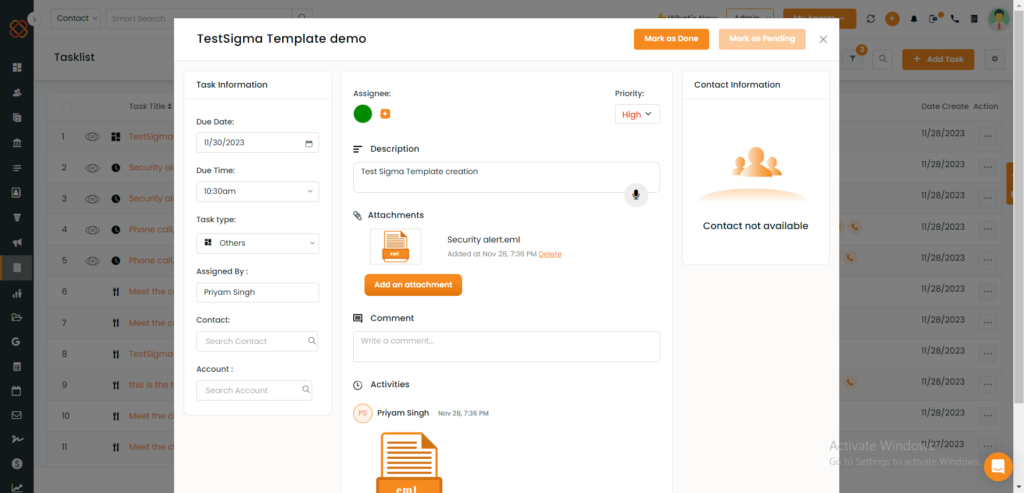
Attach a task to a work email
If an agent adds any task through their work email, that email will be linked to the task on your task list. This improvement helps people connect an email to a specific task in the task section.
To check the enhancement:
Navigate to work email.
Select the mail.
Click on add task.
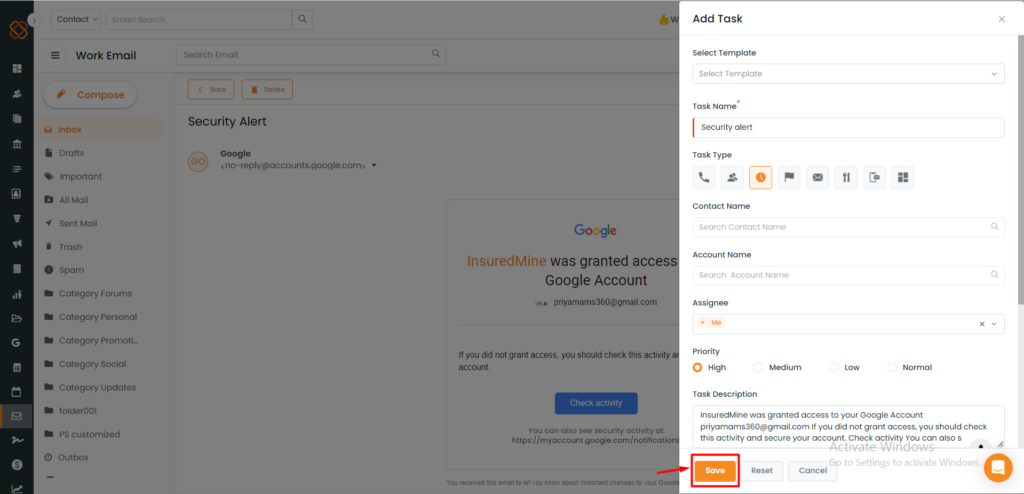
Fill in all the details related to the task that you’re adding.
Click to save.
You will get a notification saying: Task Added.
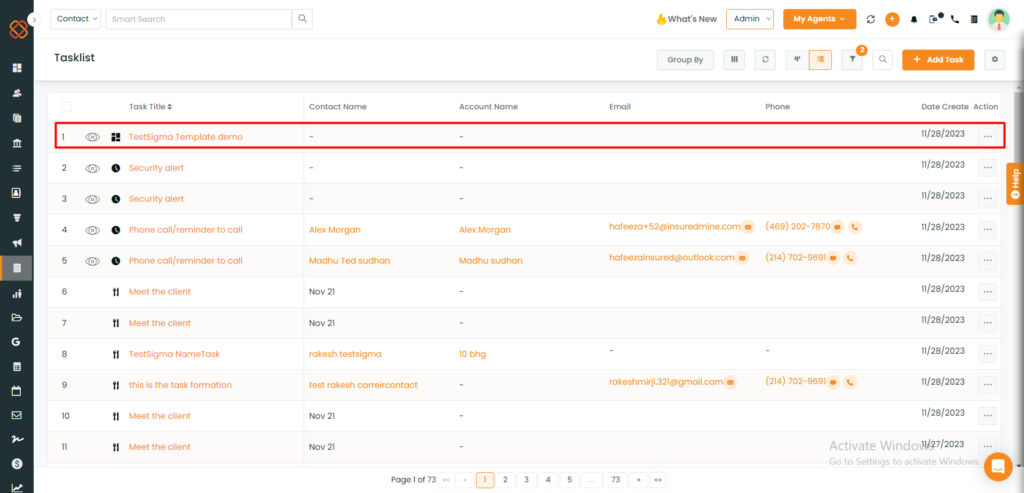
Navigate to the tasklist
In the tasklist you will find the newly added task from your work email.
Fill in all the details related to the task that you’re adding.
Mark as Done.
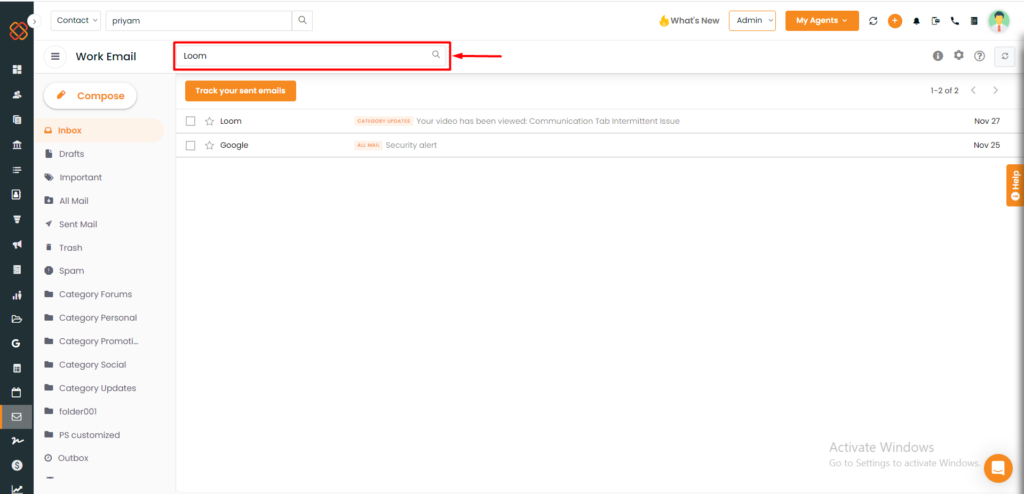
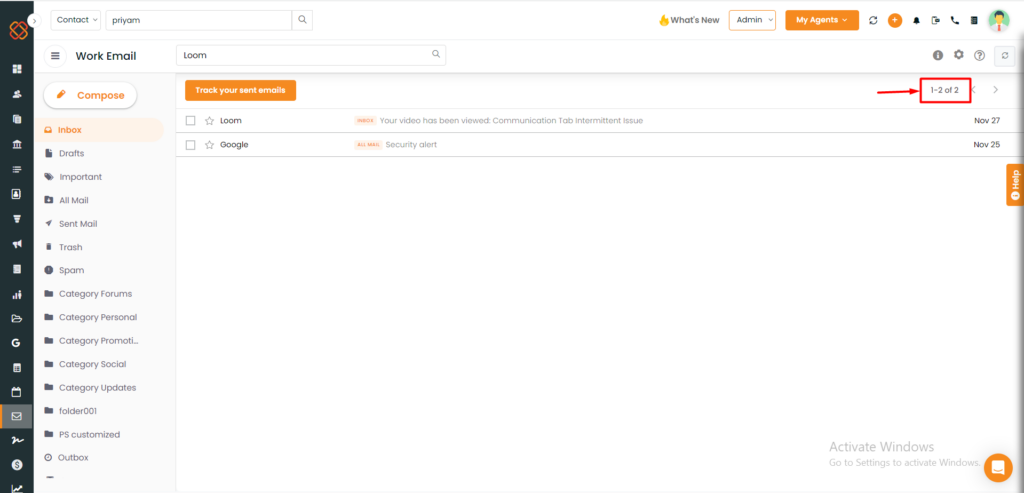
Search Option in Work Email
You can search an email by typing the name, subject, or email id in the search box. Scroll down to select all results. You can navigate back by clicking on the Inbox folder.
Email Threads in Work Email
The total count of messages under one email thread will be now visible.
Note: When you map an email to a contact or deal card, all the threads related to that email are linked together which helps to keep track of all communication in one place for that contact or deal card.
Related Articles
No related topics found. Here are 5 recent articles: