Admin can add, edit or delete the custom data fields in Accounts.
Overview
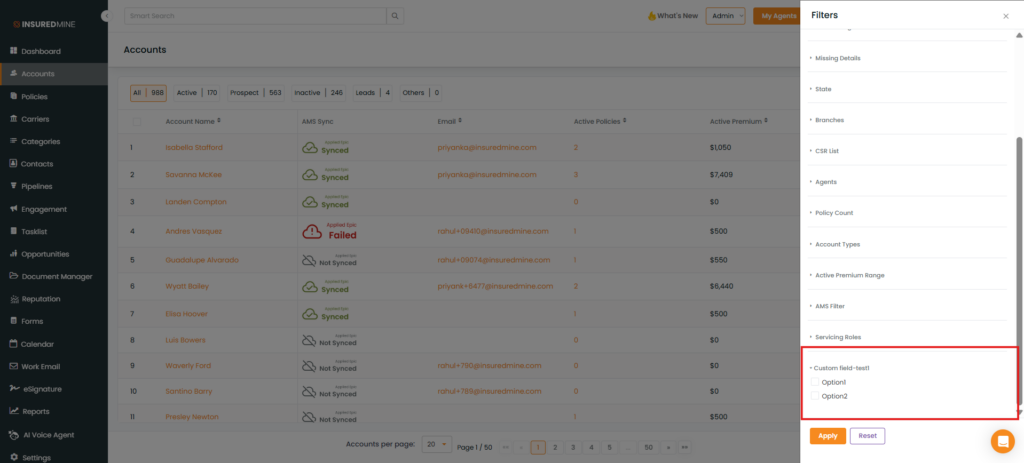
We have introduced an enhancement in the Accounts module that allows users to add and manage custom data fields for account records. Users can create custom fields, display them as table columns, update their values from Account360, and use them as filters to refine account data.
Use Case: This enhancement helps users capture and organize account-specific information that may not be available in standard account fields. By creating custom data fields, users can tailor account records to their business needs, improve data visibility through table columns, and quickly locate relevant accounts using custom field-based filters.
To view the enhancement:
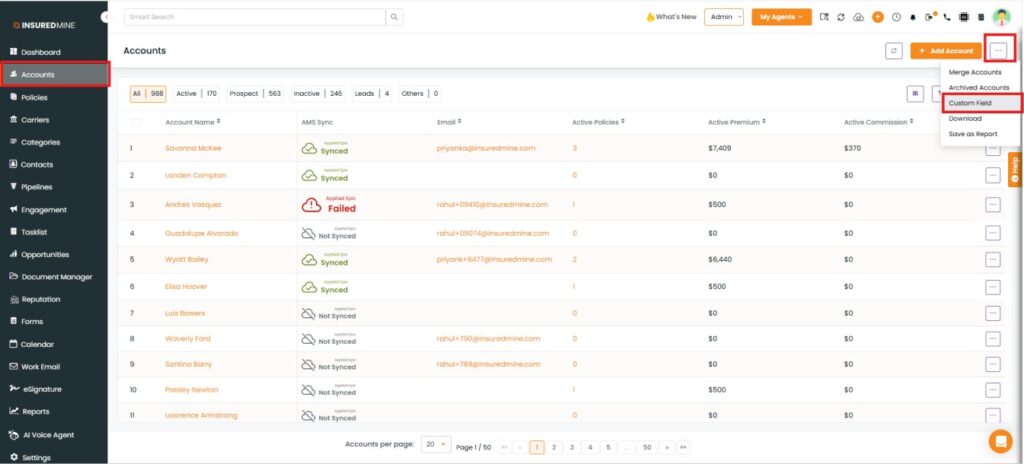
Navigate to Accounts
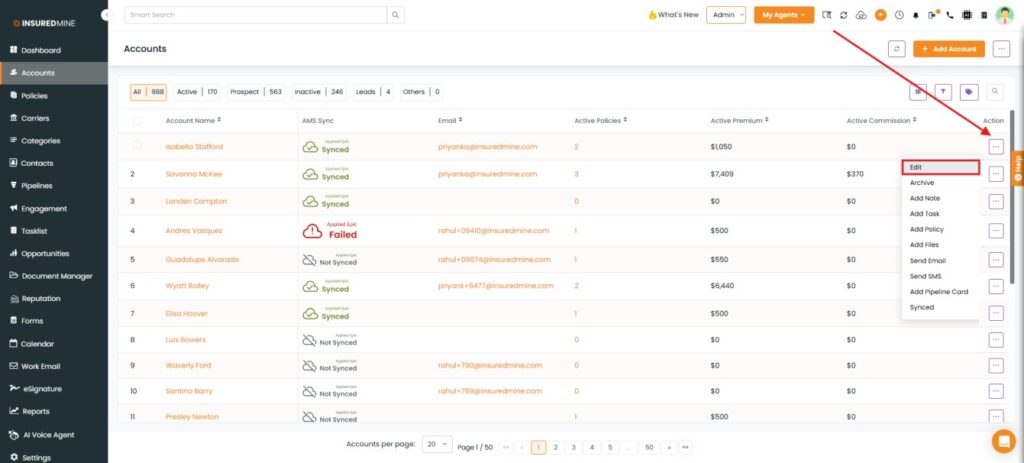
Click three-dots icon
Select Custom Fields
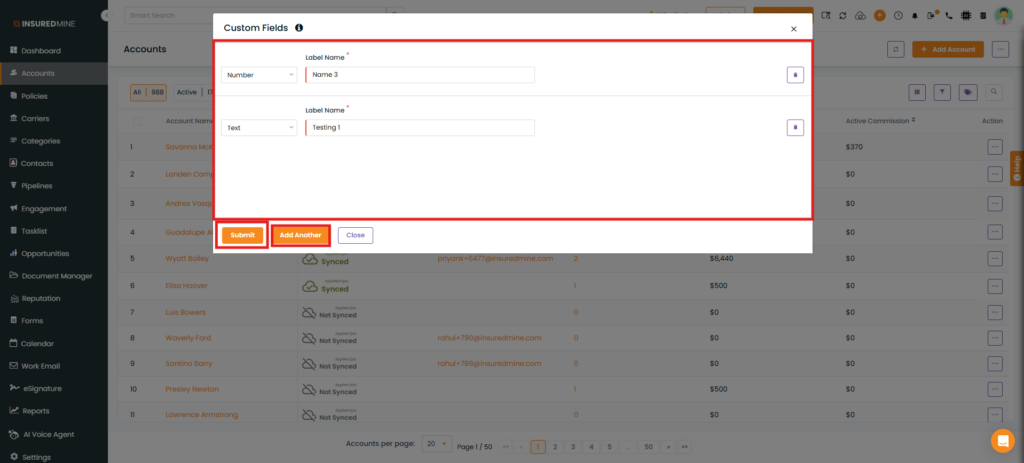
Add the custom data fields
Click Add Another to add additional custom fields.
Click Submit.
A success pop-up, “Custom fields are updated successfully,” appears.
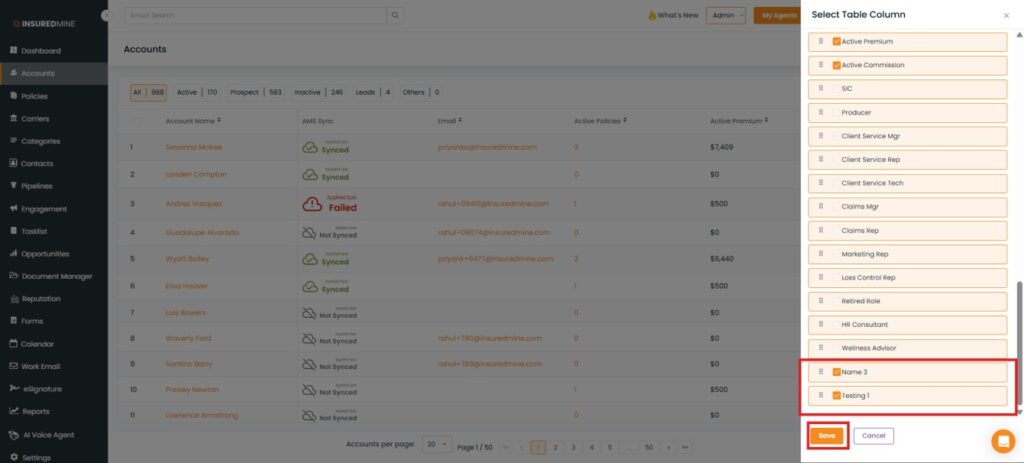
Navigate to the Table Column
Select the custom fields created
Click Save
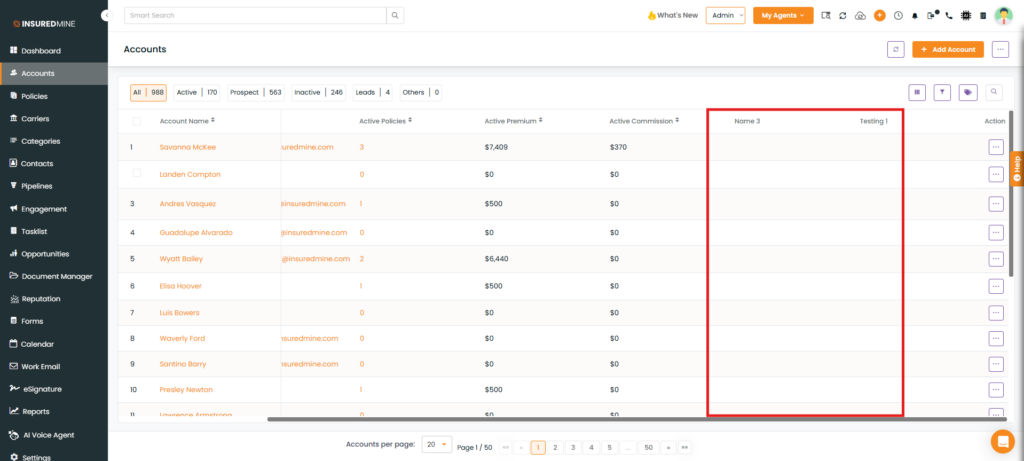
The Selected Table Column will appear in the table view of Accounts
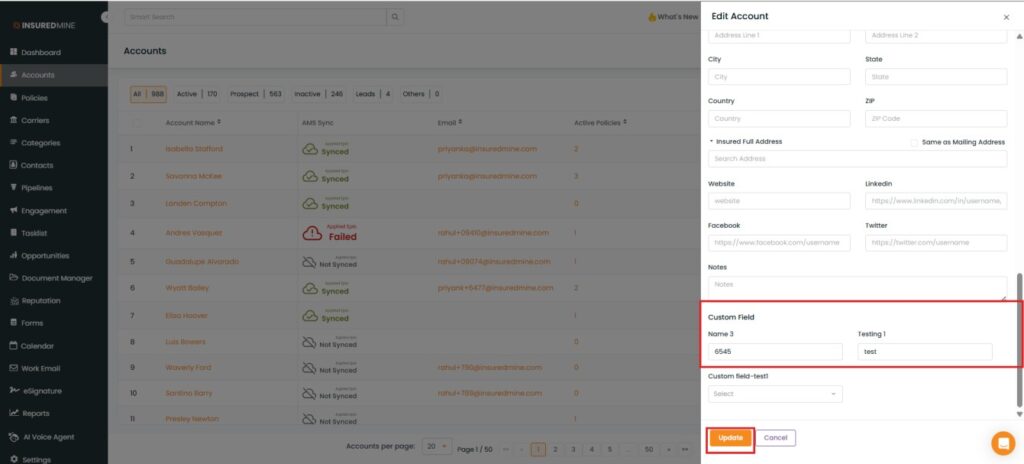
In case you want to edit the custom data, click on the Edit icon and make the necessary changes. Then click on update.
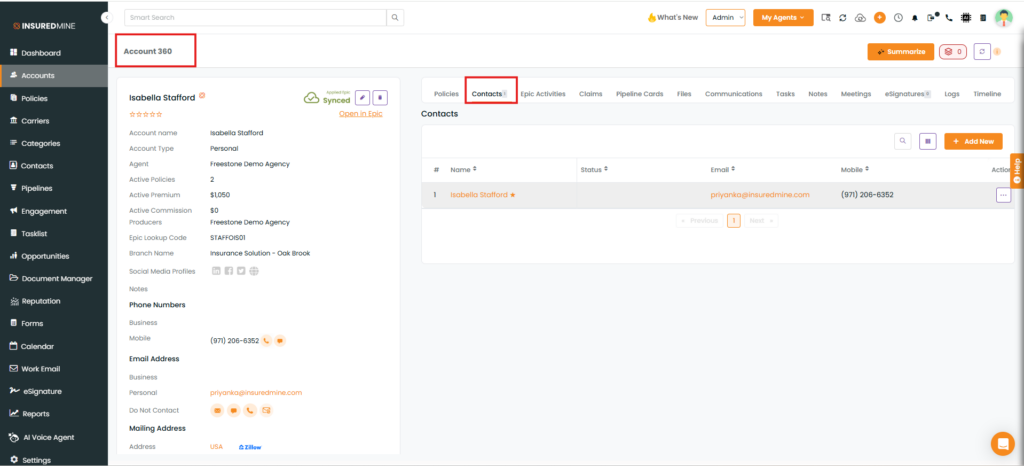
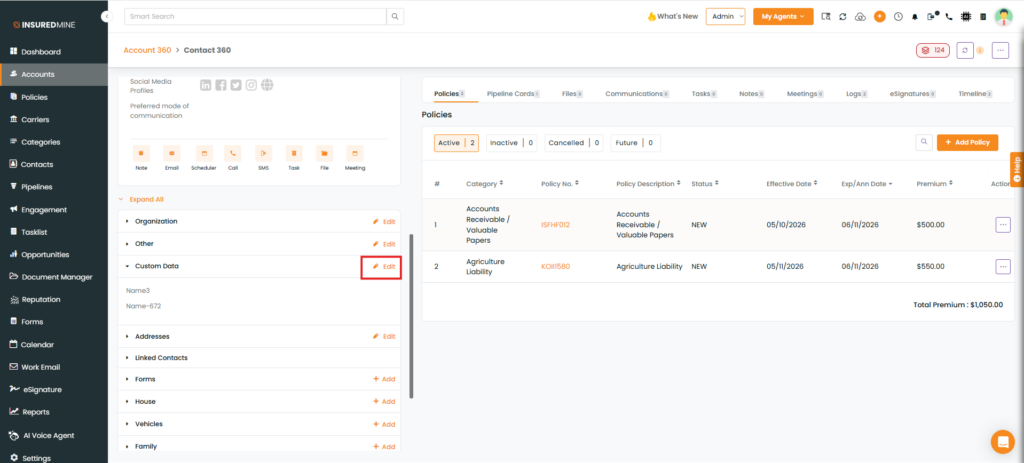
If you navigate to Account 360 of any contact and click to Edit the account, you will find the custom fields that you can edit. Once completed, click on Save.
You can also filter your accounts based on the custom fields that you have added.