Getting started with InsuredMine has never been easier. In just seven simple steps, you can effortlessly create your profile, and then you’re ready to embark on your insurance journey.
There are certain steps that you need to follow to get started with insuredmine.
Complete Profile
Connect Work Email
Connect Scheduler
Verify Email
Add Signature
Configure texting and Calling
Add Users
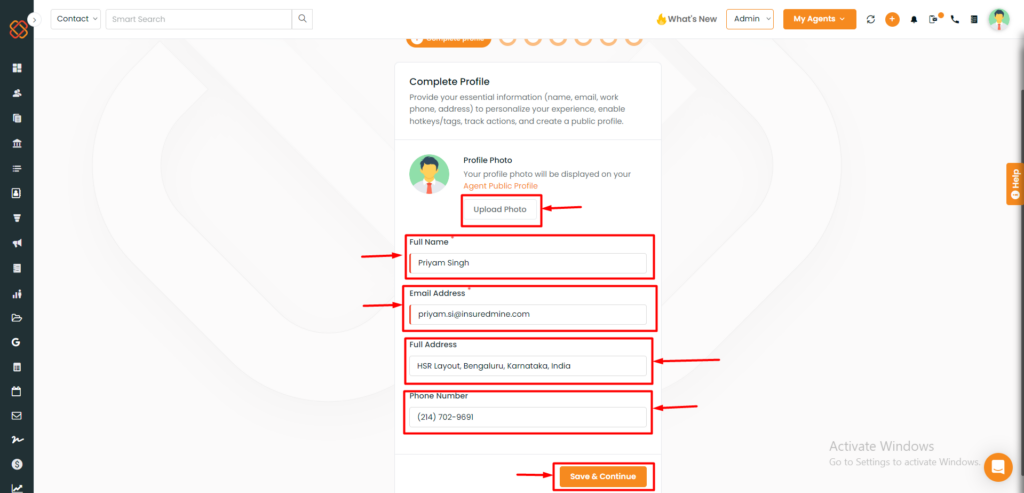
Step 1- Complete Profile
Upload your Profile photo.
Type in your full name,email address, full address, and phone number.
Click to Save and Continue.
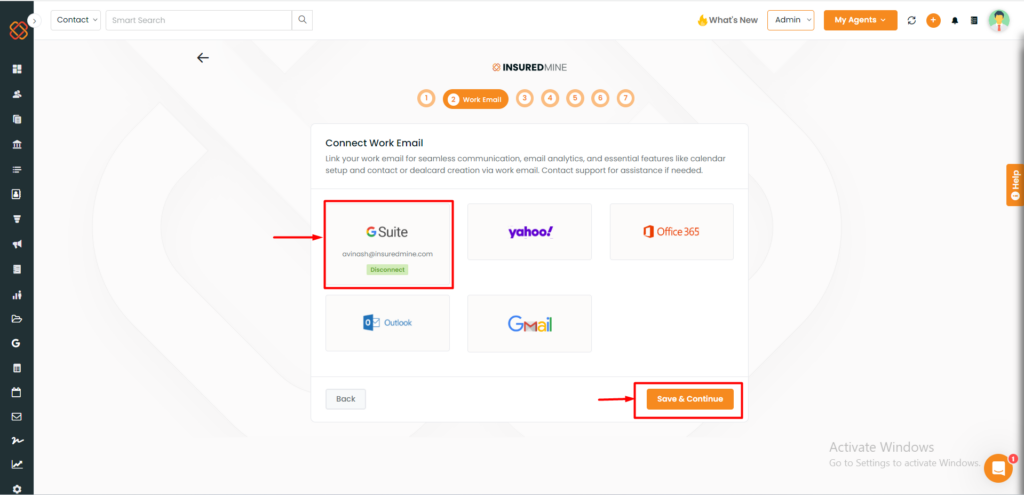
Step 2- Connect your work email
Link your email for seamless communication.
Choose any of your accounts that you like to connect and click on connect. For instance, I have chosen G Suite.
Click on Save & Continue.
Note: This email will be the email address that you use for marketing and even for your google calendar scheduling.
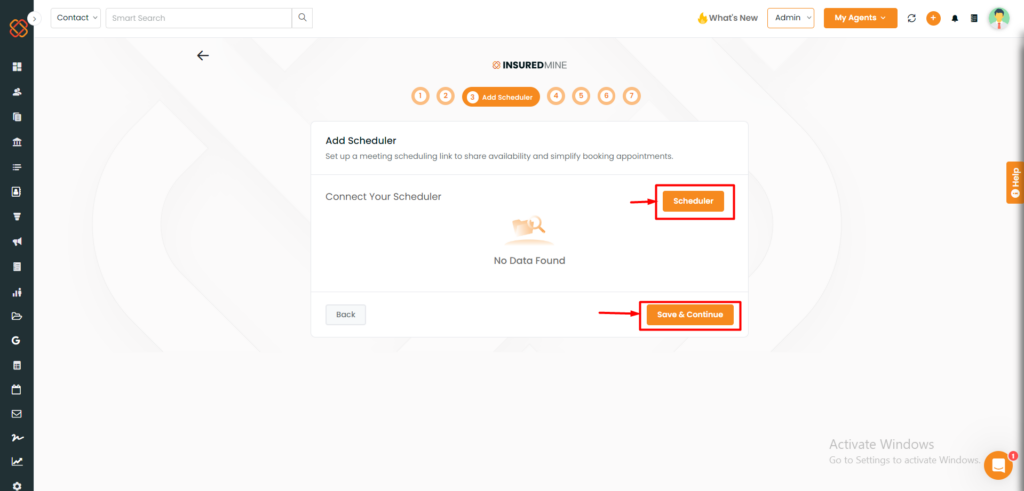
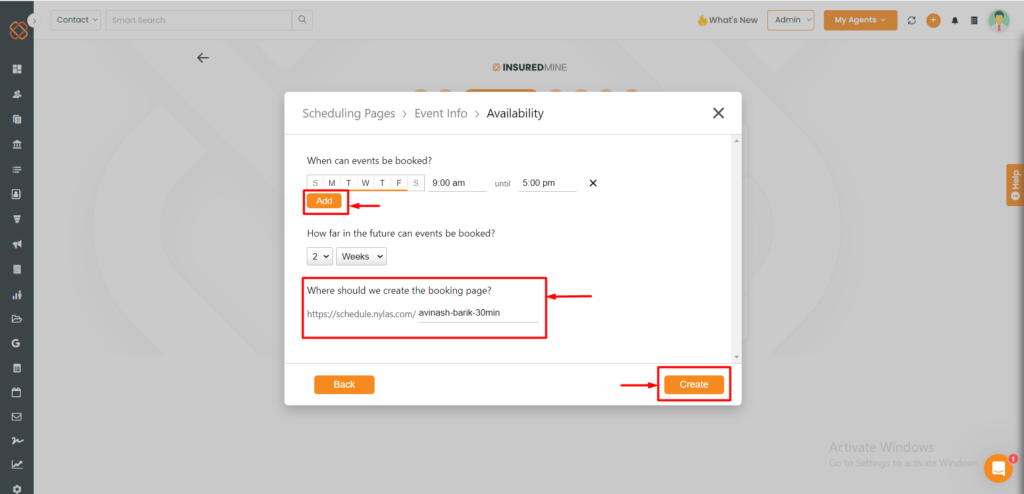
Step-3 Connect Scheduler
Now that your work email is connected , create a schedule via link.
Click on the Scheduler option.
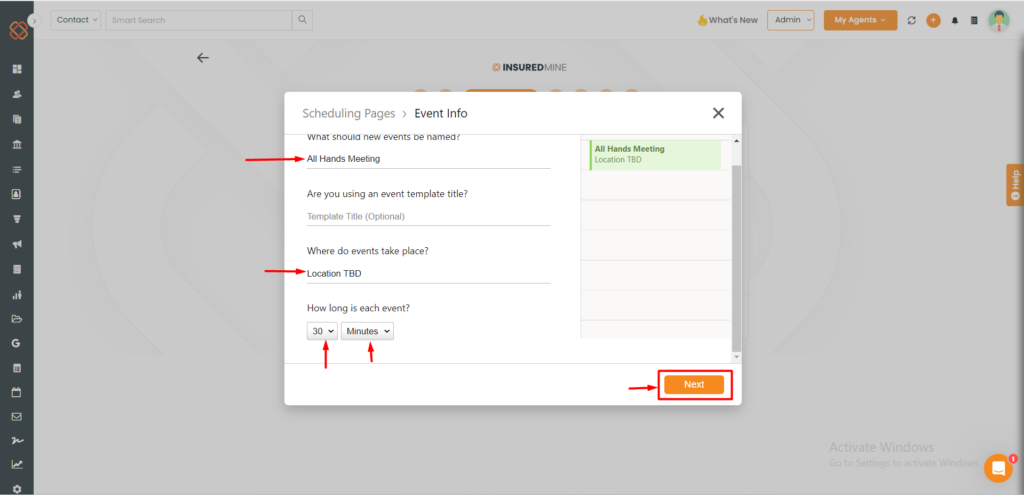
Fill up the information in the Scheduling Page and then click Next.
Fill up the event booking details.
Then, click on Create.
Your next schedule will be created.
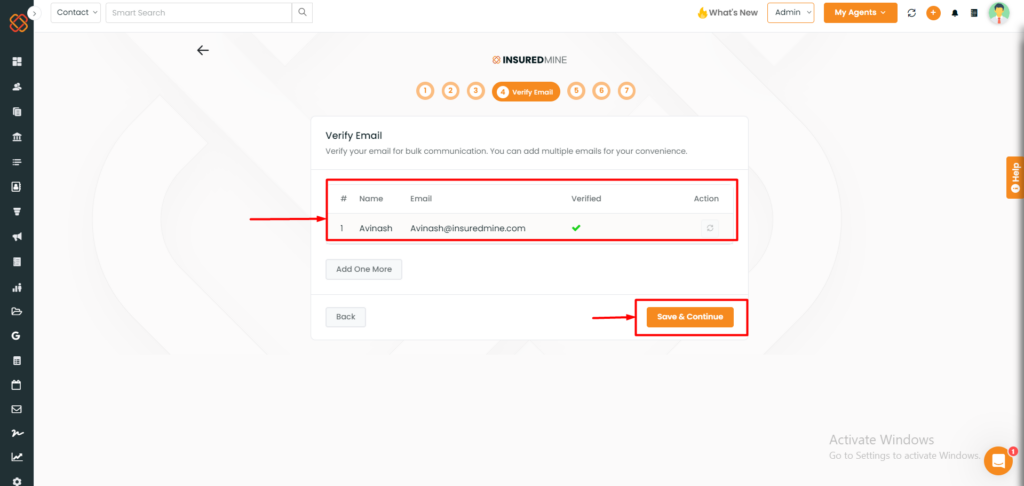
Step- 4 Verify Email
If your email has been verified, a tick mark will appear under verified; otherwise, click the verify email option.
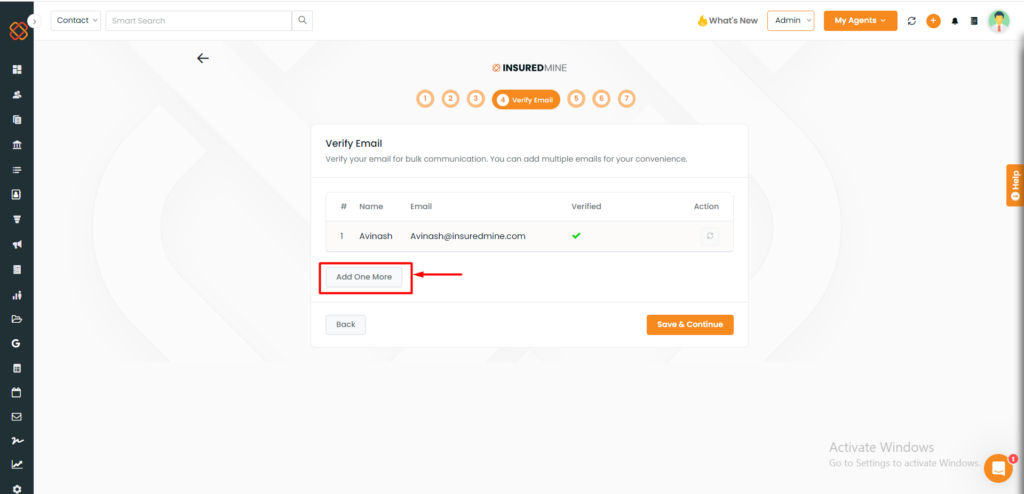
In case you want to add additional email addresses such as support or help desk email id, that you have, you can type in too.
Click on Save and Continue.
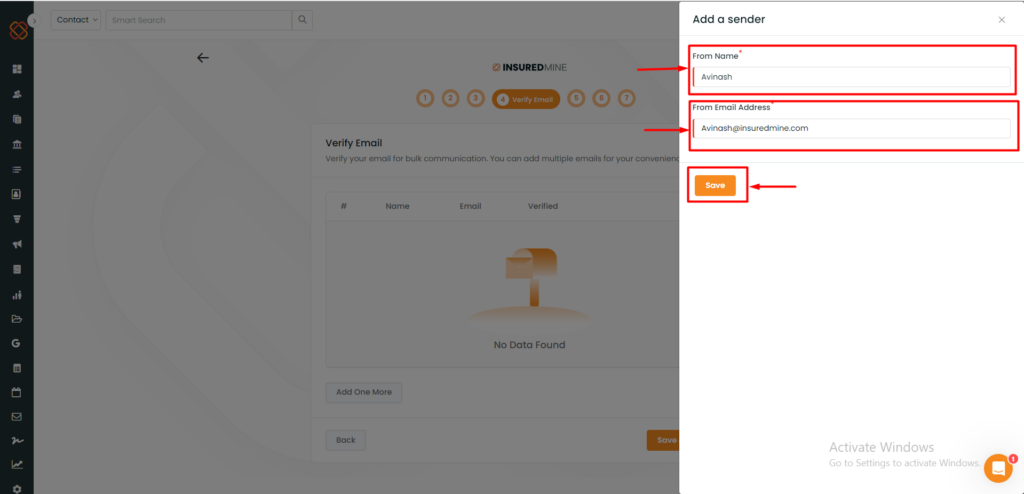
Type in your name and email address.
Click on the verify email button.
In case you want to add additional email addresses such as support or help desk email id, that you have, you can type in too.
Click on save.
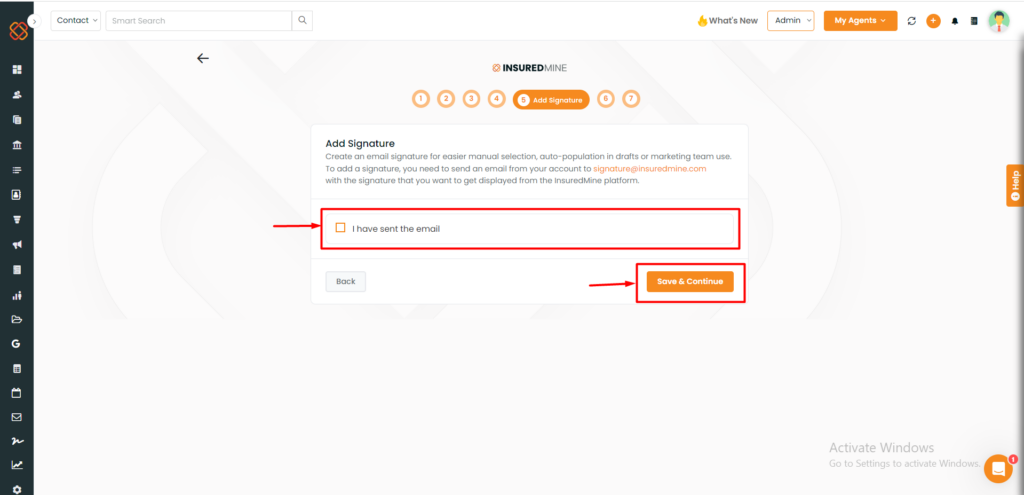
Step 5- Add Signature
To add a signature, you need to send an email from your account to signature@insuredmne.com with the signature that you want to get displayed from the insuredmine platform.
Check the box beside: I have sent the email.
Click on Save and Continue.
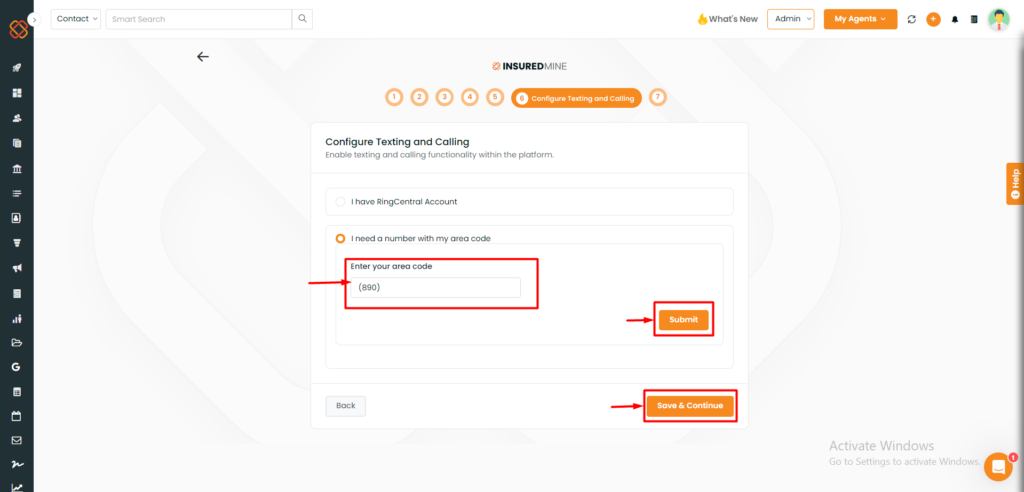
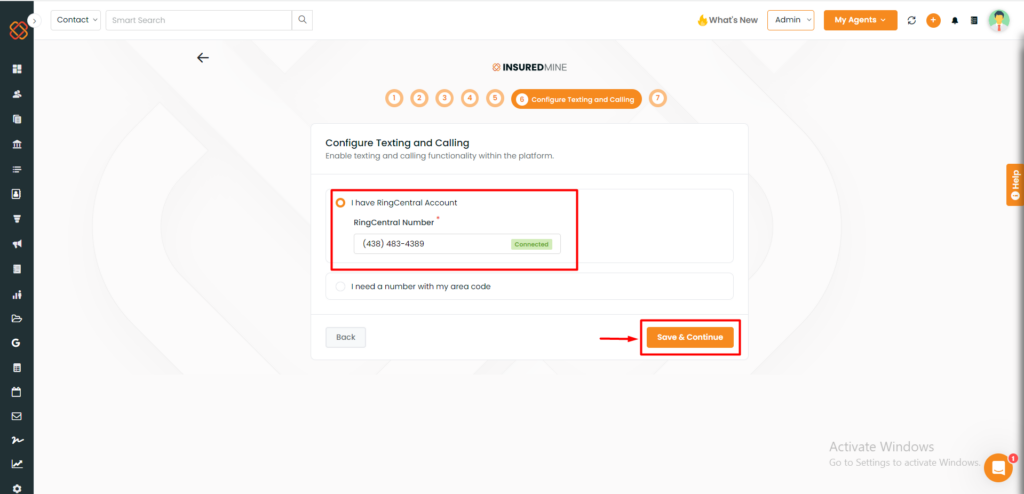
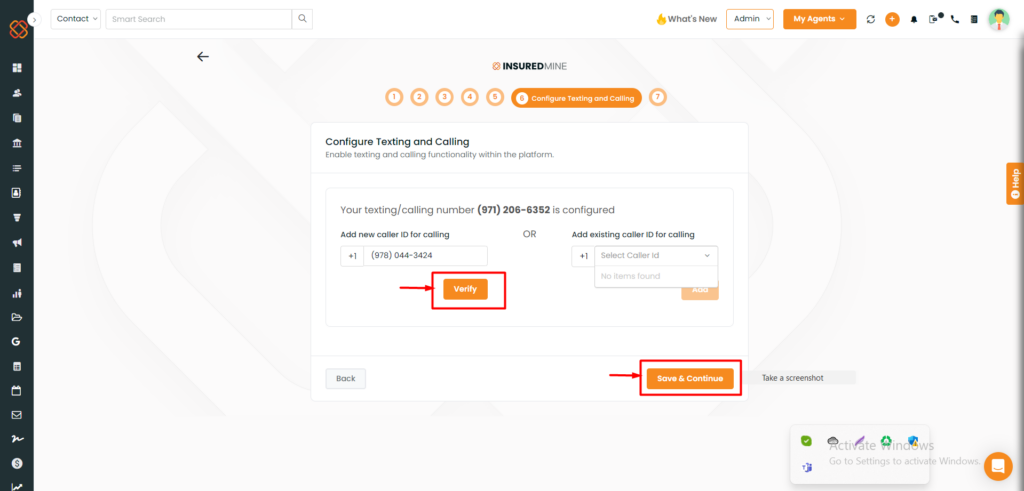
Step 6- Configure Texting and Calling
Enabling Texting and calling functionality within the platform is easy and simple:-
Just Follow these steps:
If you are having a Ringcentral Account:click the option: I have a RingCentral Account.
Fill in your RingCentral Number.
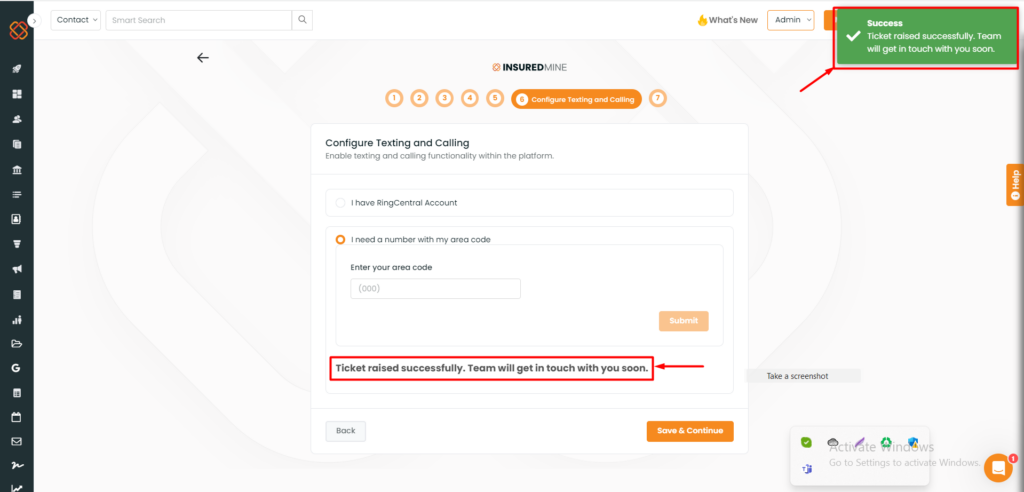
If you do not have a RingCentral account but wish to add a phone to your InsuredMine Account then select: I need a number with my area code.
Then, click on Save & Continue.
A ticket will then be raised related to the request.
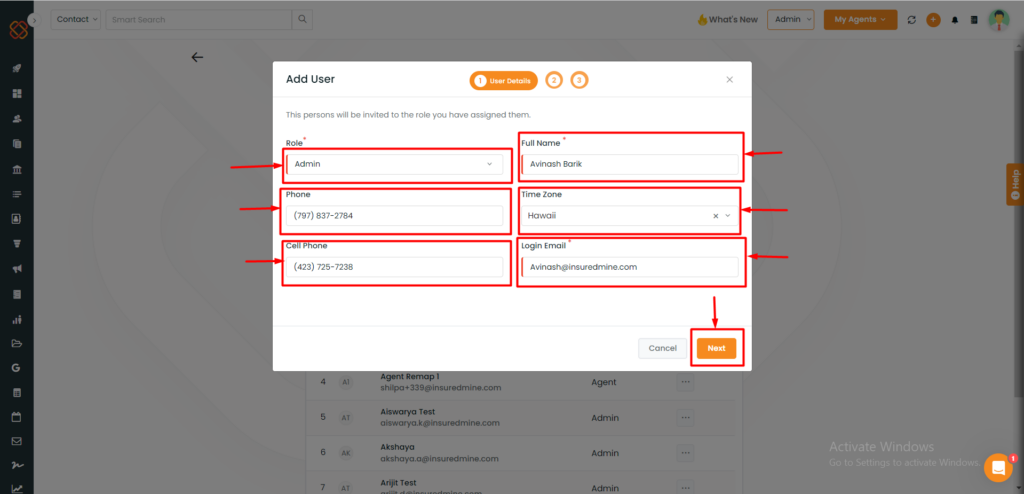
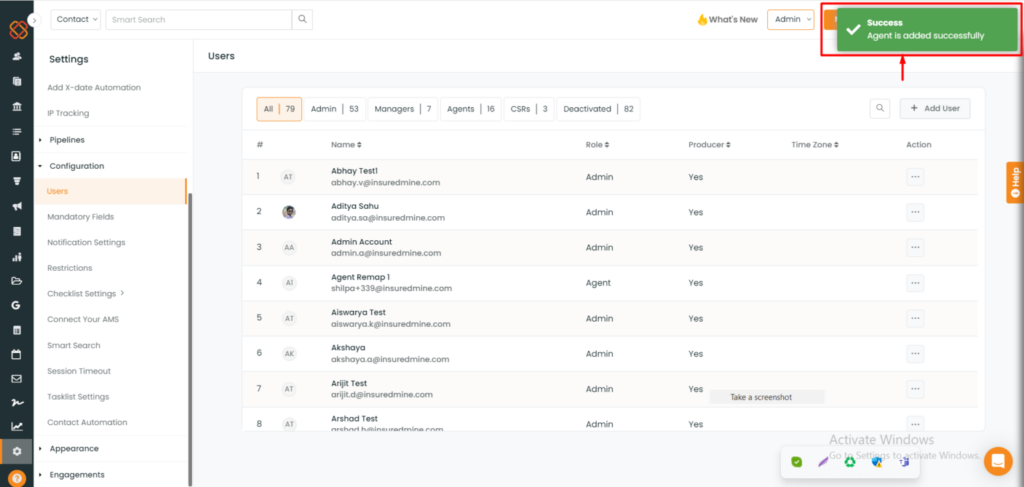
Step 7: Add Users
Note: This step is available for Admin only.
Select the role: Admin, Manager, CSR, or Agent. For instance, in this example, we are choosing the role of Agent.
Fill in the other details – Full name, phone, Cell Phone and log in Email.
Click on Next.
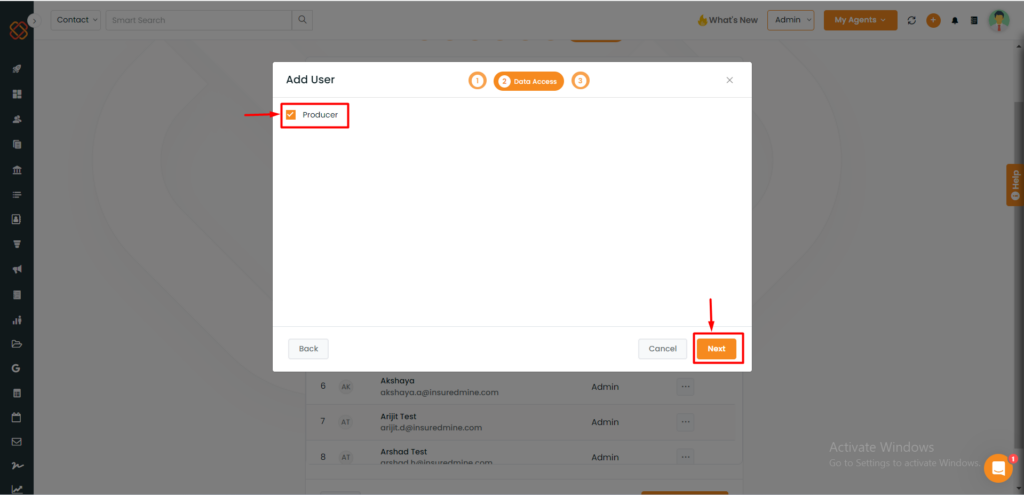
Check the Producer box to give producer level access to the new user under admin view.
Click on Next.
Once done click on Save and finish.
If you want agents to have access to all the agency data, check the box beside All Agency Data Access.
Check the Producer box to give producer level access to the new user under admin view.
Click on Next.
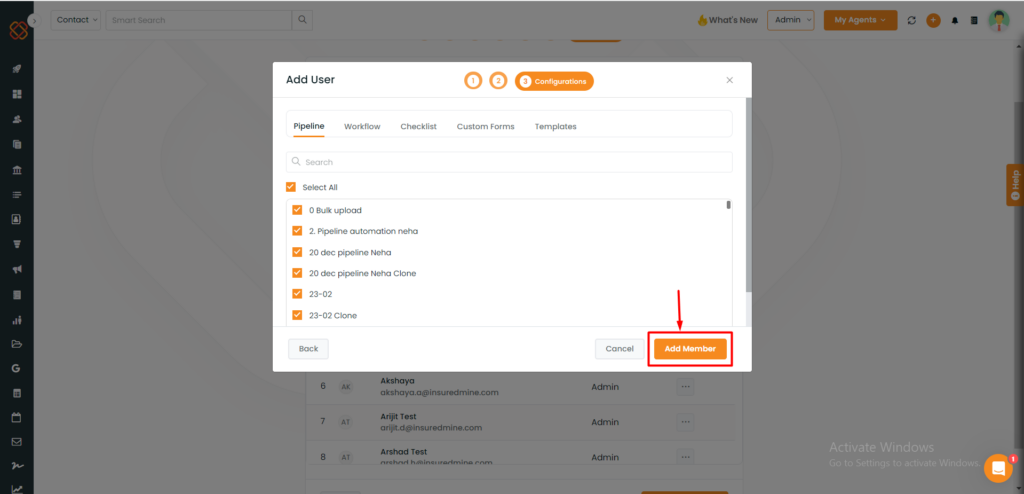
You can choose to grant access either collectively for all items (Pipelines, workflow, checklist, Custom forms, and templates) or individually for each item to the new user.
Then click on Add Member.
You will get a success notification saying: Agent is added successfully.