Welcome onboard to Insuredmine! Get set to automate your sales and marketing processes and accomplish more in less time.
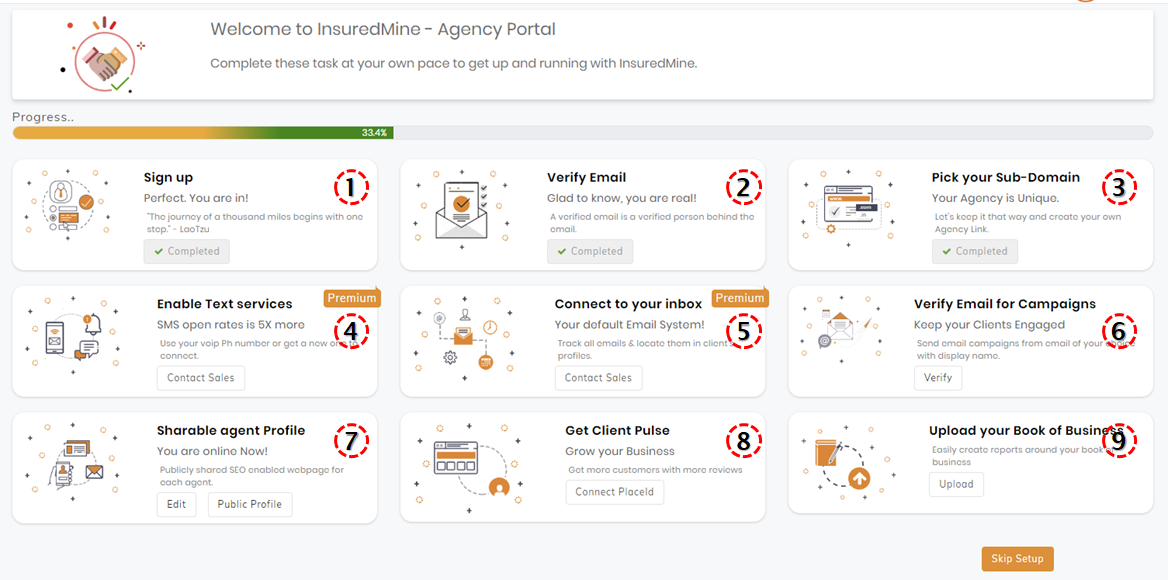
1.Sign up
2. Verify email
3. Pick your Sub-domain
- Lead capture – attraction to need
- Lead Nurture – awareness of product
- Sales Funnel – evaluation to purchase
- Onboarding – Client to Adoption
- Retention Period – Client to a promoter
- Renewals – Consumer to the believer
- Winbacks – evaluation to hope
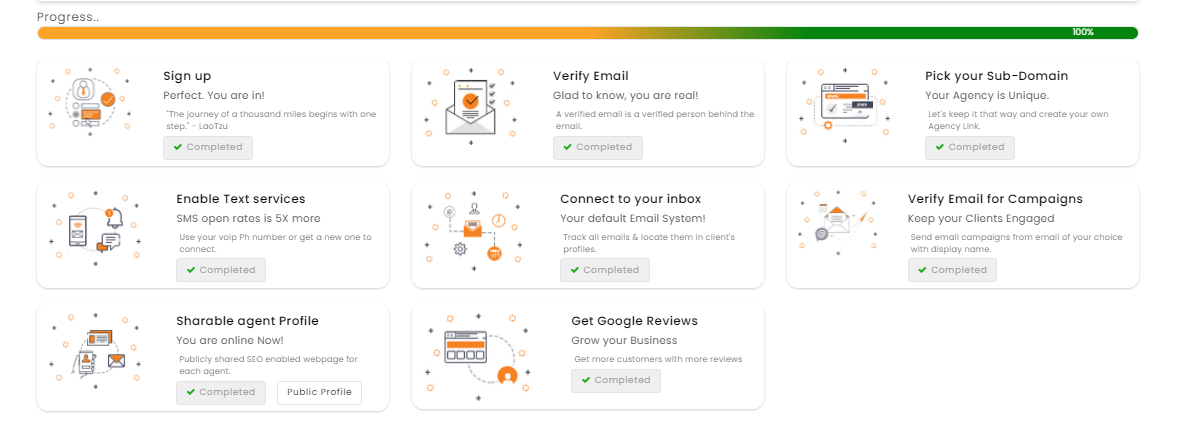
Note: The first 3 steps are marked completed by default, as Insuredmine sets them while onboarding as seen in the image below:
4. Enable Text services
- Click Request in Enable text Services segment.
- On the support pop up screen, Add Subject as Enable text Services (Marked as 1 in the image)
- Select category as Issues (Marked as 2 in the Image )
- Type the message or use the default message “Hello Customer Support, Request you to please configure my account with a phone number for text messaging” in Message segment. (Marked as 3 in the image)
- Click the Submit button to send support requests. (Marked as 4 in the image)
5. Connect to your inbox
Link your inbox for insights into email analytics. Track every email you send to your clients or customers and know whether it was delivered, opened, responded, or reported.
Steps to connect to your inbox:
1.Click on the Connect button under the Connect to your Inbox segment on the Get started module.
2. The Settings screen appears, click on the Connect button in the email account tab as seen below.
3. Insuredmine integration request for email signup window pops up. Enter the email address you wish to integrate with Insuredmine.
6. Verify email for the campaign
Varifying email for the campaign is required by AWS SES to ensure email identity is verified so you cant sent campaigns from any fake id or anyone cant use your id to run a fake campaign.
Steps to verify your email for campaign
1, In the get started module, click on the Verify button under the Verify email segment.
2. You will receive an email with a verification link.
3. You just have to click on the link and InsuredMine will get notified that the client has clicked the link.
Click to know more about ways to verify your email for campaign
7. Sharable agent profile
A public profile with all your agency information with links to Facebook, Google, Twitter and LinkedIn accounts can be created and shared with all your contacts.
Steps to view Sharable Agent Profile:
1. Click on Public Profile in the Share agent profile segment of Get started module.
2. The public profile website appears with agent credentials and other information.
8. Get client pulse
Google’s business reviews of your agency attract more leads. Ask your clients for reviews through an automated workflow setup. Create your google place Id and know what your clients say about you.
Steps to Get client Pulse:
1. Click on Connect Place ID icon in the Get client pulse segment of Get started module.
2. Enter your Google Place Id and click Submit button.
To know more about how to get Google place Id and information on the client pulse module click here.


