Contact Settings, General Settings, Pipeline Settings
UI Changes in the Settings Module
April 24, 2026
In our ongoing commitment to enhancing user experiences, we have made significant updates to our “Get Started” process, “Settings” module and the “Sales Dashboard” feature. Our latest changes involve the incorporation of existing features that, while functional, were not particularly simple to use. The result of these updates is a more intuitive and organized system that caters to our users’ needs effectively.
Use Case: The upgraded “Settings” module, along with refinements in the “Get Started” process and the improved user-friendliness of the “Sales Dashboard” settings, simplifies user interactions by categorizing every feature into unique, specific categories. This makes it easier for users to locate and utilize specific settings as they kick-start their journey with insuredmine. This streamlines the user experience, enhances efficiency, and reduces the complexity of navigating the platform, ensuring that users can make the most of our services with ease.
Recent UI changes in the "Get Started" feature:
Get Started:
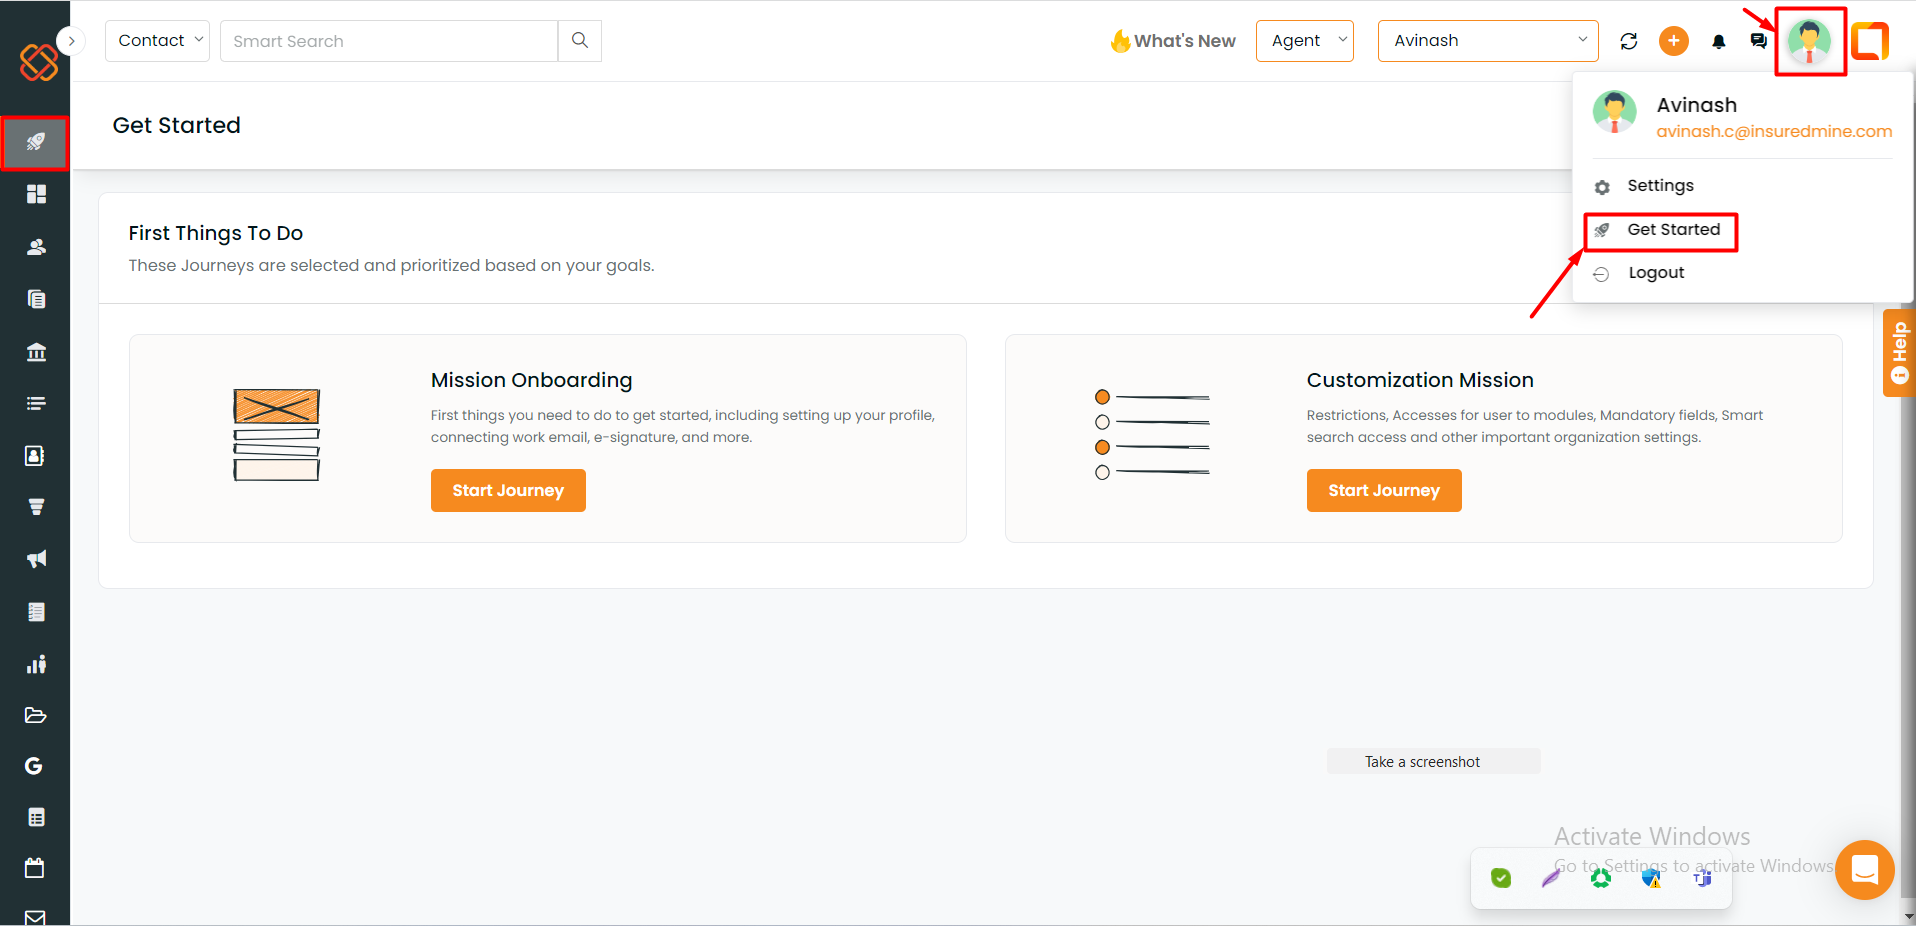
Now, with the recent UI changes, let’s walk through how you can begin your journey with insuredmine using the “Get Started” option.
You can access it in two ways: by clicking the top icon present in the left sidebar or by clicking your profile icon and selecting “Get Started” from the dropdown menu.
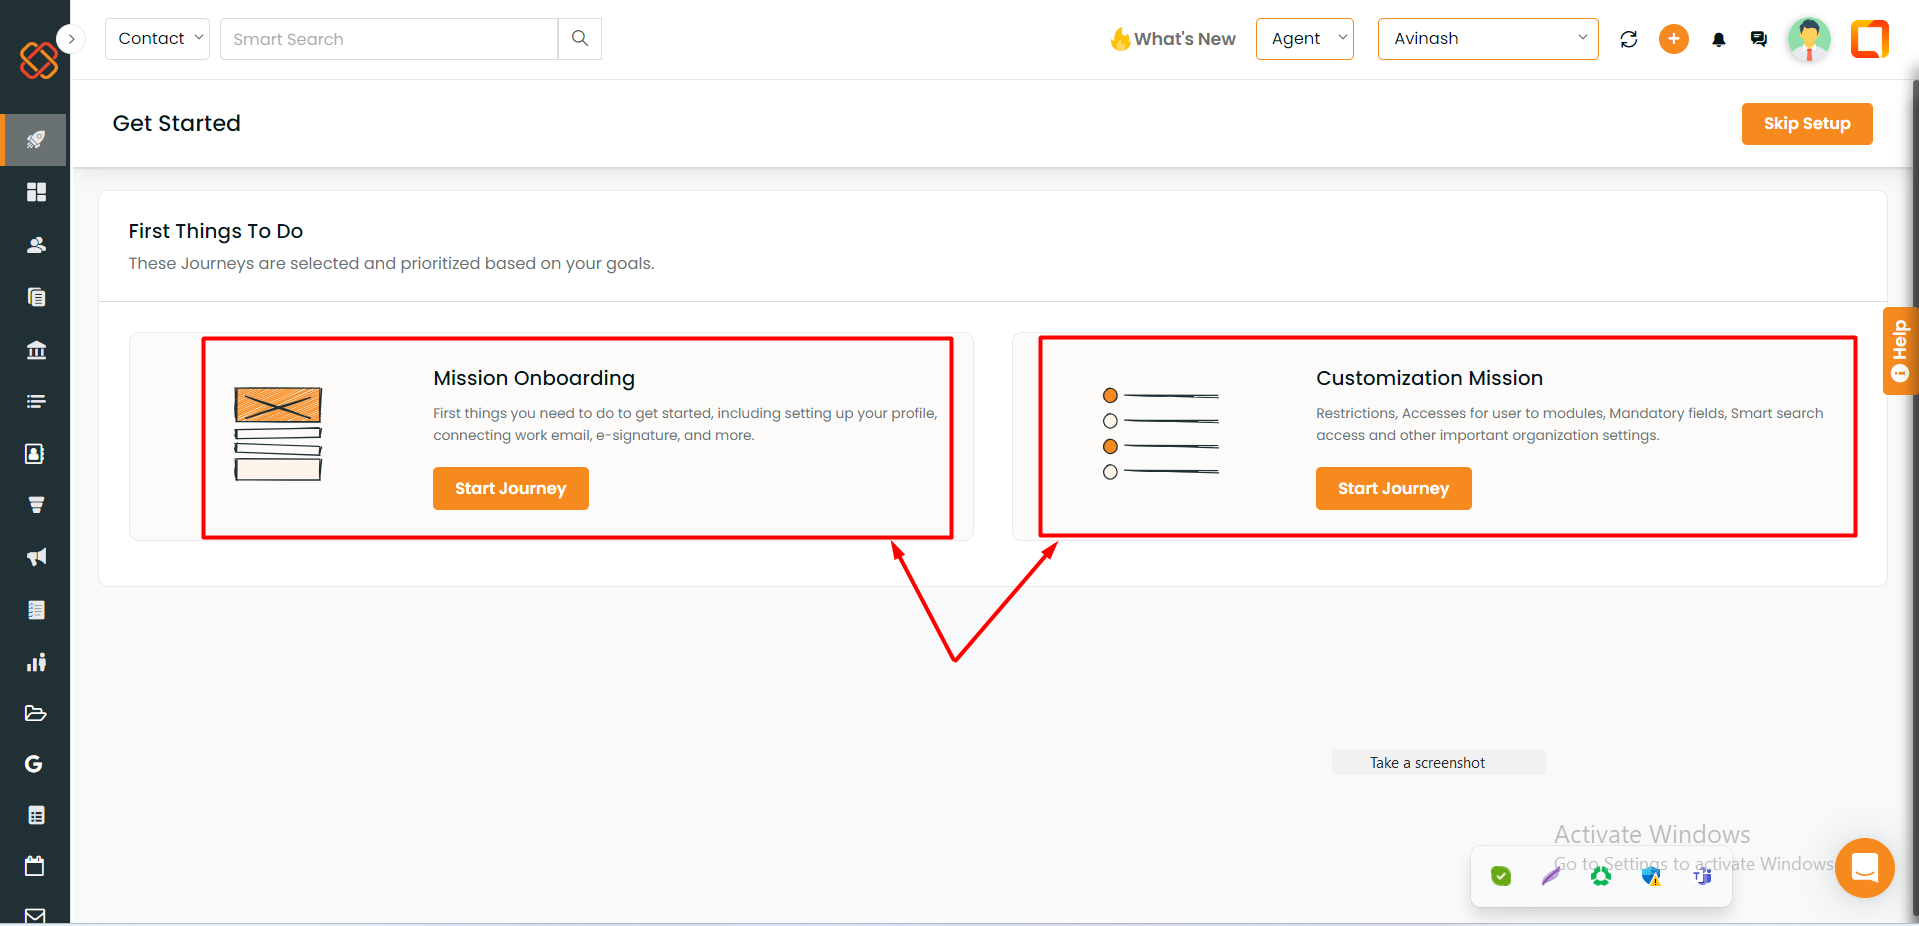
Here we’ve streamlined “Get Started” into two distinct categories, “Mission Onboarding” and “Customization Mission.” Next, you’ll be redirected to a page where you can start your journey by setting up your profile or customizing other essential organization settings.
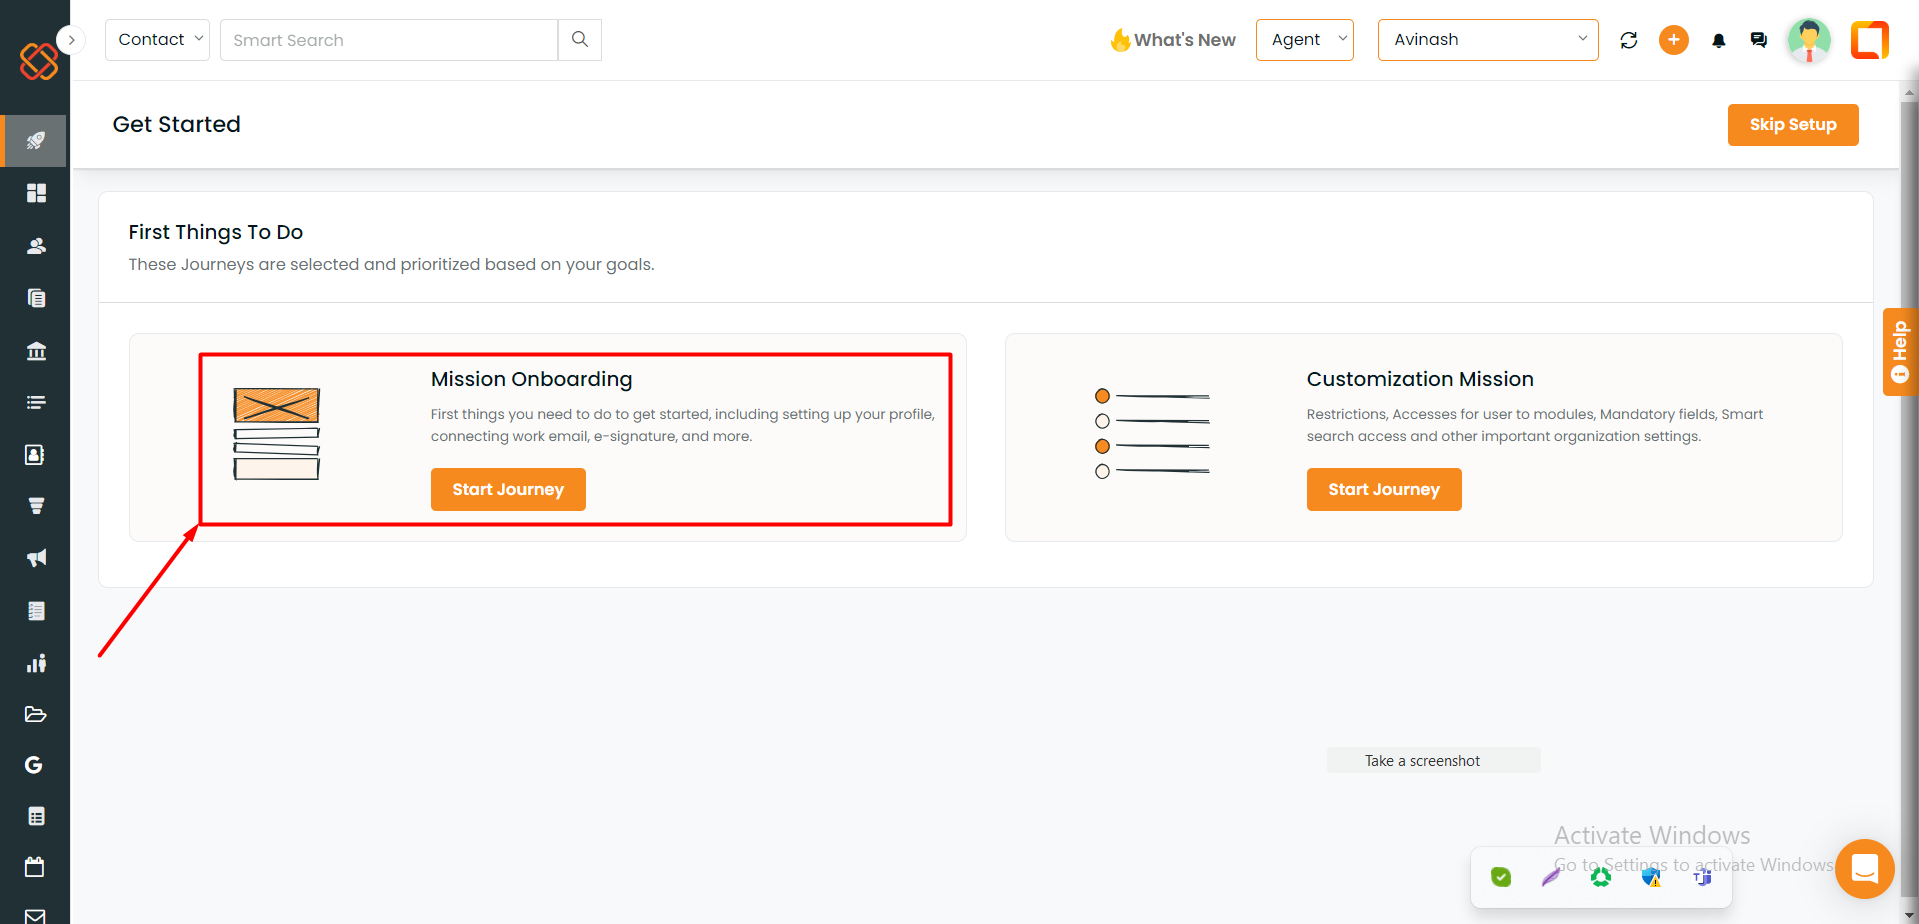
“Mission Onboarding” is the initial process to help you get started with insuredmine quickly. It includes essential steps like setting up your profile, connecting your work email, and the option to use e-signature features. This process is meant to ensure a smooth start to your mission.
The Second Category is “Customization Mission” which will allow you to configure various aspects of your journey. It lets you do tasks such as setting restrictions, defining user access to different modules, specifying mandatory fields, enabling smart search access, and configuring other essential organization settings.
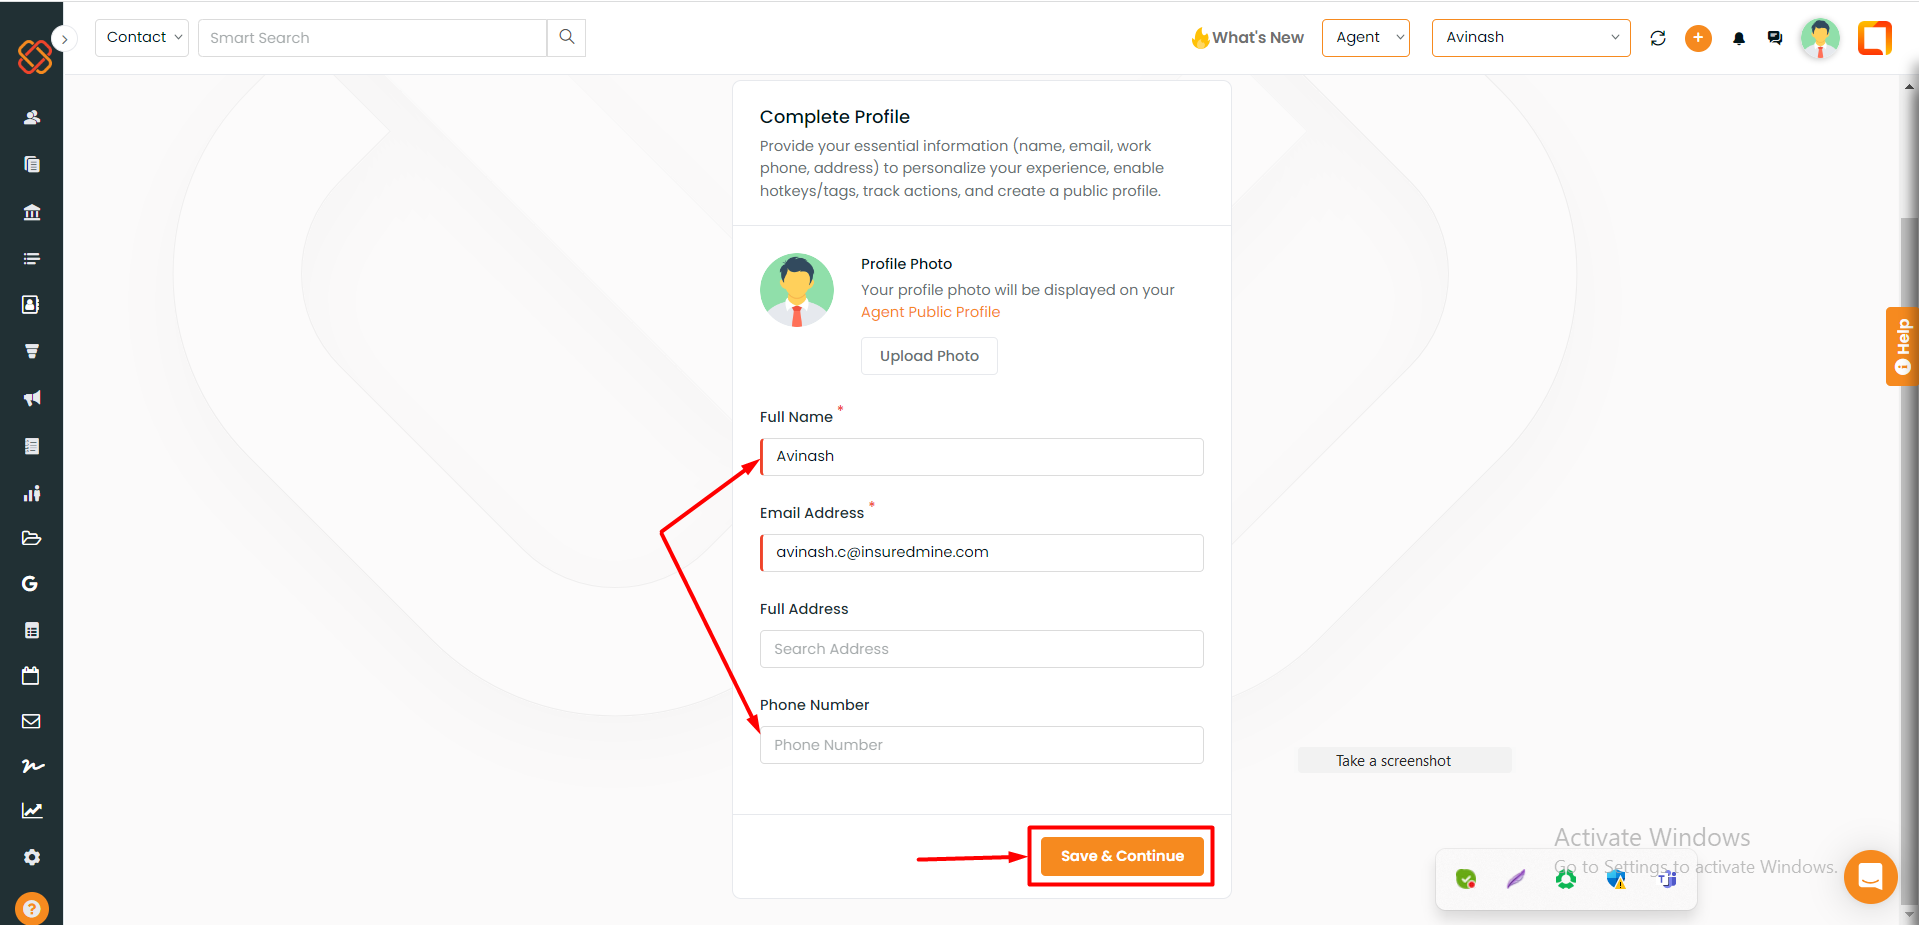
Quickly complete your profile by following these six easy steps:
Start, personalizing your account by uploading a nice profile picture of yours from the “Upload Photo” section, which will help you enhance your credibility.
– Then, enter your “Full Name.”
– Enter “Work Email Address.”
– Enter “Full Home Address.”
– Enter “Phone Number.”
To finish, simply click on “Save & Continue”.
Recent UI changes in the “Settings” module:
Settings:
Now let’s begin by exploring the changes that have been done within the “Settings” module.
But first, let’s navigate through the possible ways to access the “Settings” module.
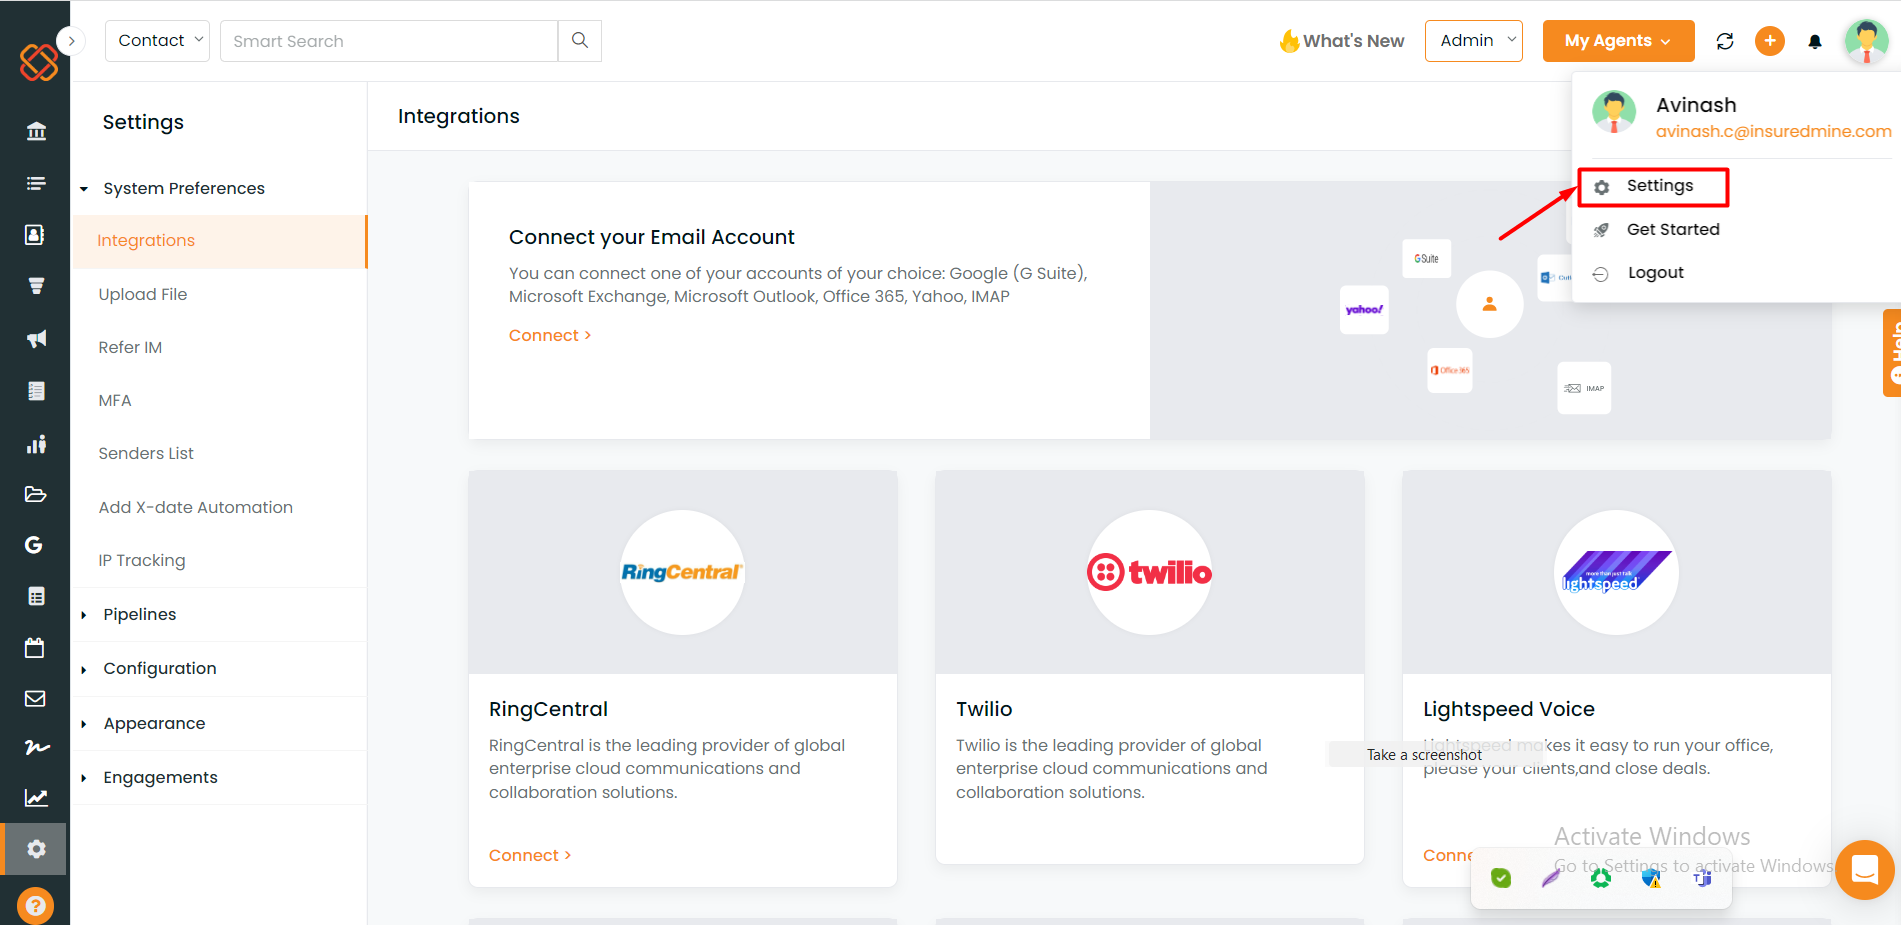
First, you can access it by clicking on the user profile or face icon drop-down located at the top right corner of the header.
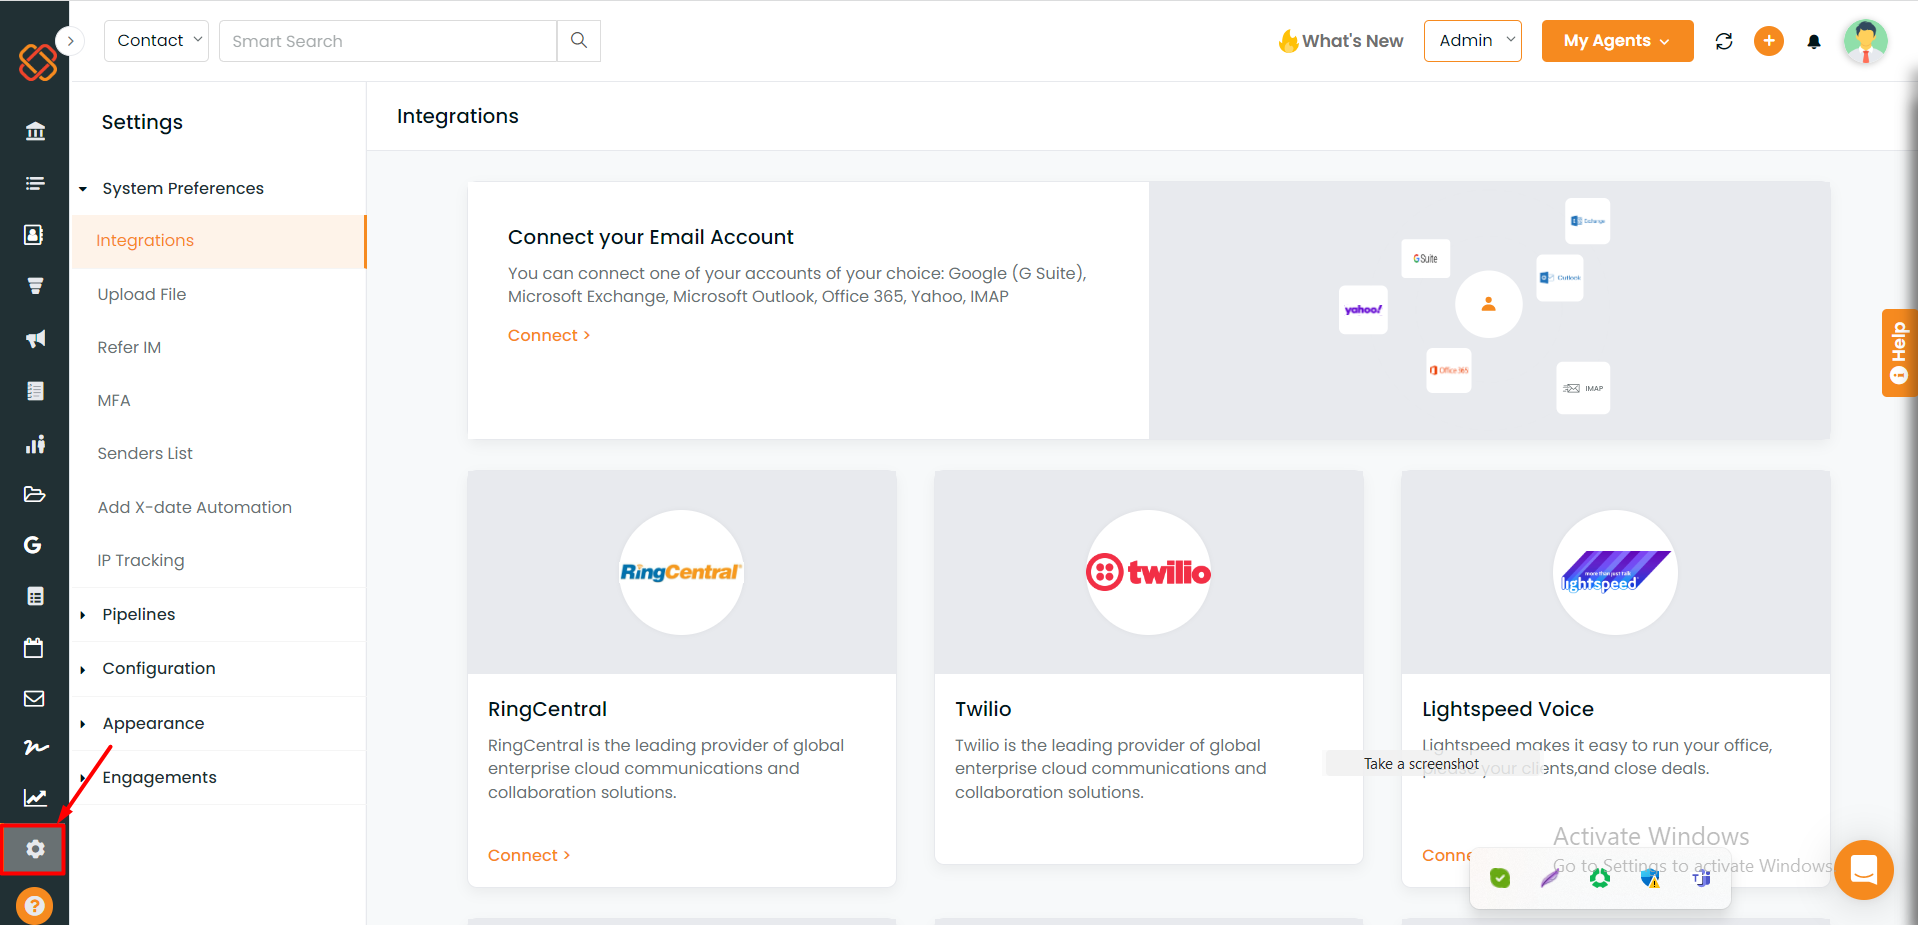
An alternative way to access it is by scrolling through to the bottom of the left sidebar.
Below are some of the categories within the “Settings Module” where we’ve recently integrated existing features:
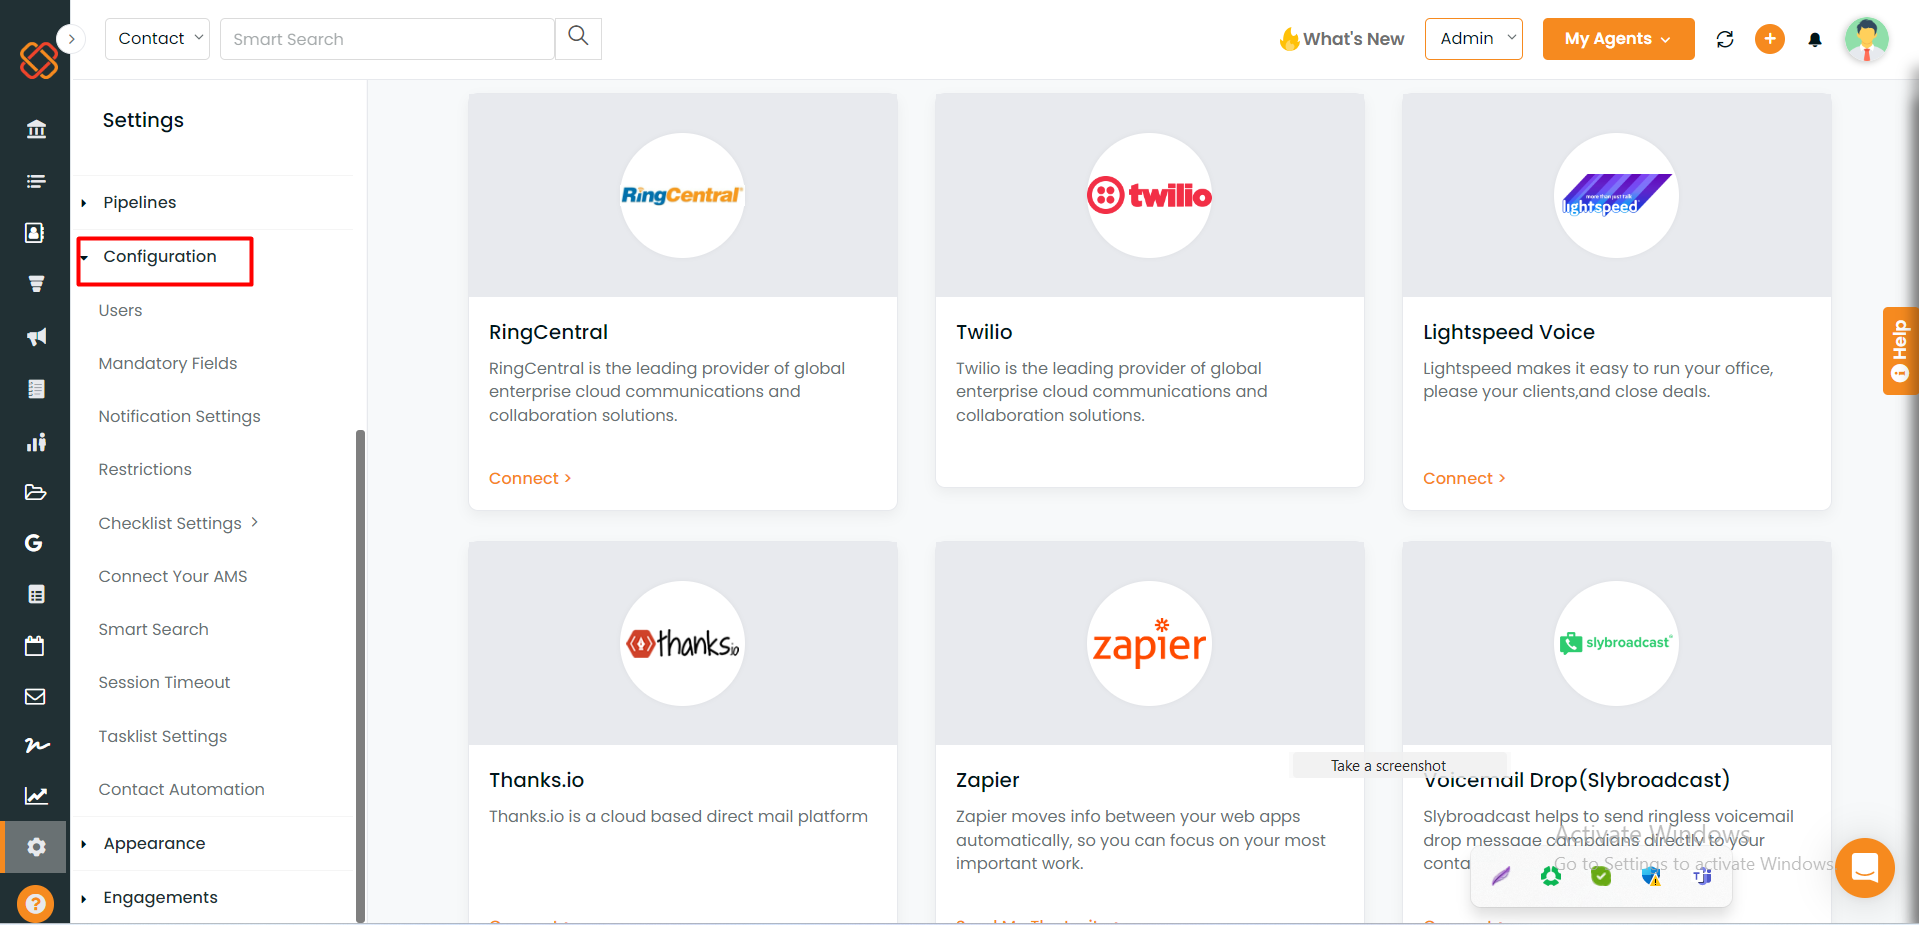
Under the Category: Configuration
Checklist Settings:
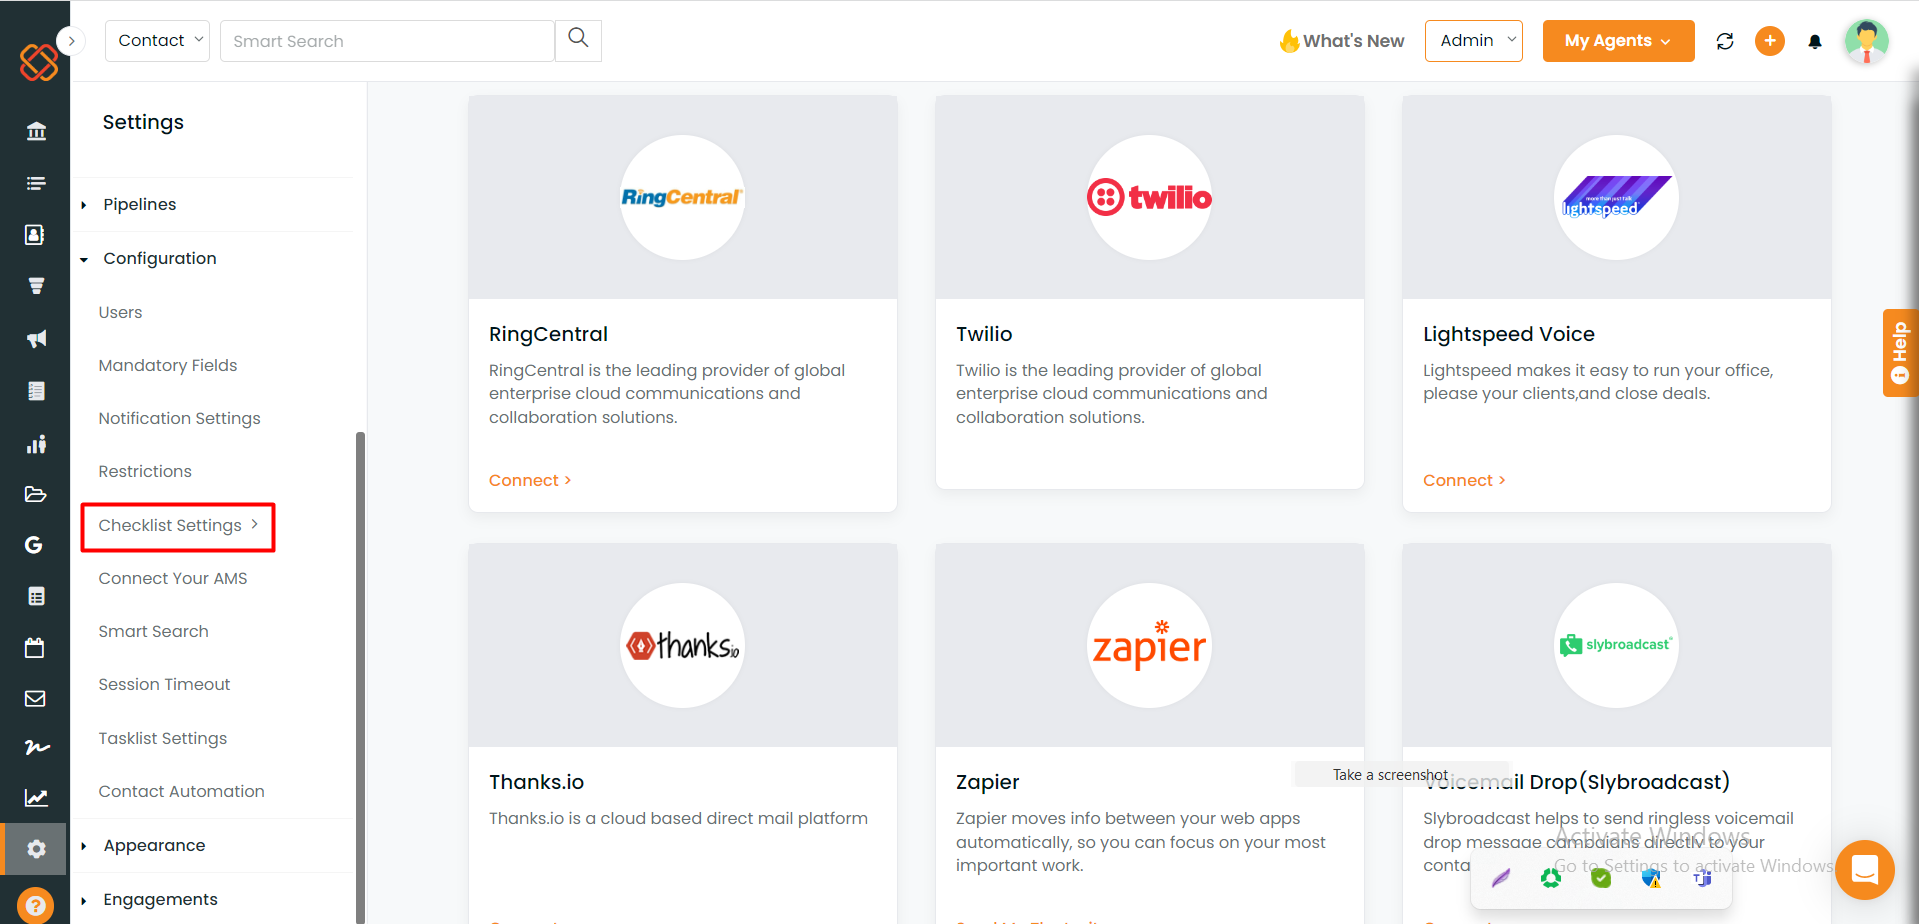
The “Checklist Settings” feature has been introduced under the settings module.
“Checklist Settings” can now be created and managed in the configuration under the settings module.
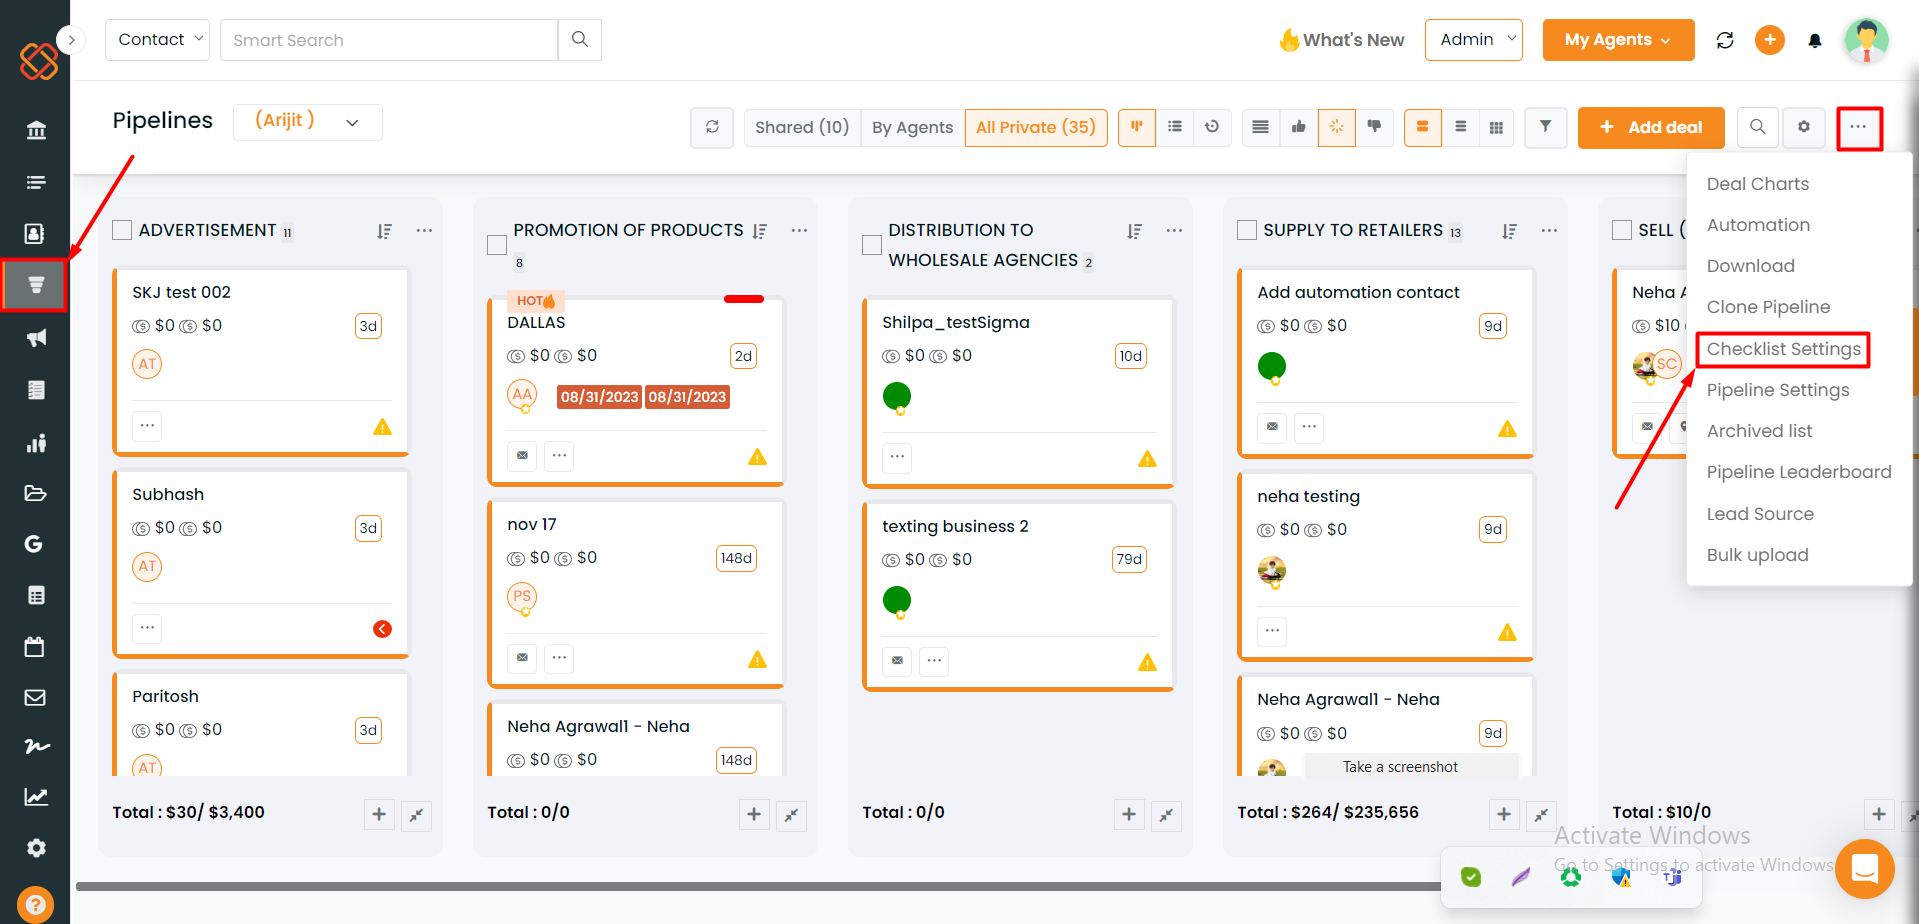
It is also accessible from the “Pipelines Module” present in the sidebar. To access “Checklist Settings,” simply head to the Pipelines module in the left sidebar, click on the settings icon from the top right corner, and then select “Checklist Settings” from the drop-down menu.
Tasklist Settings:
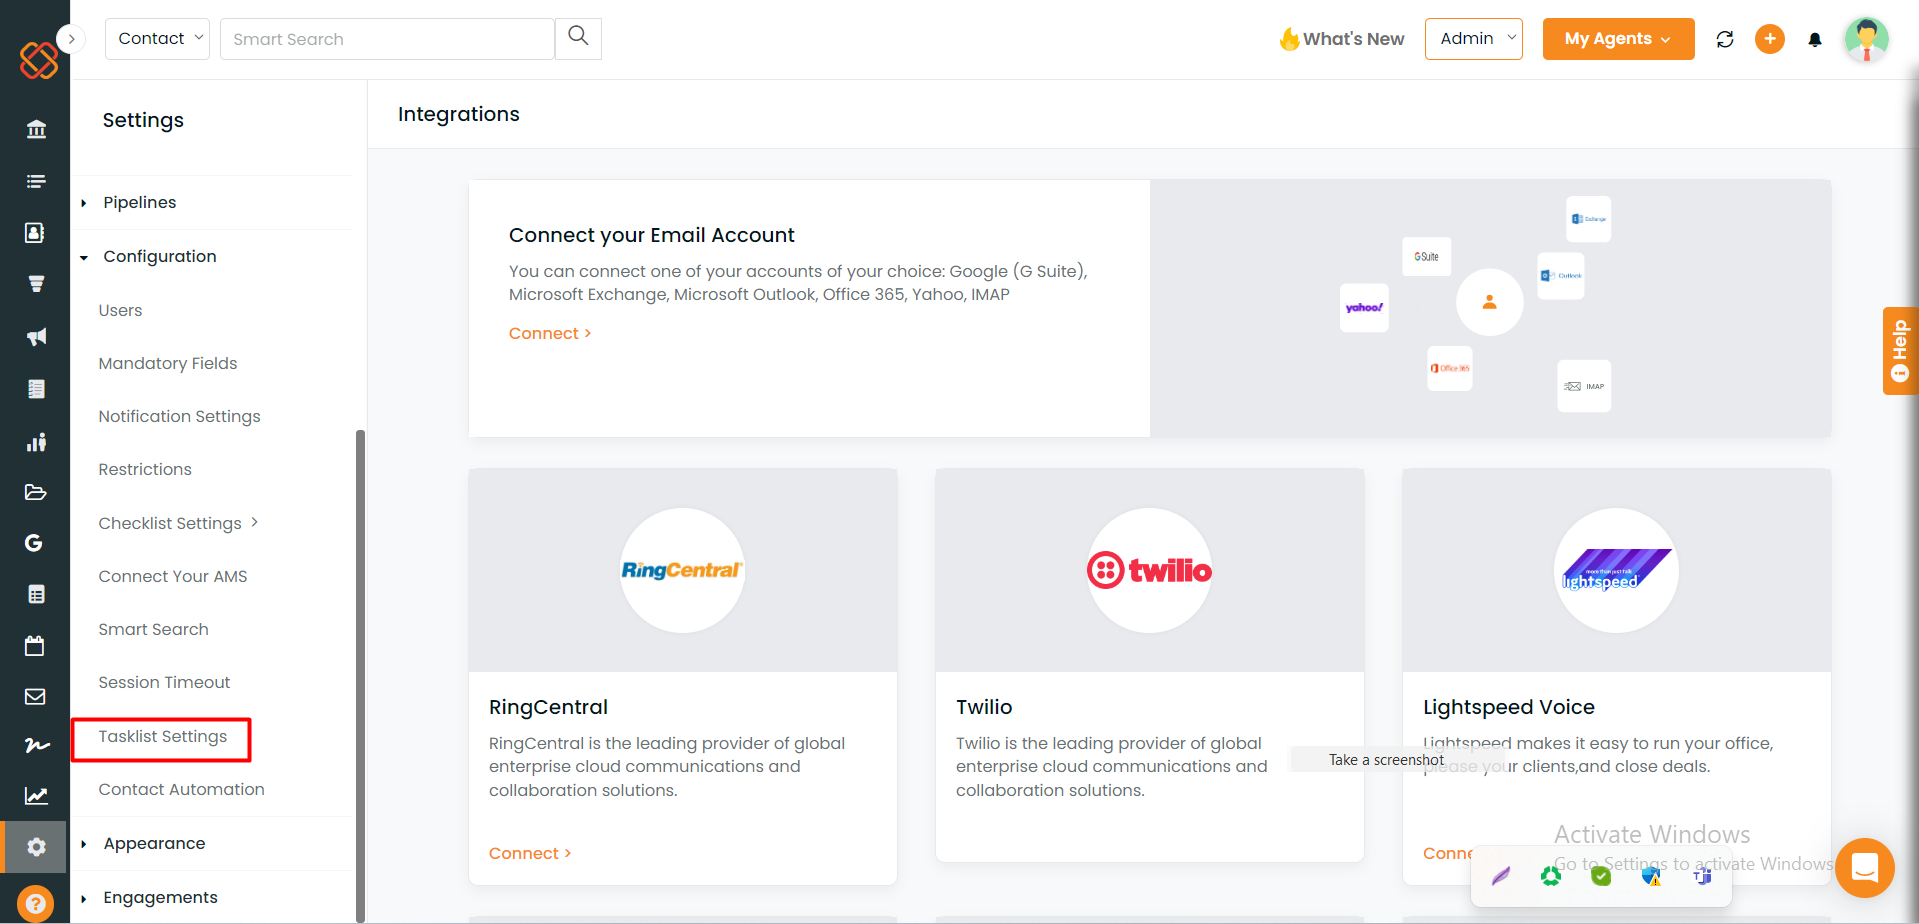
“Tasklist Settings” now has been introduced in the settings module under configuration toprovide options to customize and configure task-related preferences.
Users can also now tailor tasklist settings to their specific workflow needs under the settings module.
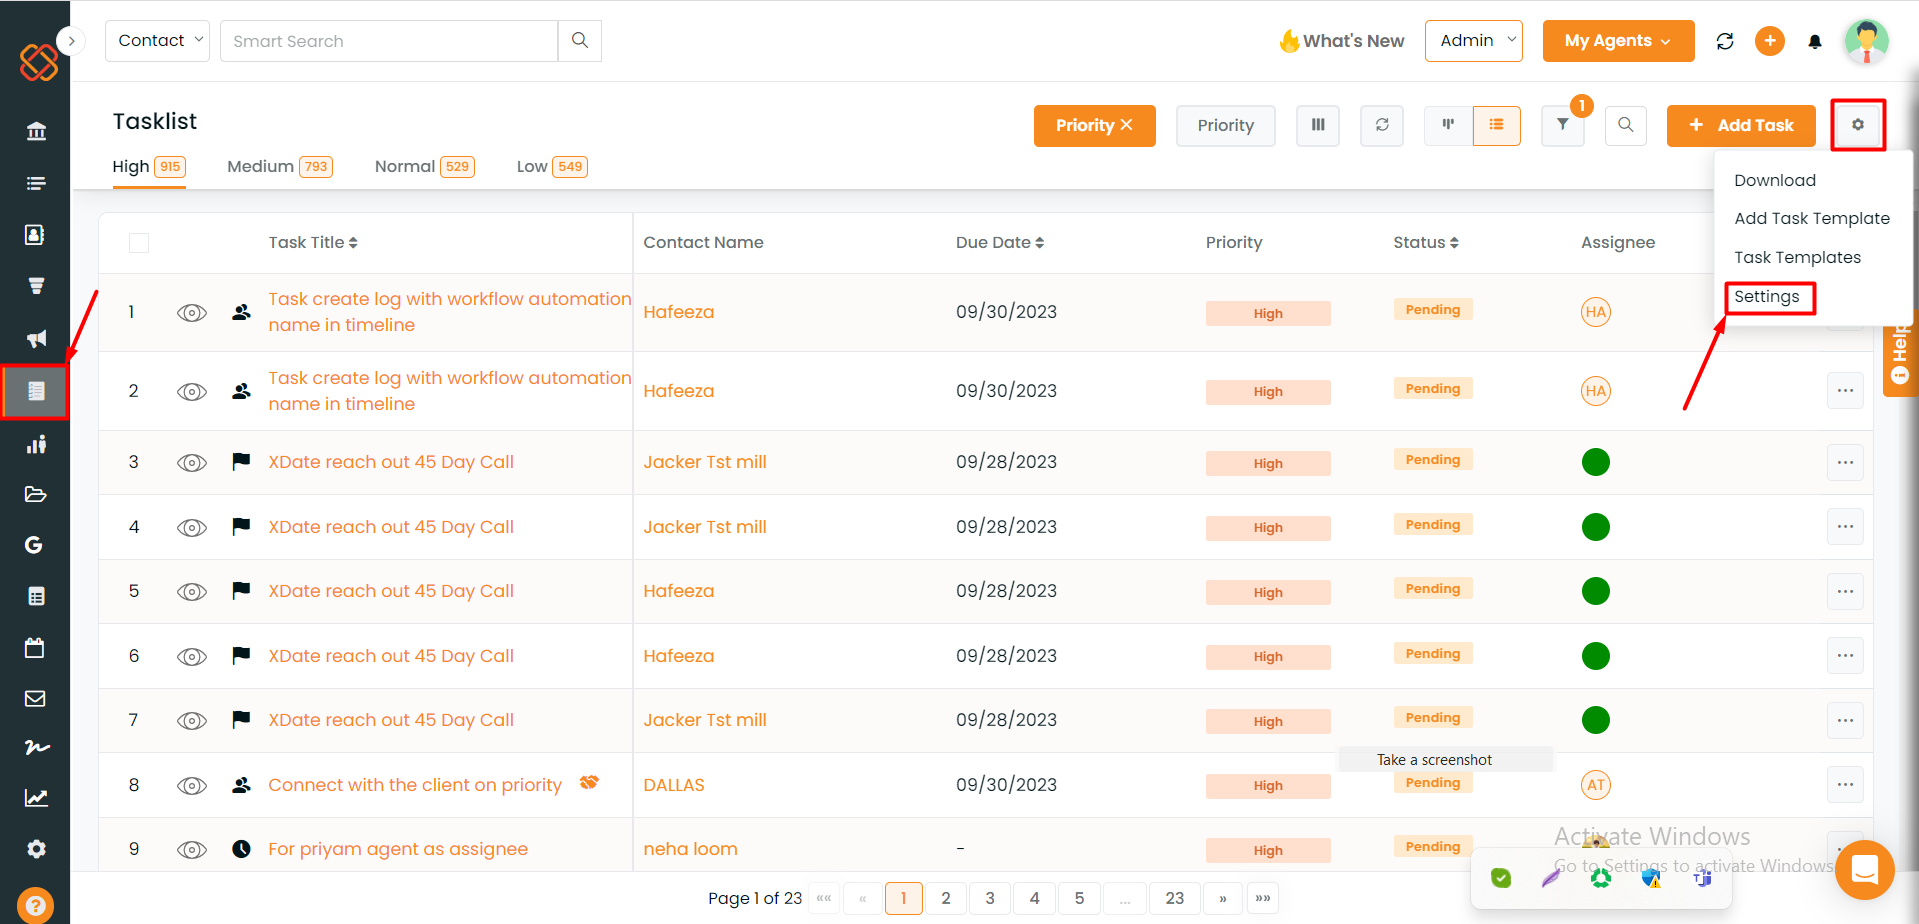
It is also accessible from the Tasklist module’s sidebar. To access “Tasklist settings,” simply head to the Tasklist module in the left sidebar, click on the settings icon in the top right corner, and then select “Settings” from the drop-down menu.
Contact Automation:
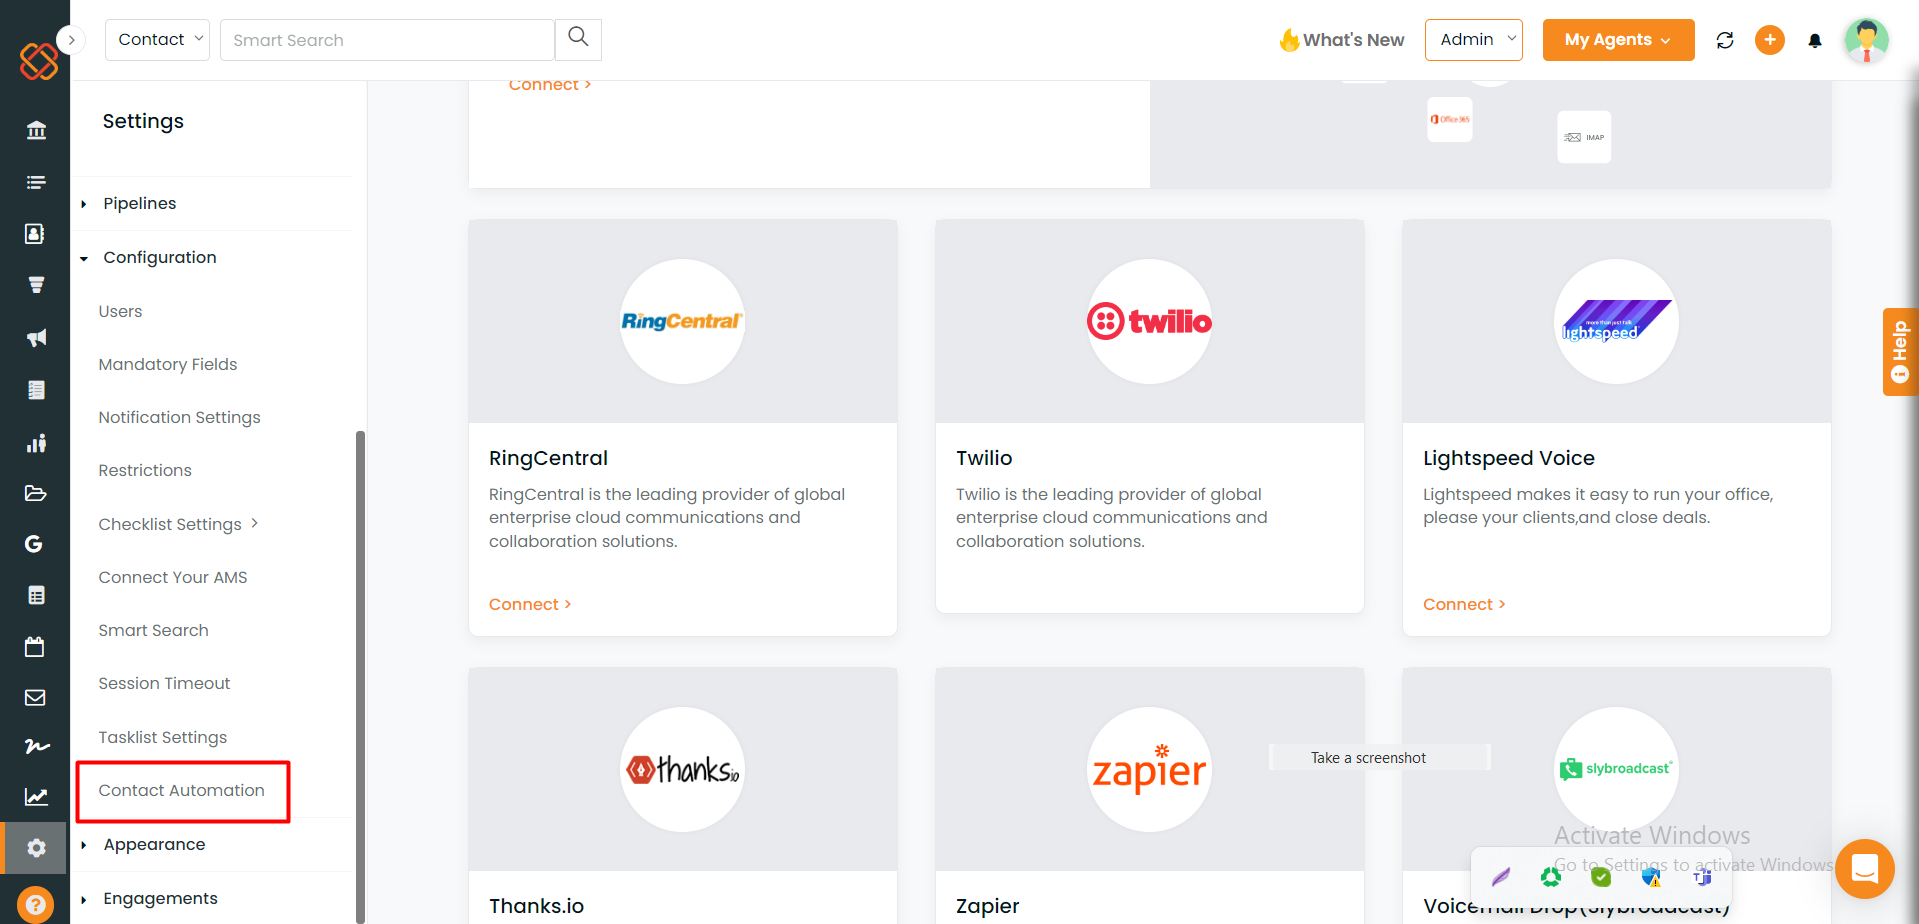
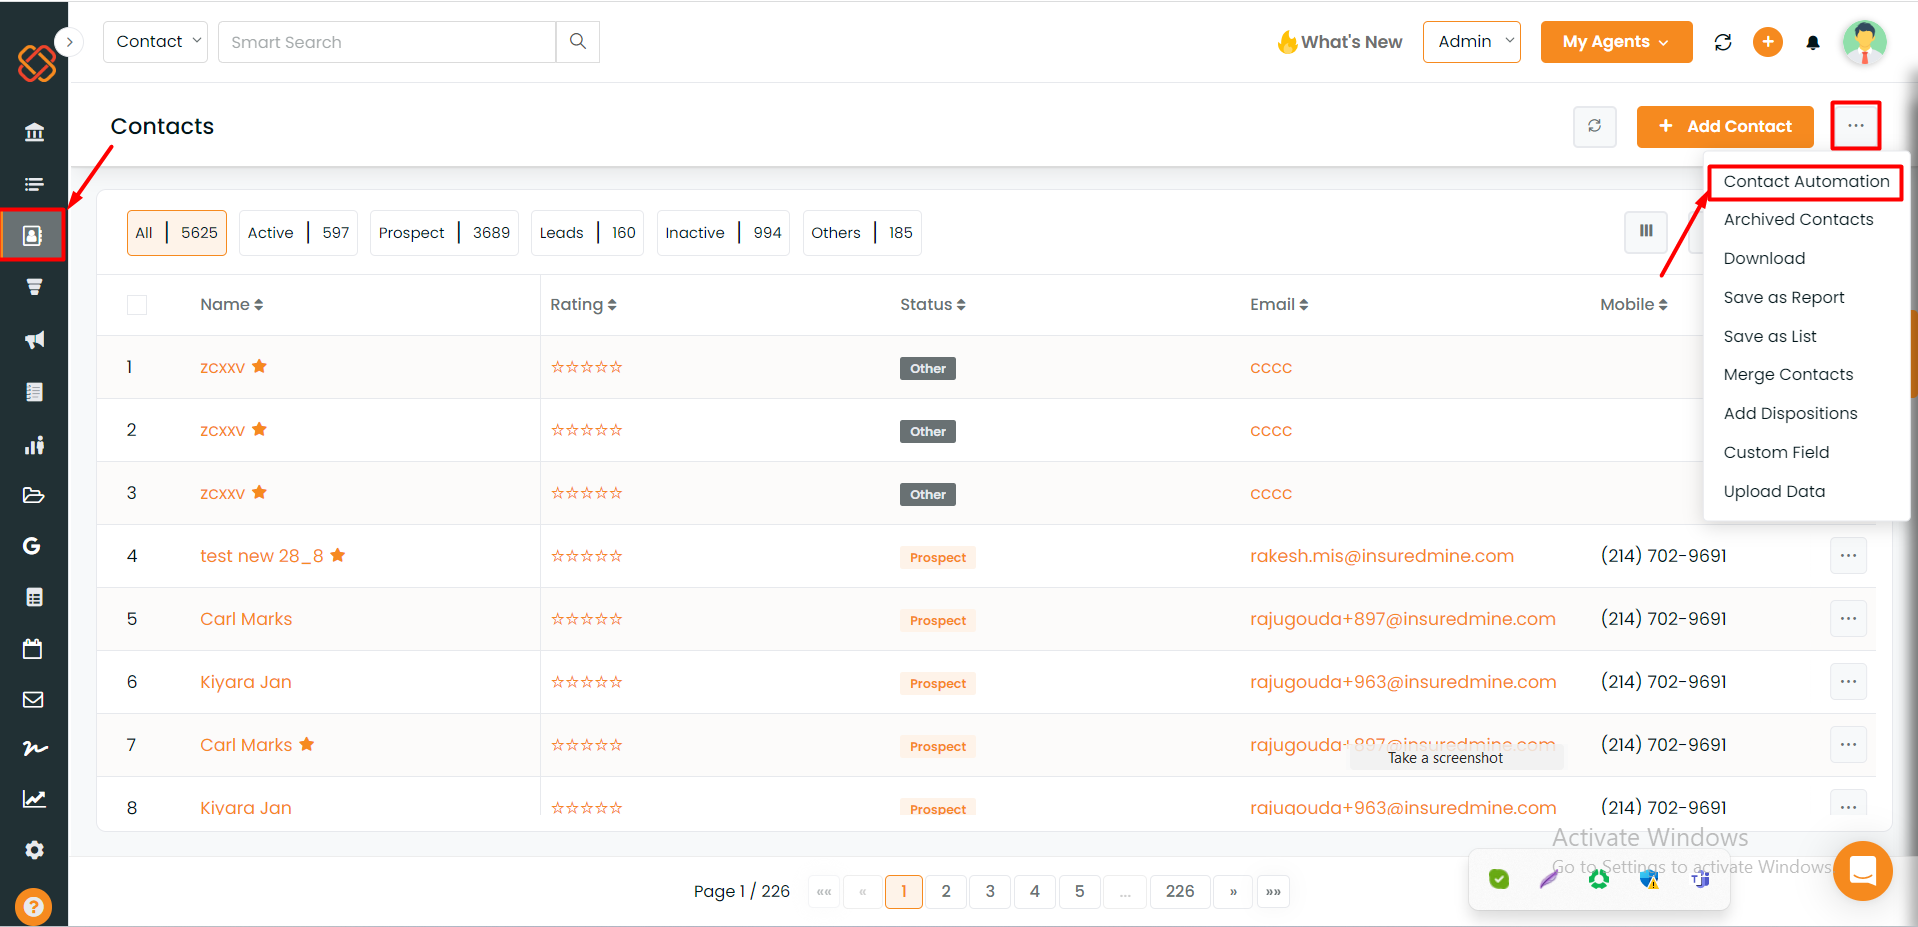
A feature called “Contact Automation” is now added to the settings module. This feature was earlier found within the Contacts module, but it has now been integrated into the configuration section for better organization and accessibility.
To access “Contact Automation” go to the Contacts module in the left sidebar, then navigate to the three dots icon in the upper right corner, and then select “Contact Automation” from the drop-down menu.
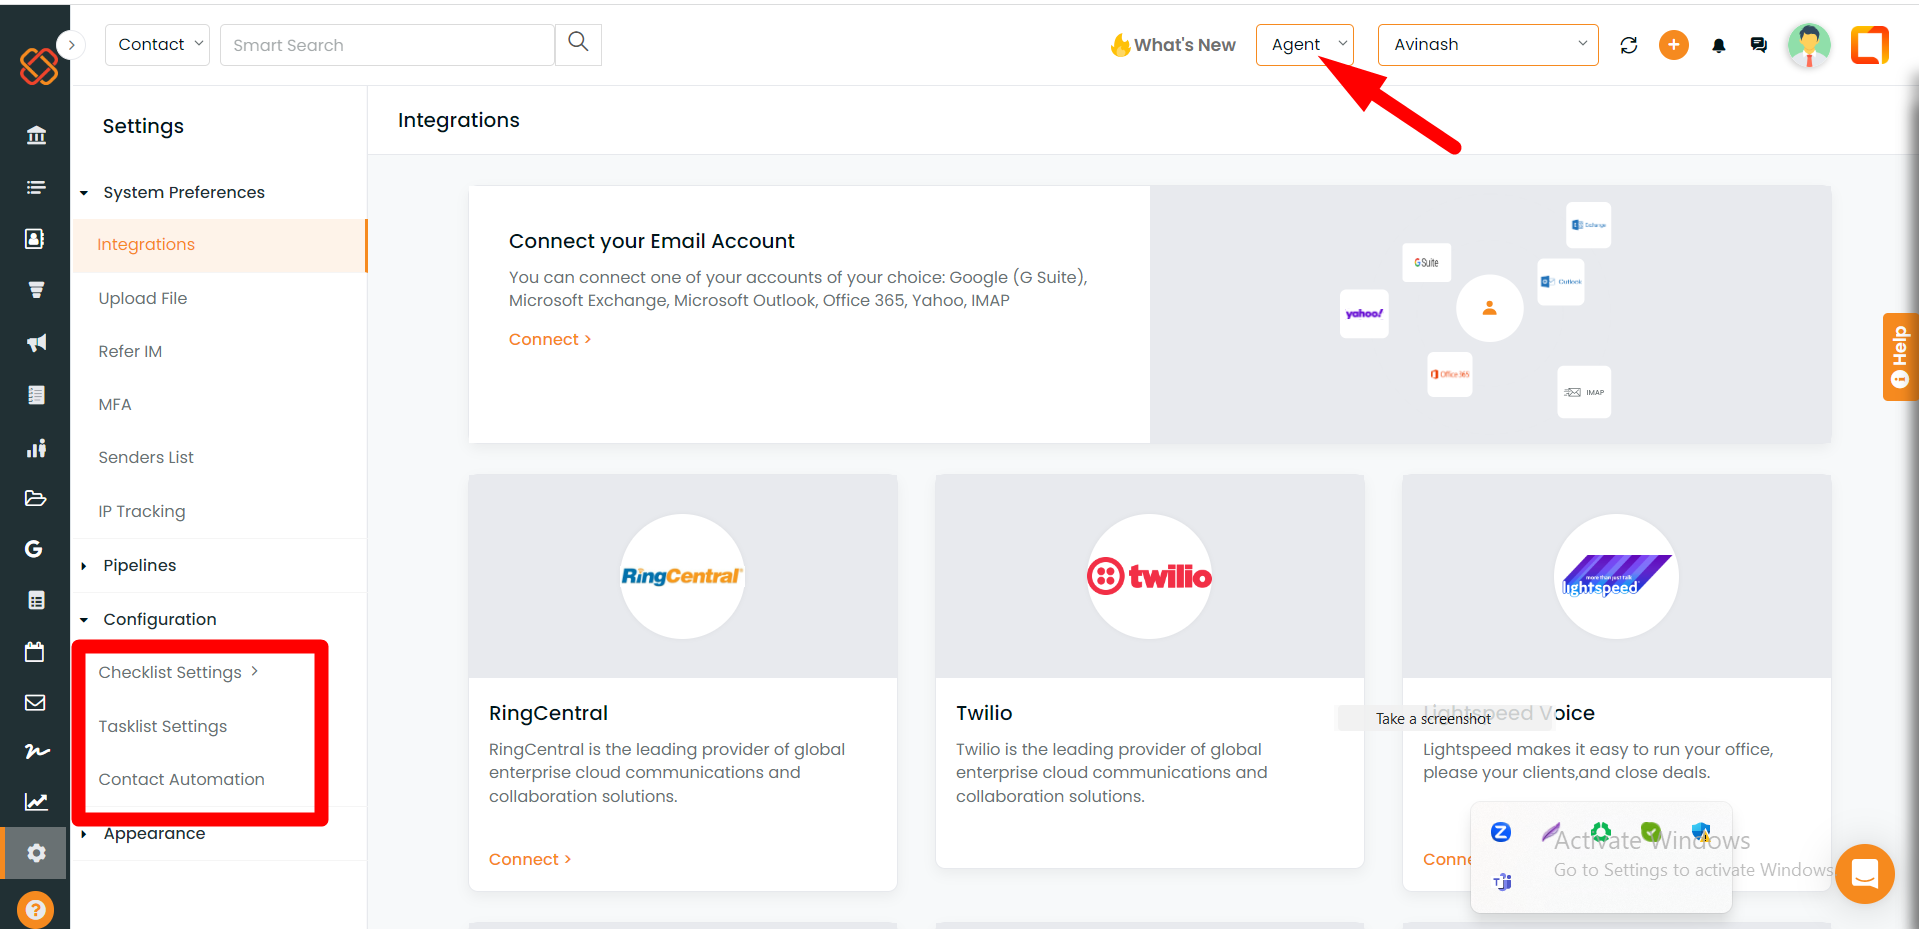
Under Agent View: We can now also access Checklist Settings, Tasklist Settings, and Contact Automation under the settings module.
Pipelines:
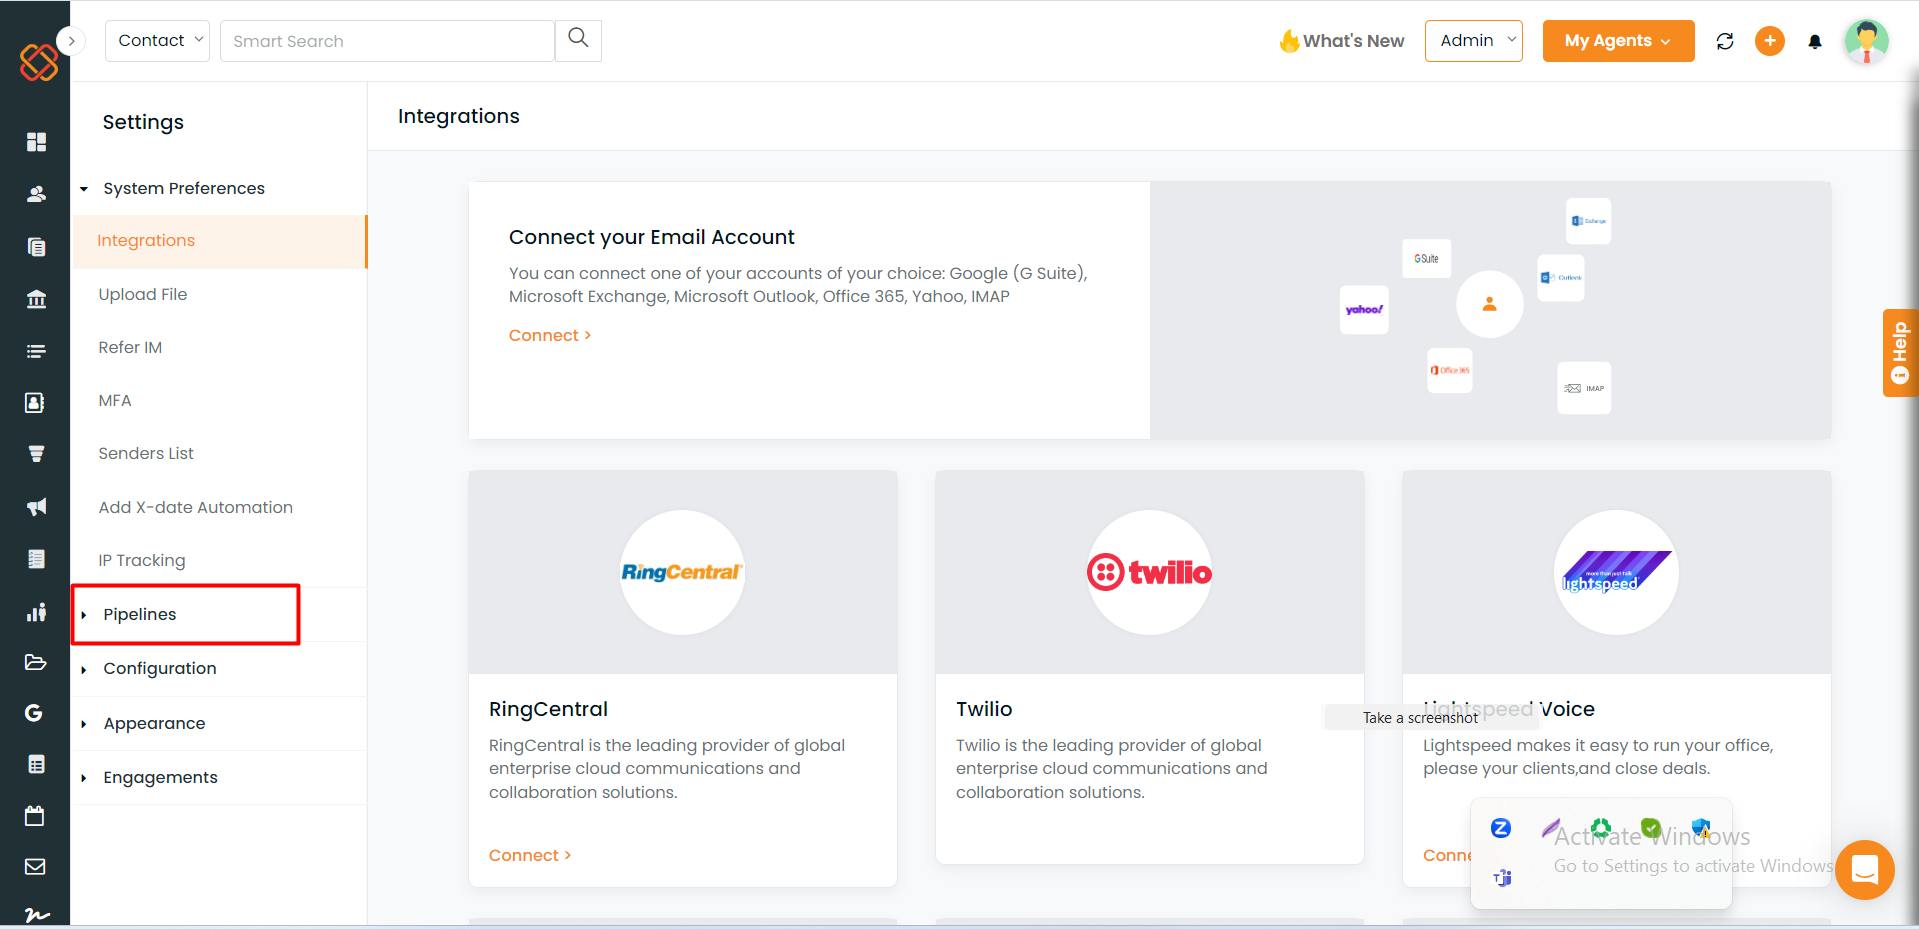
Now you can access Pipelines directly from the settings module.
The Edit & Create Pipelines option is now available within the Pipelines category.
Currently, if you are an Agent, some options might not be available in the agent view. For instance, if you go to the pipeline category, you can only view pipeline settings; underneath, there are many features, but you can only view Pipeline Leaderboards.
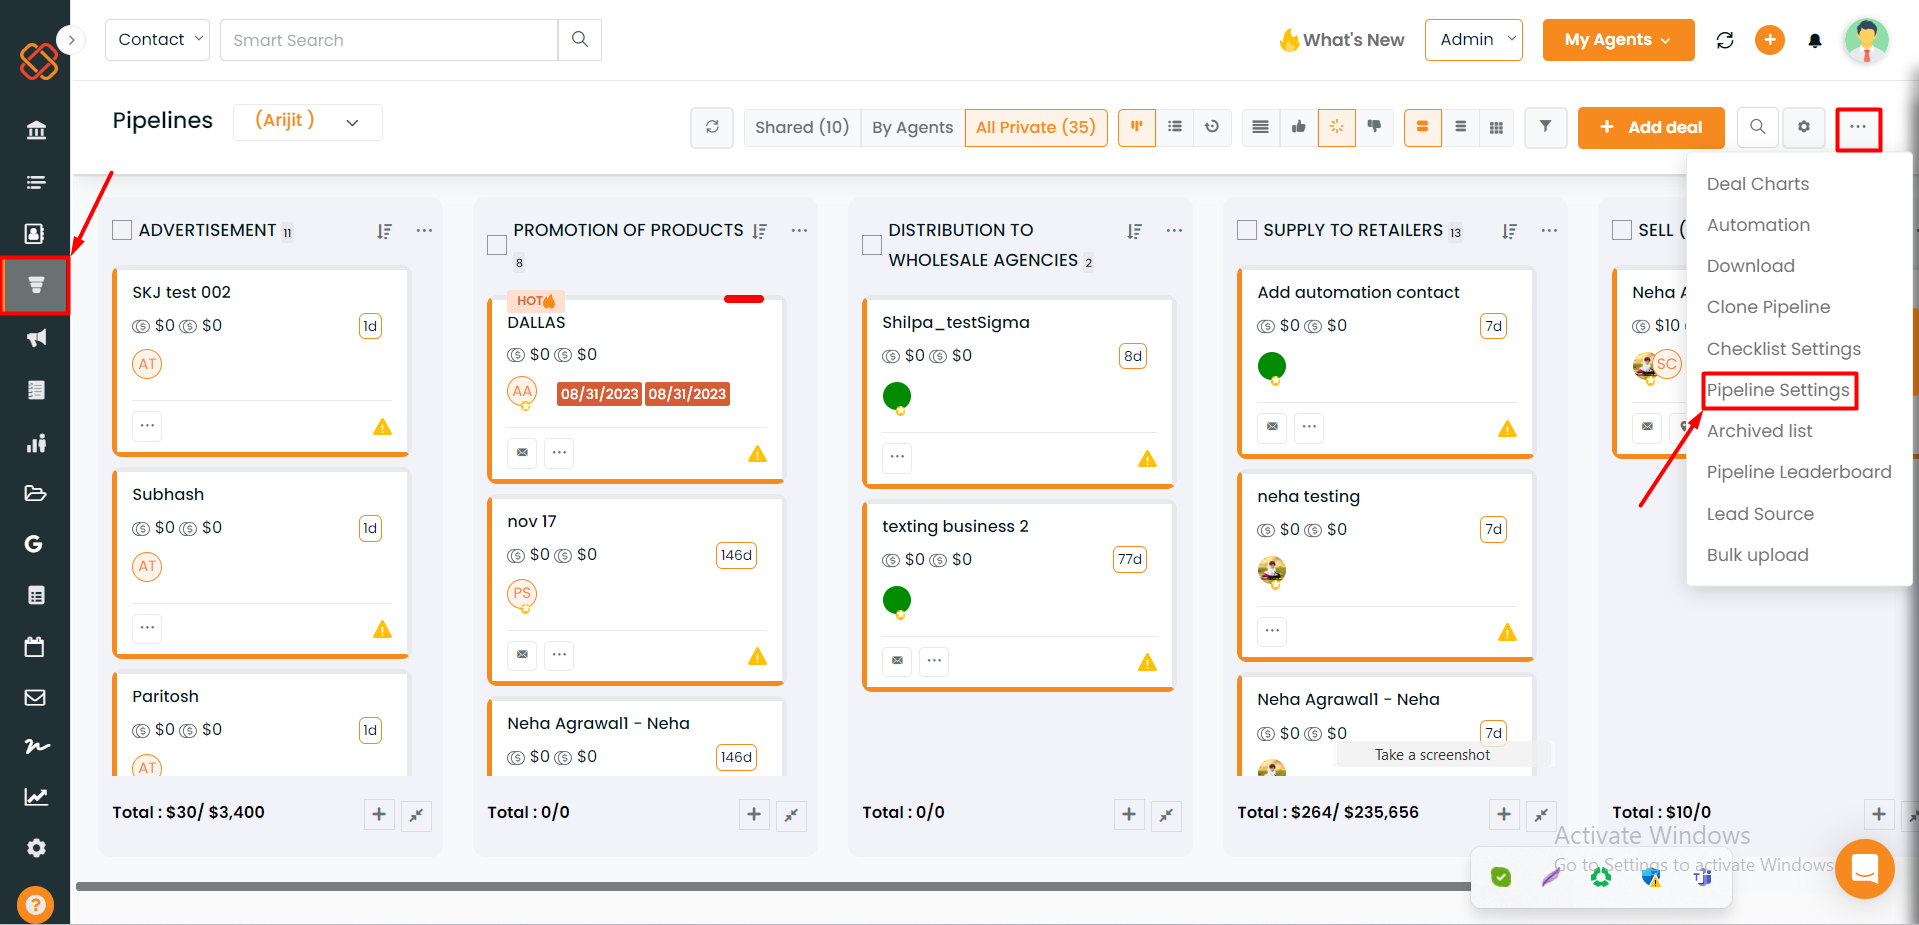
It was earlier located in the Pipelines module’s sidebar. To access “Pipeline Settings” go to the Pipeline module in the left sidebar, then navigate to the three dots icon in the upper right corner, click on them, and then select “Pipeline Settings” from the drop-down menu.
We have also included headers for each feature within the Settings Module to improve its structure and user-friendliness.
Recent UI changes in the “Sales Dashboard” feature:
Sales Dashboard:
Lets begin with how you can access the “Sales Dashboard” feature.
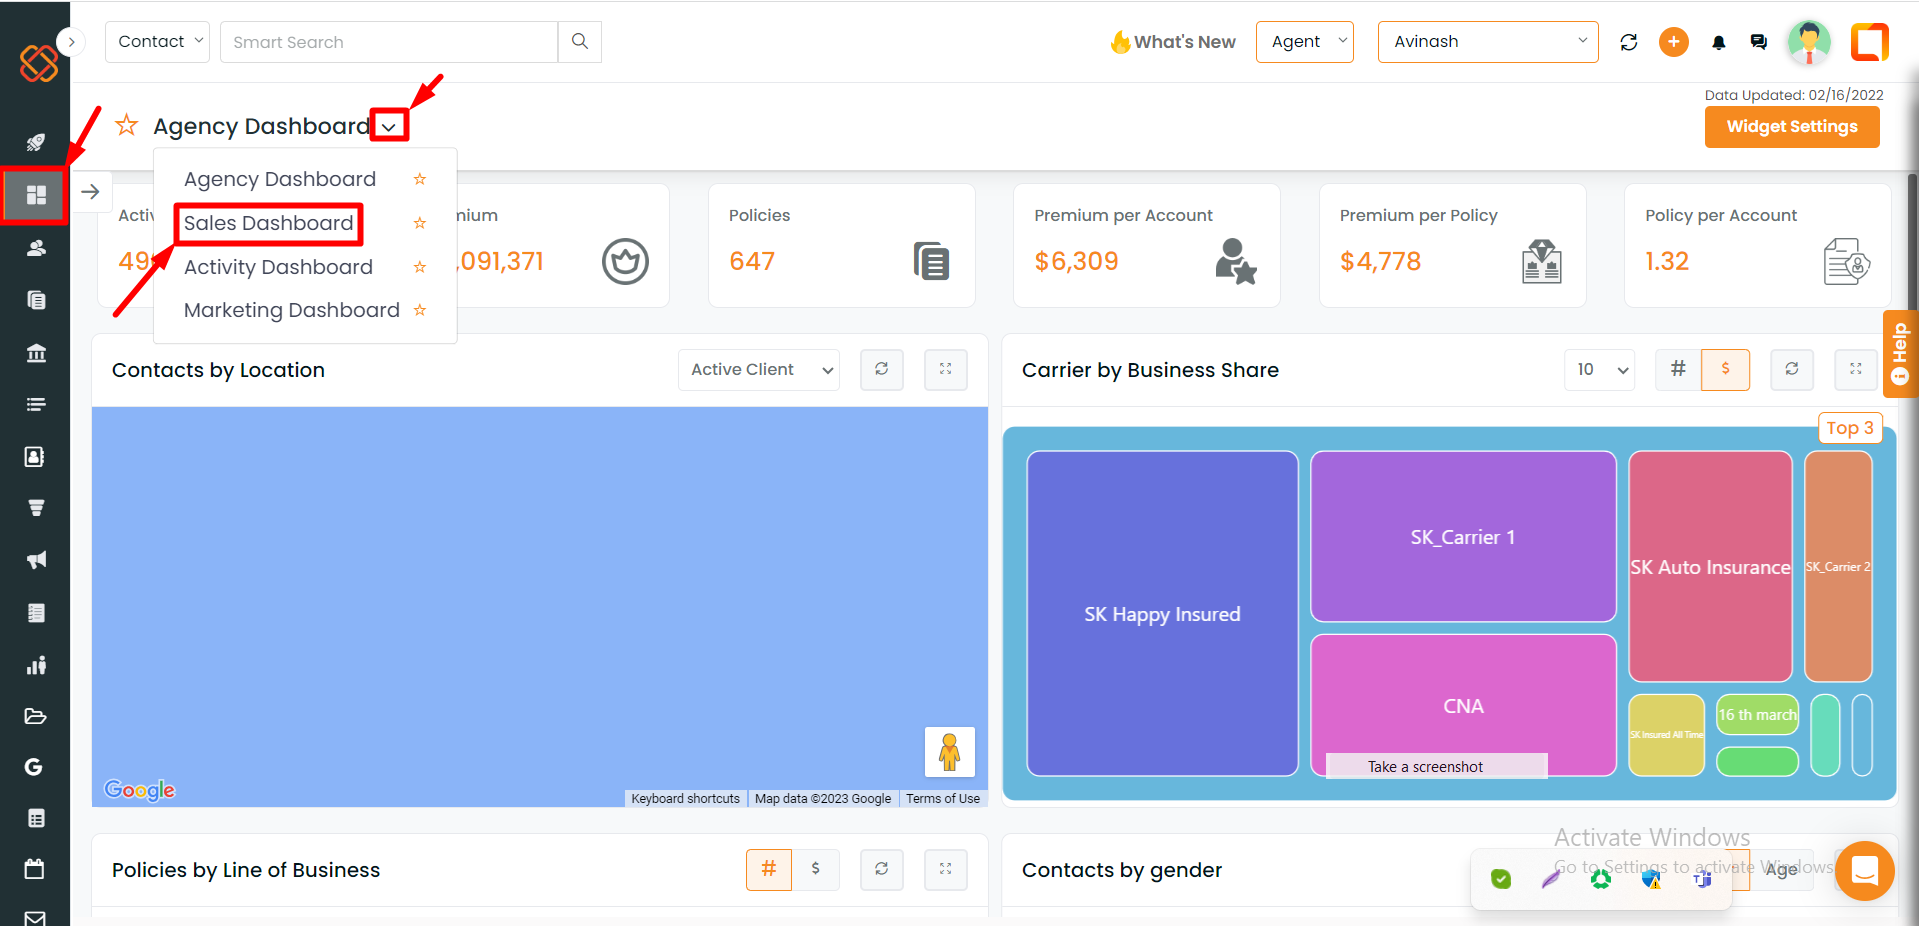
To access the “Sales Dashboard”, navigate to the “Dashboard” option in the sidebar menu. Once there, click on the drop-down arrow located below the “Agency Dashboard” from there select “Sales Dashboard” from the options provided.
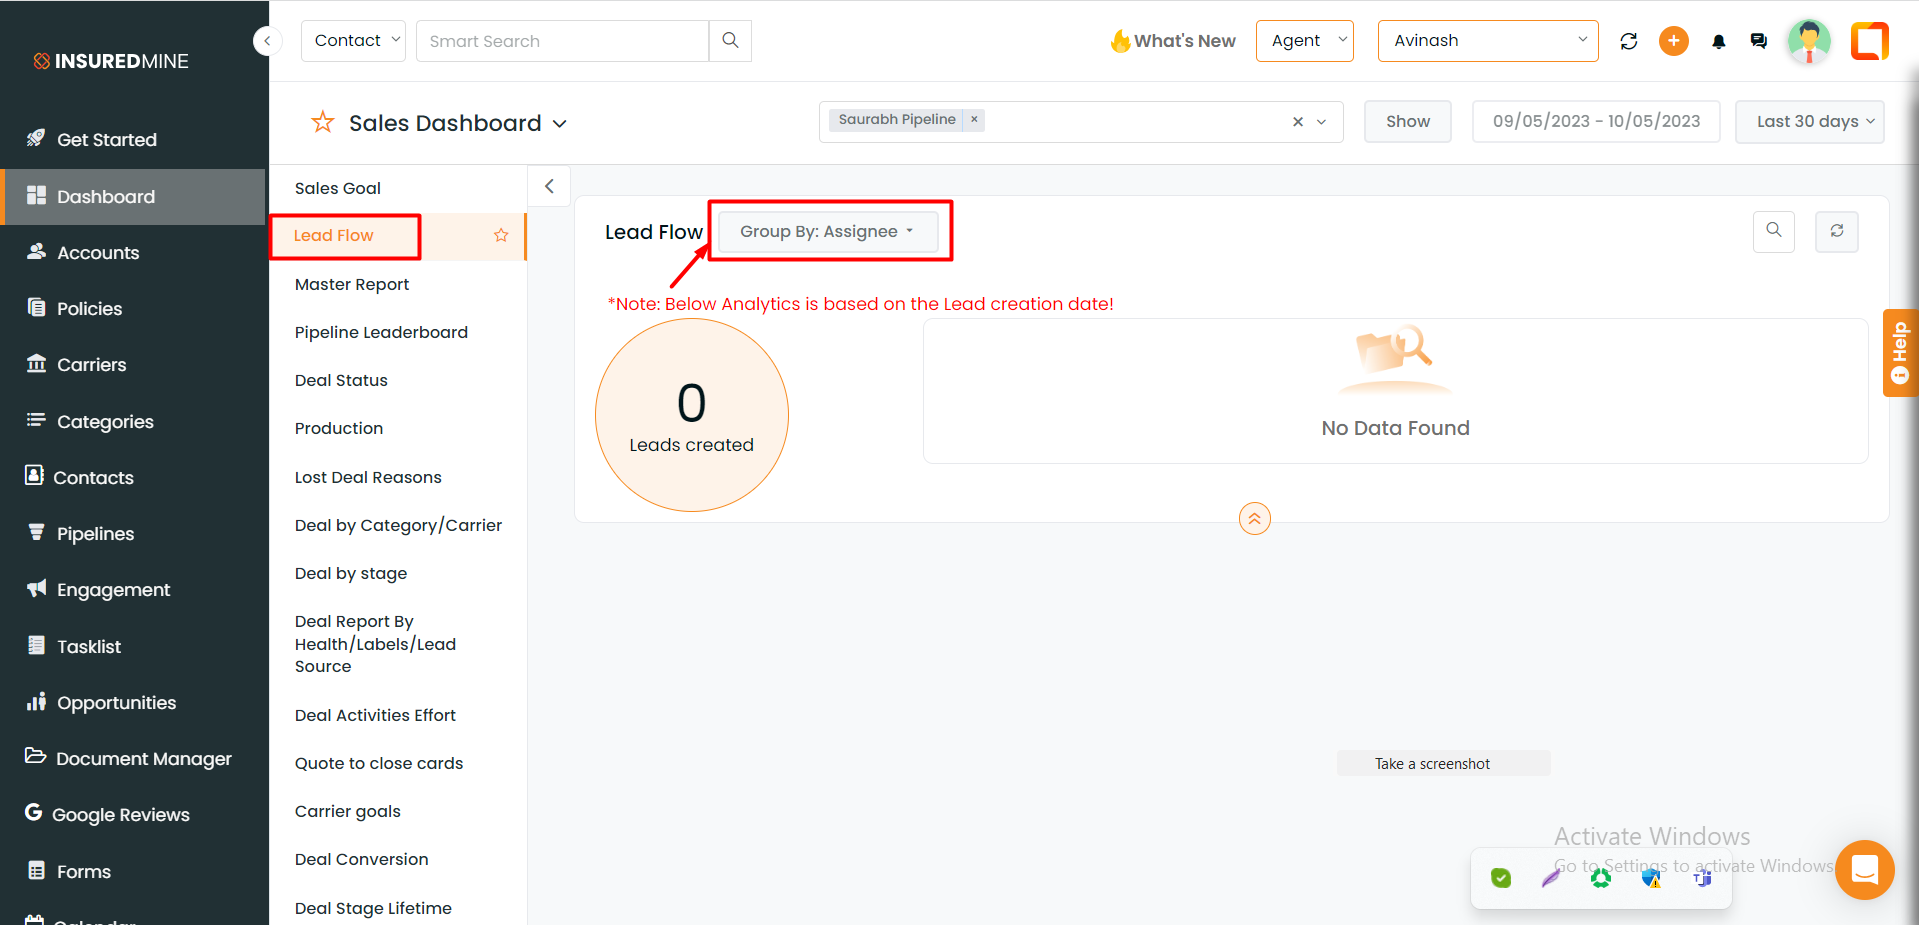
Lead Flow:
Before, we could access the information by choosing “Group By,” but now we need to select “Group By” to view the details.
Options have been refined for better usability, including grouping features by category.
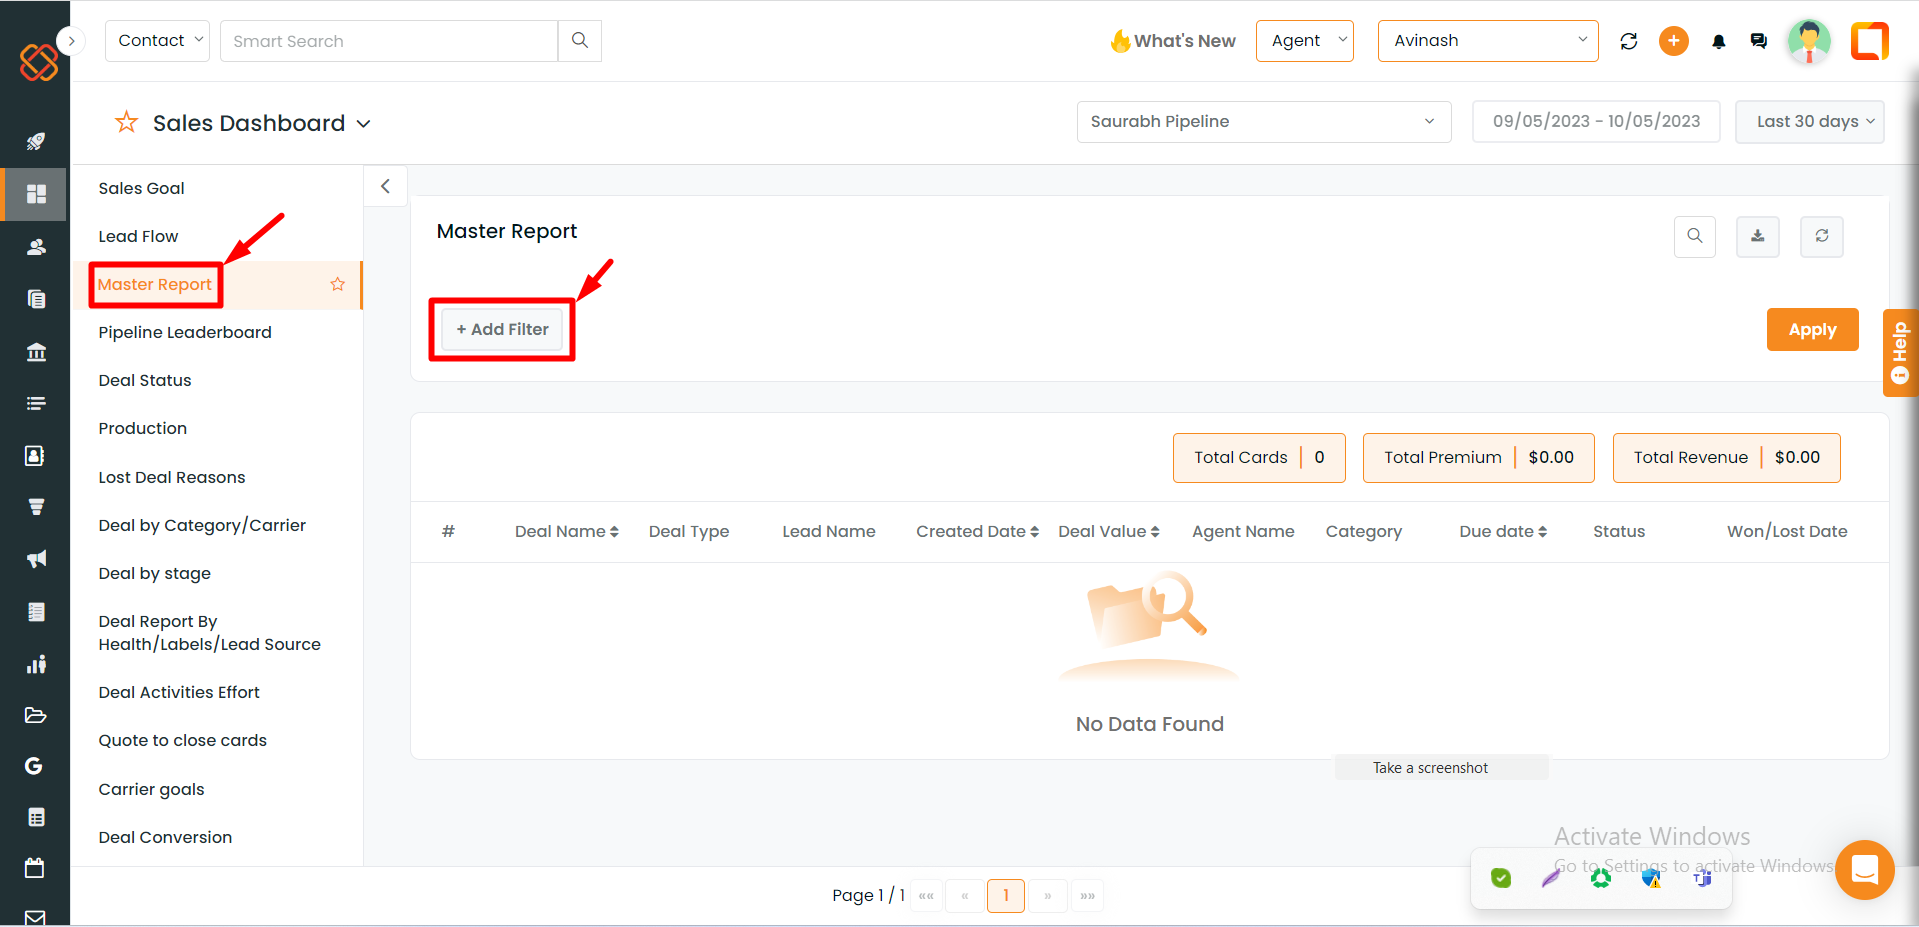
Master Report:
A new feature has been added to provide data based on selected pipeline criteria, including cards count, premium, and revenue.
Add Filters can be applied based on stage, status, assignee, deal source, label, and category.
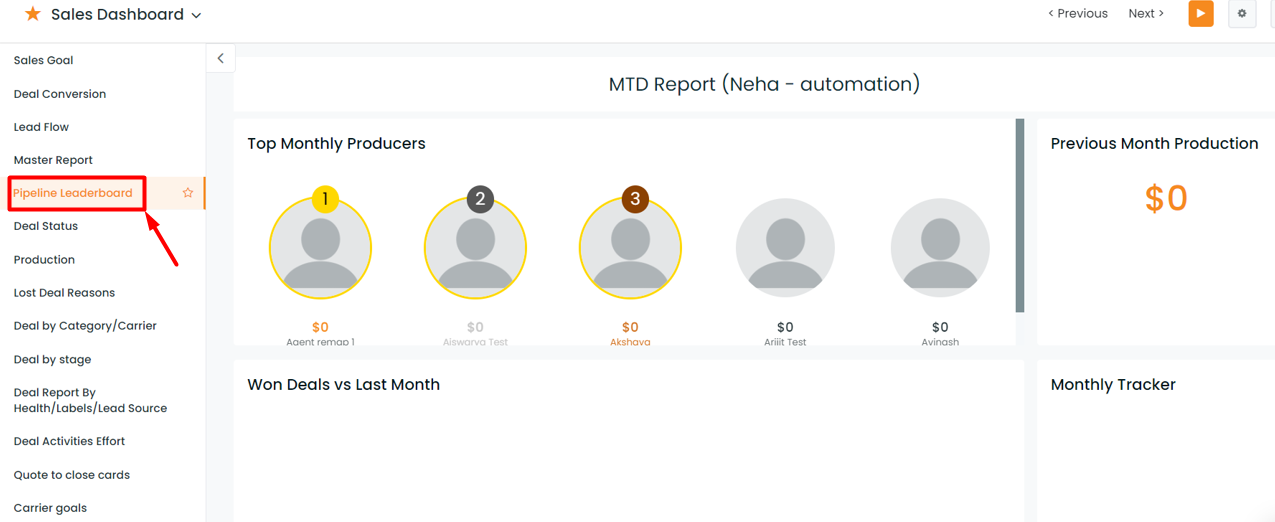
Pipeline Leaderboard:
The background color has been updated.
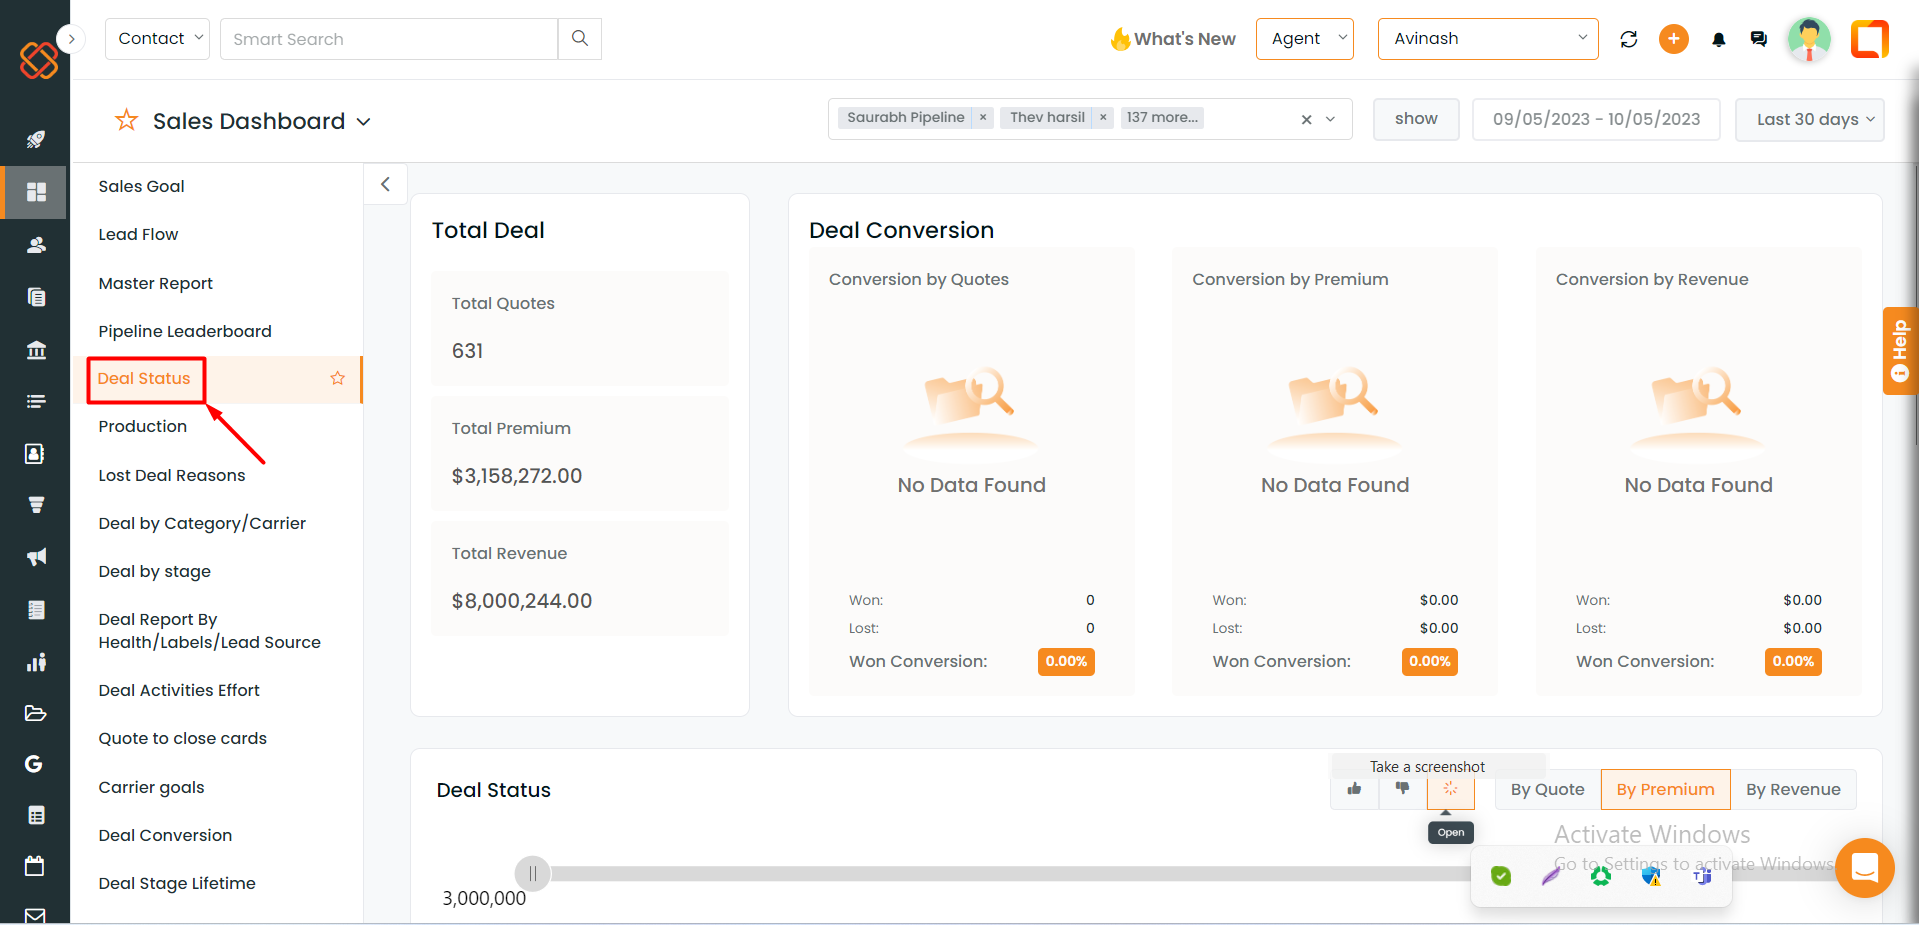
Deal Status:
Deal conversion, Total Deal & Deal Status have been grouped within “Deal Status” for better clarity.
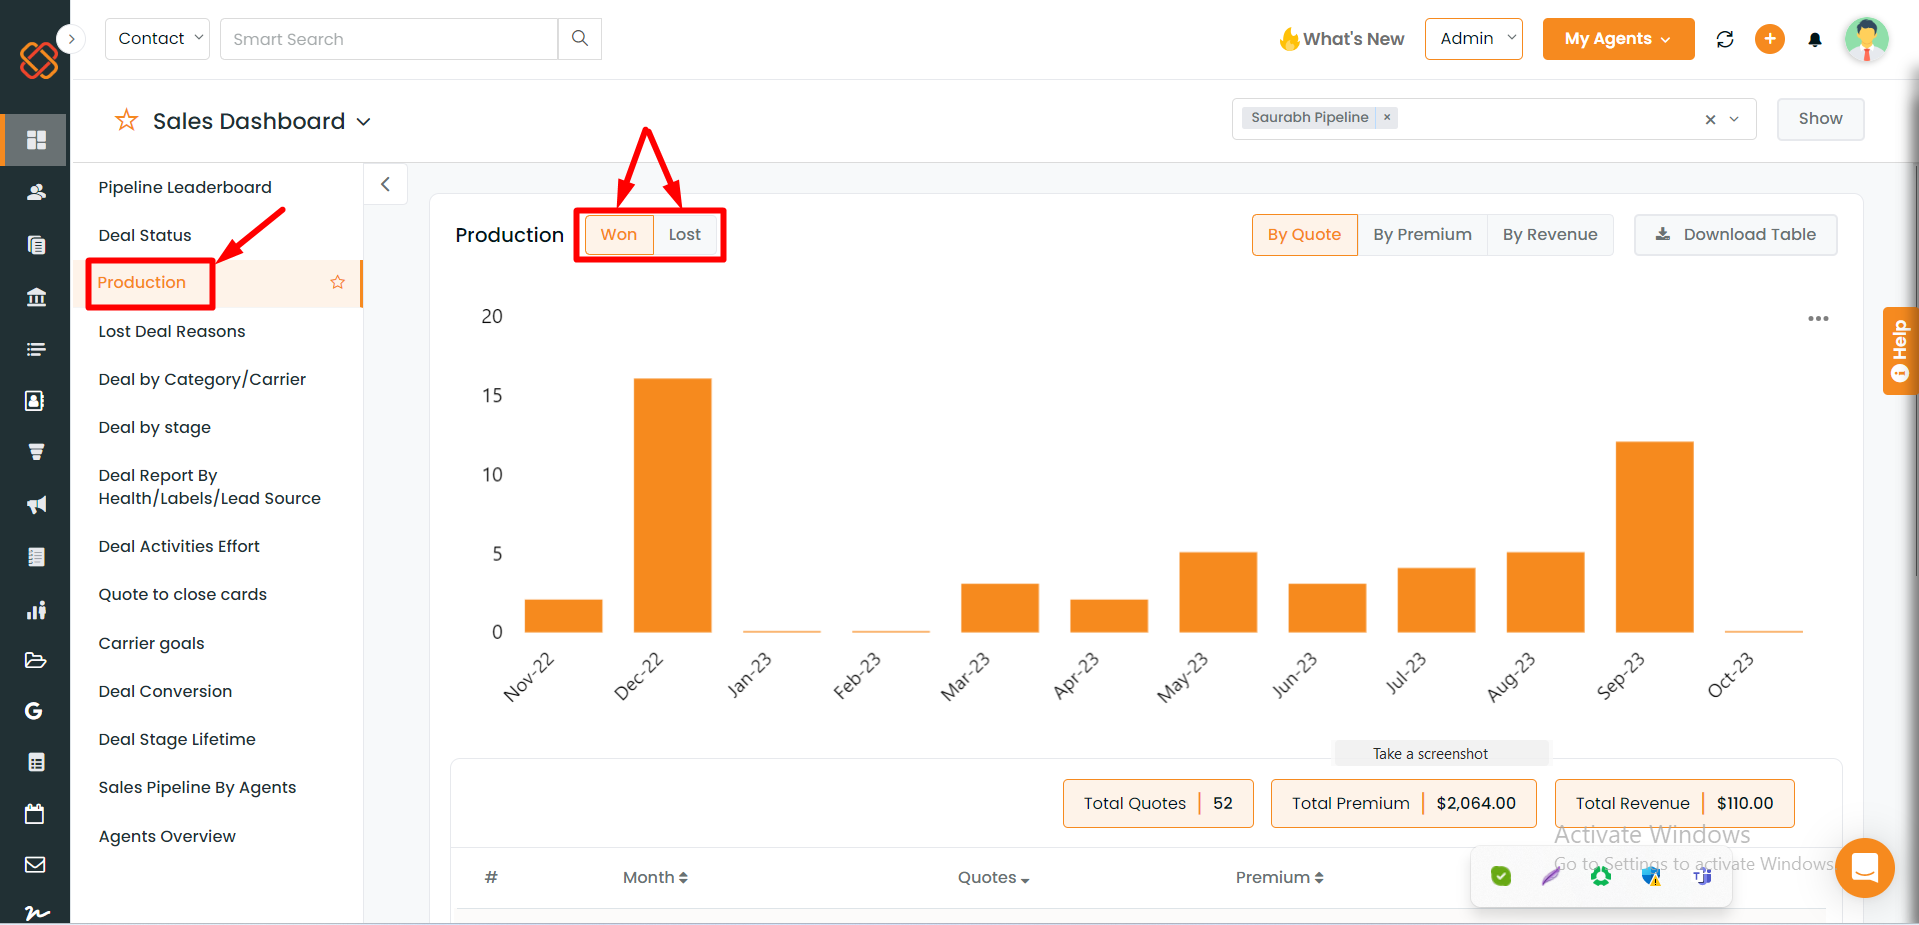
In the “Production” section, you can now easily track two key metrics: MonthlyProduction “Won’’ and Monthly Production “Lost.”
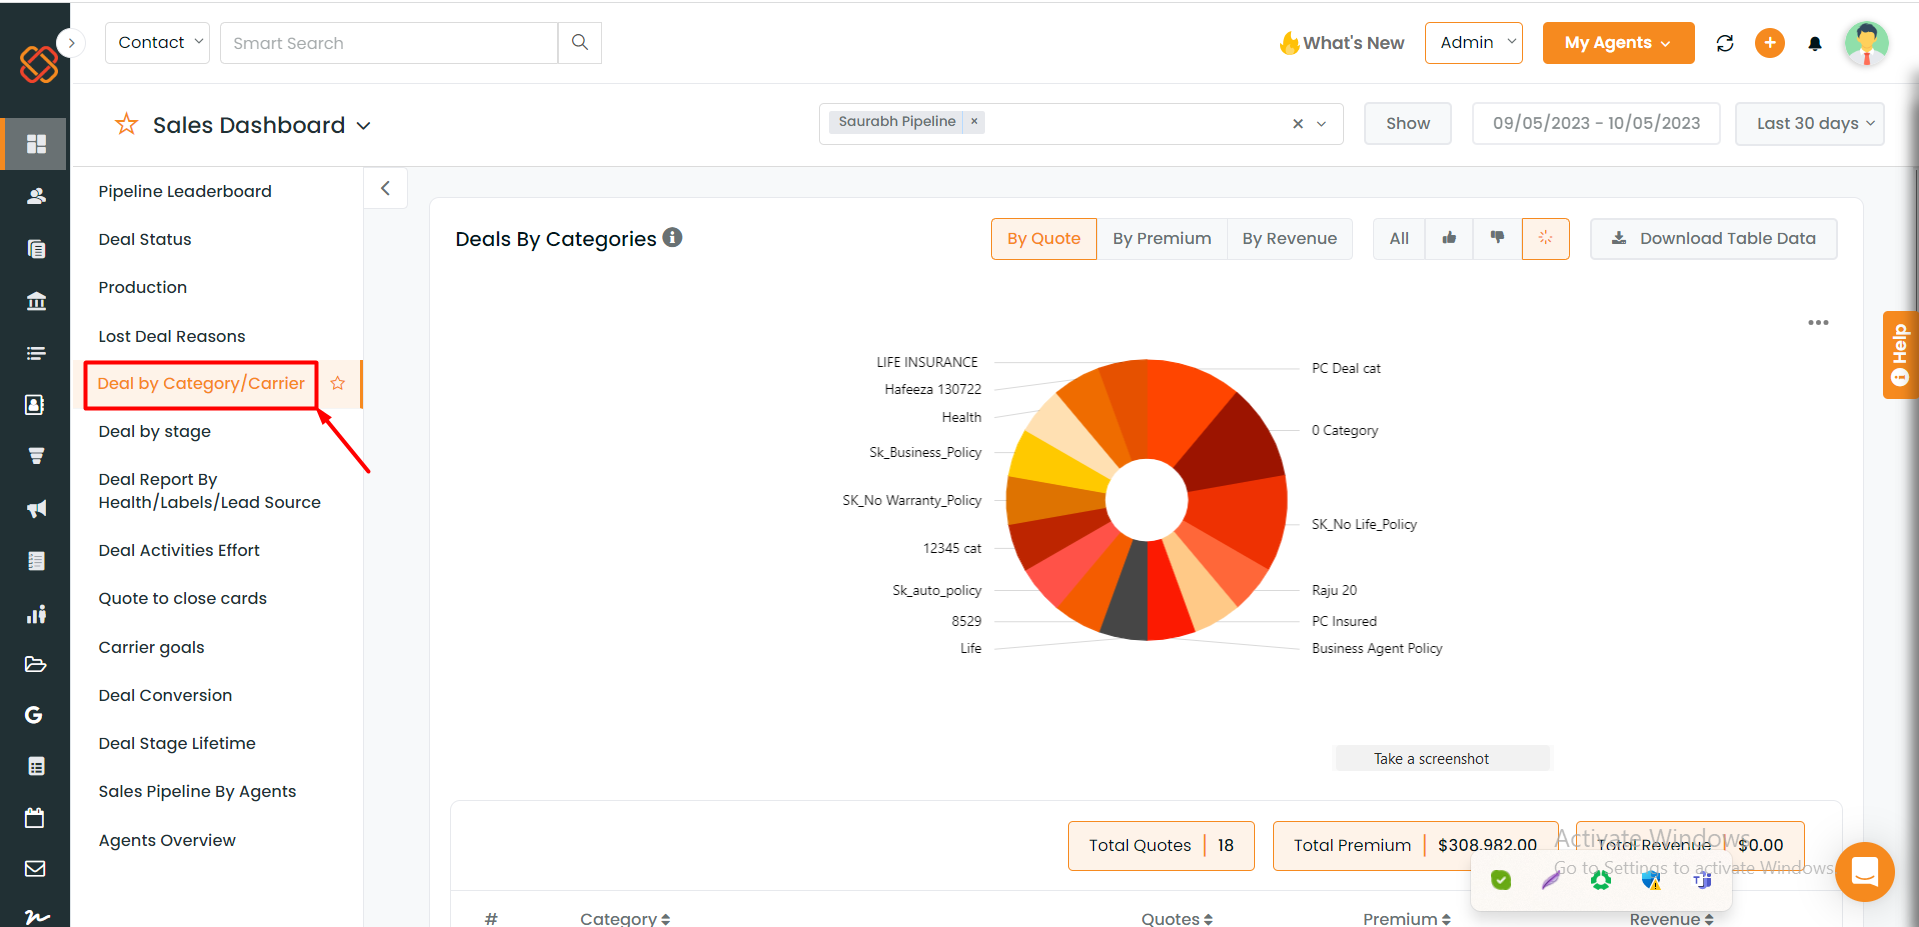
Deal by Category/ Carrier:
“Deal by Category” and “Carriers” are now combined and presented in a single view.
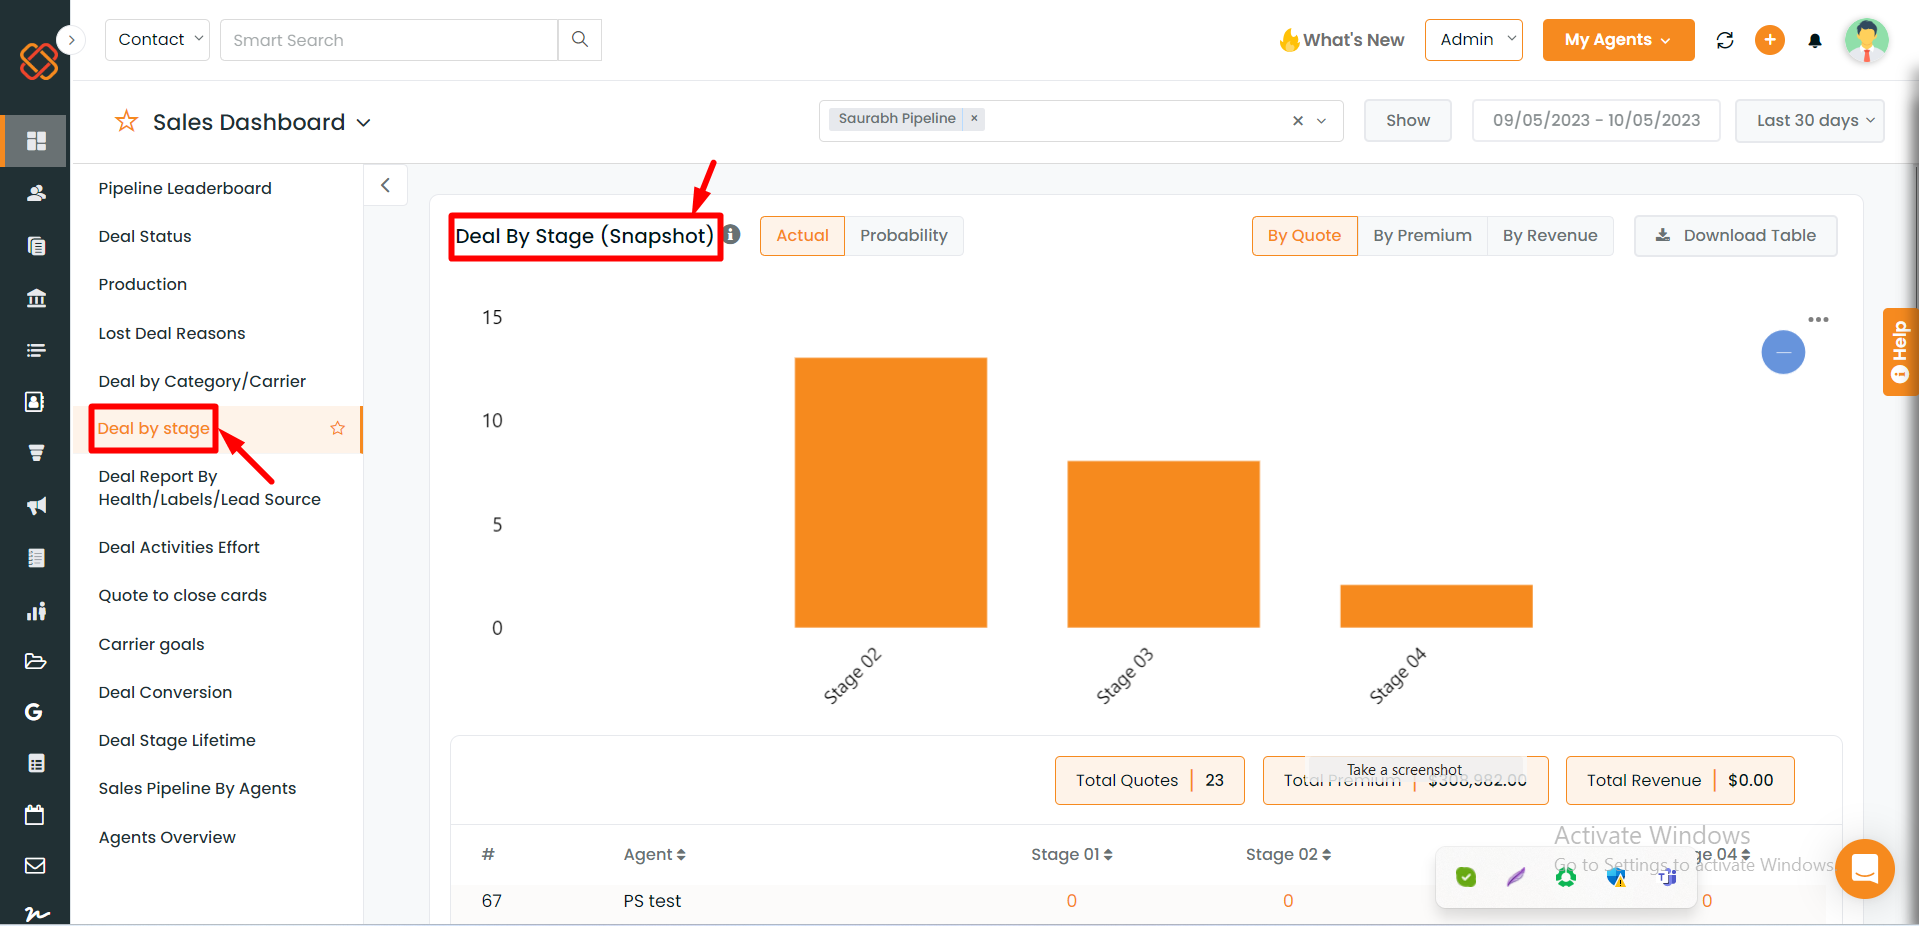
Deal by Stage:
We’ve now categorized a total of 3 stages within the “Deal by Stage” option: Deal by Stage (snapshot), Deal Conversion by Stage, and Deals Moved To Stages for better organization.
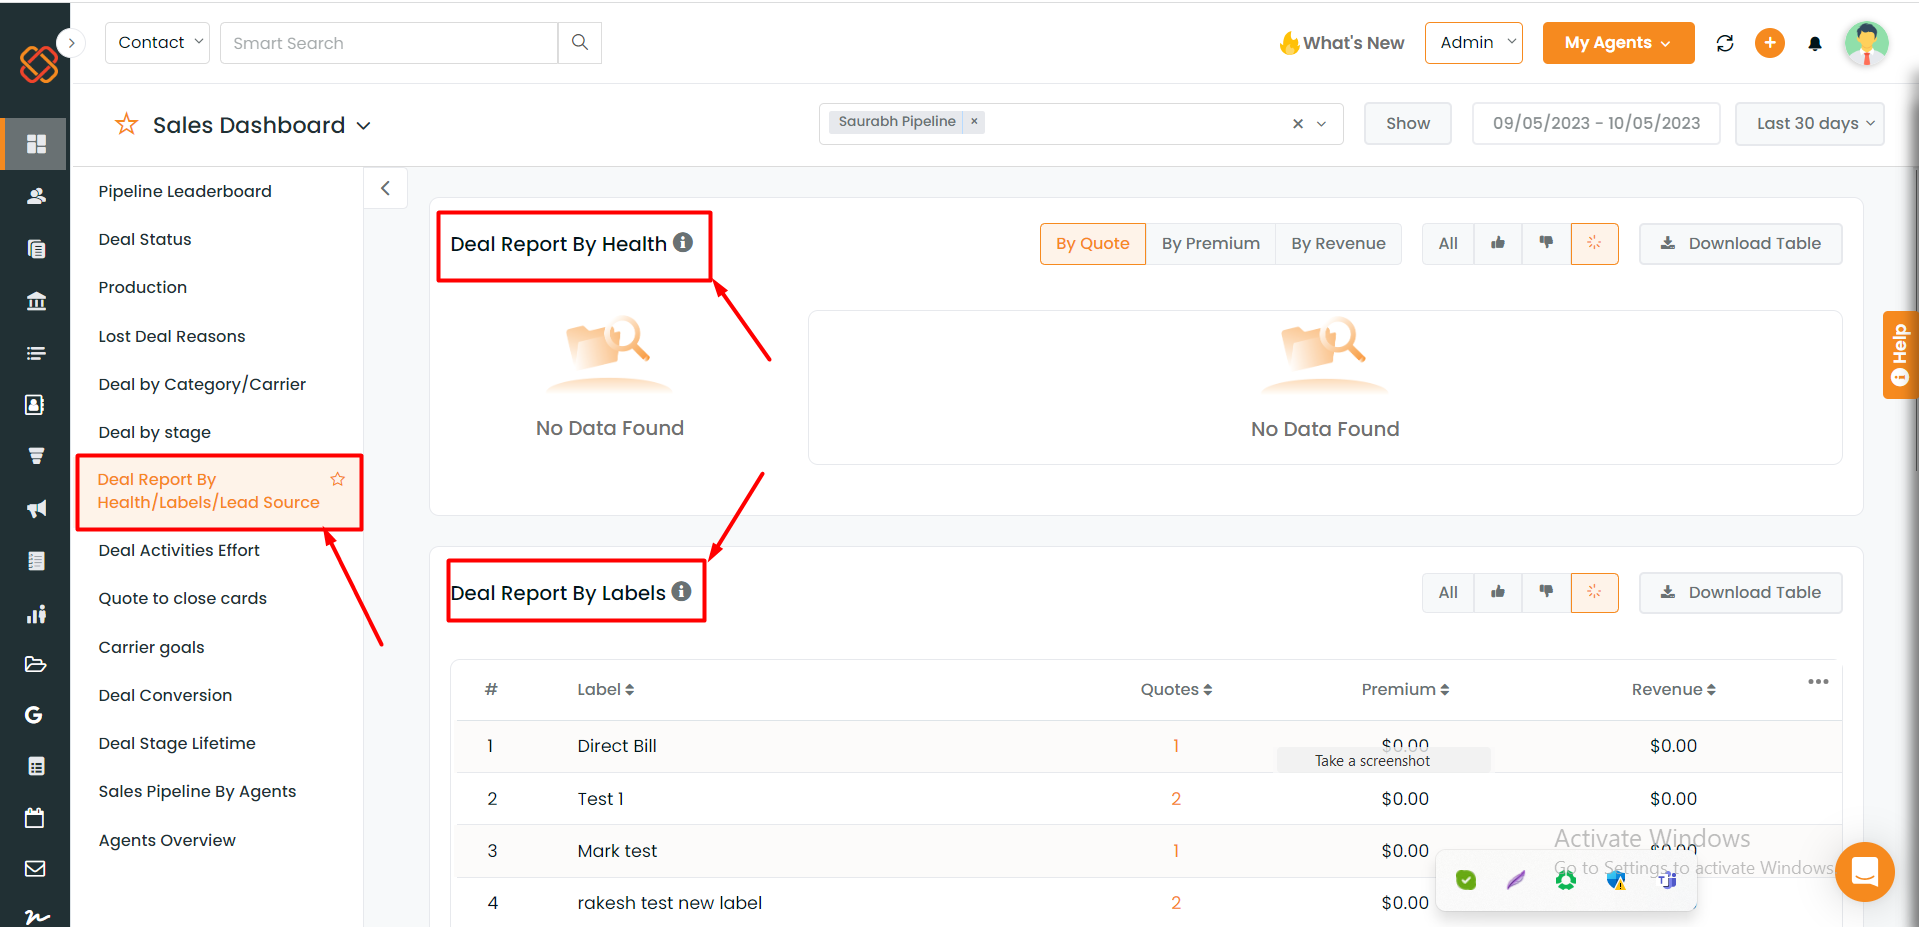
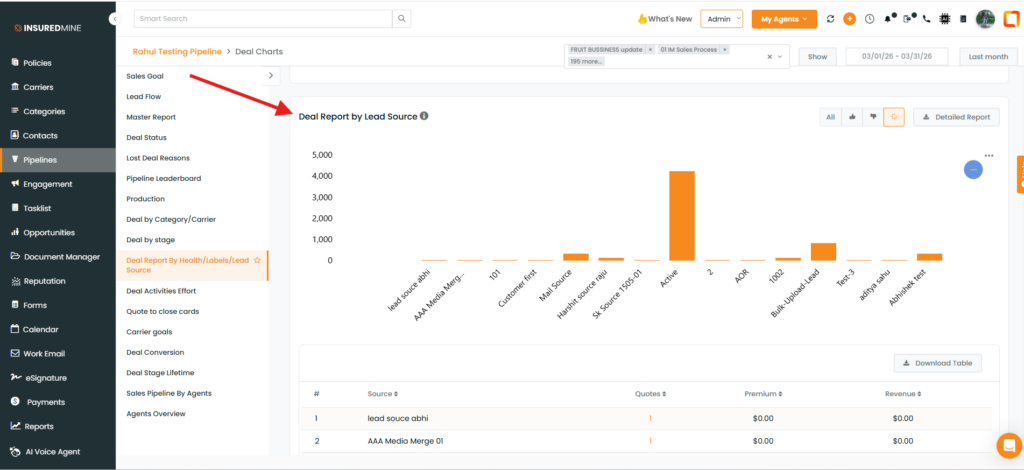
Deal Report By Health/ Labels Source:
Deal Report by Health, Label, and Lead Source have been combined into one section (Deal Report By Health/Label/ Lead Source) for better accessibility.