In this article, you will learn:
Create customized automated emails quickly for your clients to stay connected and deliver value on their terms.
How to create a Single Contact Drip (SCD)?
- To create email automation for a particular client, go to the Engagement located on the left-hand navigation panel followed by clicking on Single Contact Drip.
2. Click on Create button to create a workflow.


3. On the left-hand side you can add desired stages, followed by templates, tags to your email.

Enhancement: March 2021
Rearrange SCD stages by drag and drop. To view the enhancement click here.
4. After you are done adding the desired information, click on the Save button.

5. You will get a success notification.

6. Created Drip will be visible on the Single Contact Drip dashboard

Enhancement: April 2021
Assigning agents in Single Contact Drip
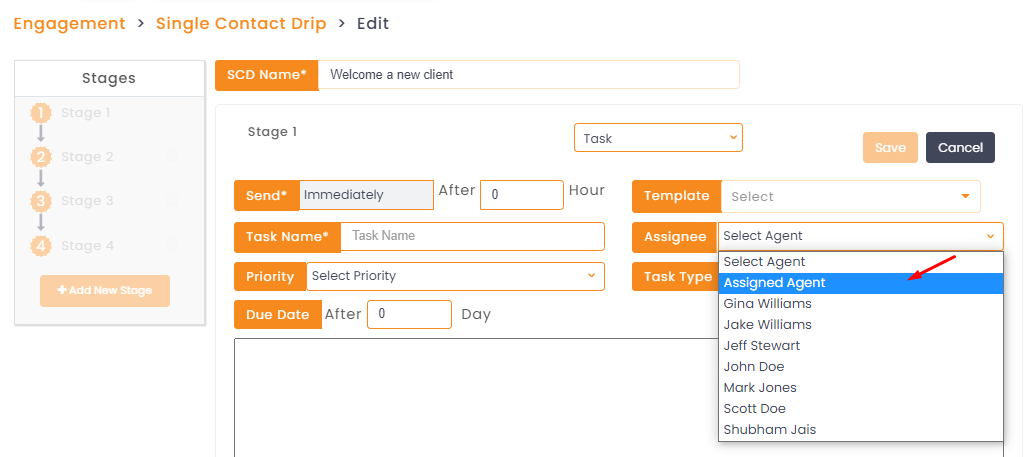
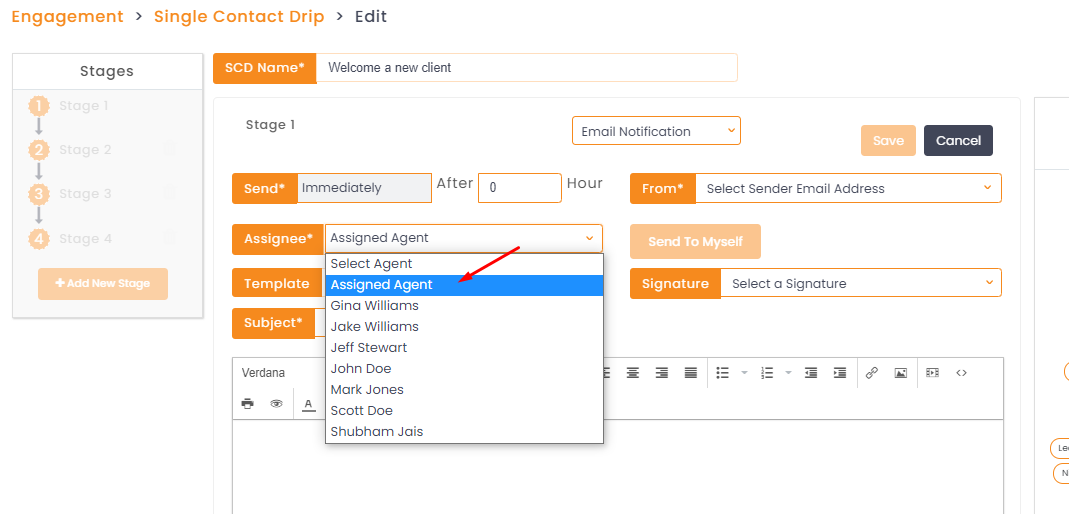
Now you can select a specific agent, to send the campaign from or to create a task for that particular agent. This feature is applicable for email, task, and email notification.
How to assign an agent while creating a Single Contact Drip?
In case of an email campaign:

In case of task:
In case of email notification:
Assign SCD to contact in Account 360
1. Choose a contact you would like to assign the workflow to from directory
2. Click on the contact name which will re-direct you to its account360
3. To the far right under Action, select the three dots and click on Assign Drip to start the workflow for the selected contact.
4. Select the required drip and click on Assign.
Please Note: You can also edit/delete/share a drip by clicking on the created drip campaign and then on DELETE/EDIT/SHARE

Assign SCD from a deal card
Assign SCD from Contacts
To assign SCD from contacts:
- Navigate to Contacts
- Select a contact and click on the 3 dots
- Select Assign Single Drip
- A panel will open to select the drip
- Selec the drip
Note: In case if it already assigned, you will get a message saying already assigned beside the drip.
- Once the drip is selected click on assign.
Enhancement: April 2021
Notification for Drip Campaign if already assigned
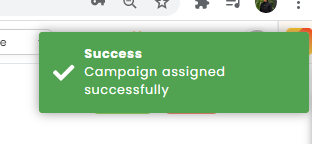
If you want to set a drip campaign that has already been assigned for a particular deal card, you will receive a notification saying it has been already assigned. You can still reassign the same drip for the deal card.
- Navigate to Pipeline Manager
- Click on the deal card for which you want to set a drip
- Open the deal card and navigate to the drip on the right side
- Click on add drip.
- Selec the drip, if that drip has been previously assigned you will see a message that says it has already been assigned
Enhancement: June 2020
Add Tasks as a stage
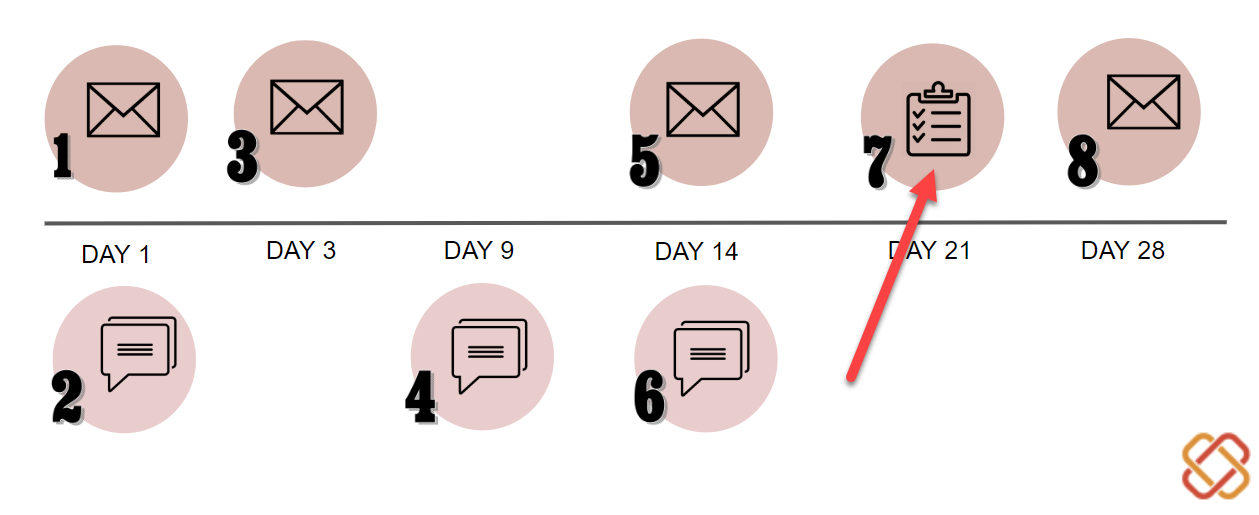
Use case: Multiple notifications for Single task can be sent to a specific agent before the deadline. An email alert for the task due date can be sent 15 days in advance, a week in advance, an hour in advance making it easier for the agent to accomplish the task in time.
The steps to create the drip campaign remain the same, now you can select a task from the message type dropdown. When you select the tasks type campaign, enter the Task name, assignee agents’ names, and select your priority.

Note: Task campaigns can be triggered Immediately or After the task is created. The day’s input must be in increasing order for the next rolling stage.
It is also possible to set triggers for the send field as immediately at any stage.
Enhancement: August 2020
Send time triggers
Send time really does matter when it comes to planning and executing your email campaigns. The KPIs like open rate, engagement rate, click-throughs show better results if the email campaign is sent at the right time.
(A) Send Trigger for Immediate after [xx] hours
You can now set the trigger for Immediately running the campaign after specific number of hours. While creating single contact drip, in the Send section, select Immediate and fill the number of hours in After.

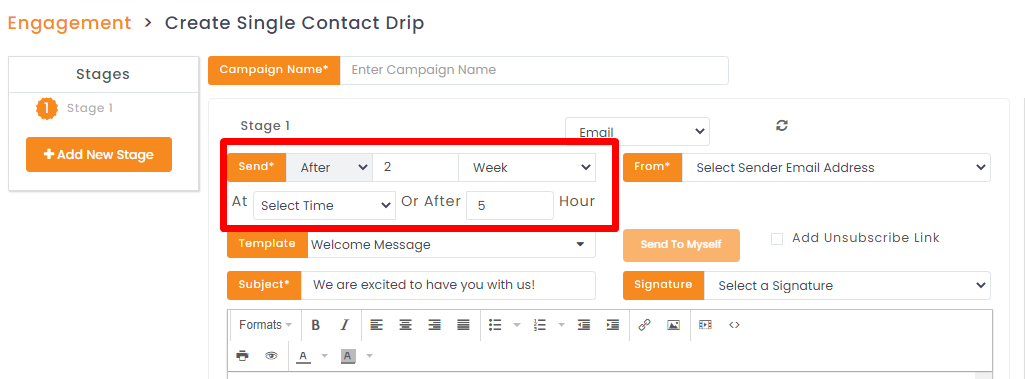
(B) Send trigger for After – [xx] Days/Weeks/Months at Specific time or after hours
For the first stage or the subsequent stages, you can opt to set trigger for sending the email/ message sequence after some days, weeks or even months. Earlier the messages were triggered at 10 am, now you can schedule hours as per your preference. You can select the exact time or enter the number of hours after which you need the campaign out.
Analytics
You can view details of each campaign, its current status, email count and other key indices in Analytics for the current day, week and month.
To view the analytics follow the steps below:
- Navigate to Engagements
- Click on Analytics in the Single Contact Drip segment.
3. Select from Today /Week / Month/ Customat the top left as shown above, for a detailed list of respective data.
You can click Stop All under Actions for deterring the campaign run.
Advance your skills – learn how SCD triggers work


