To create multiple Pipelines – make sure you login as an admin.
Create a pipeline for sales or service
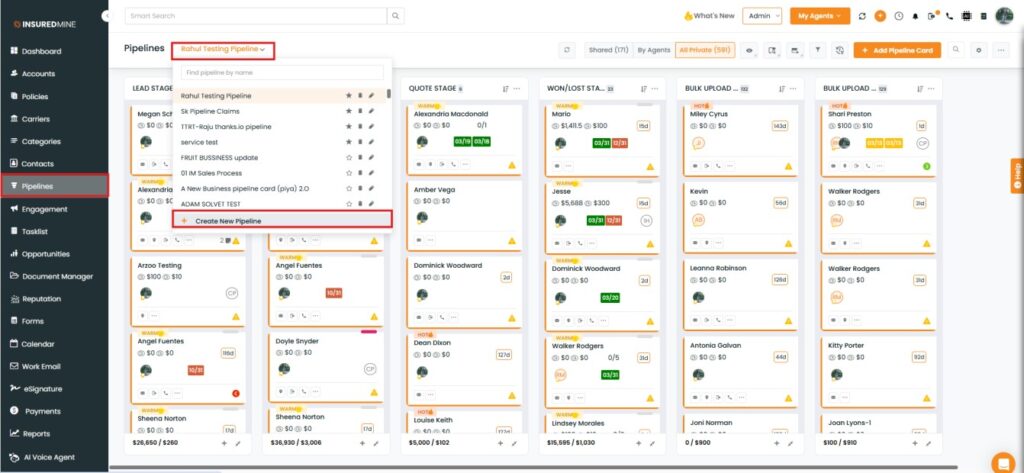
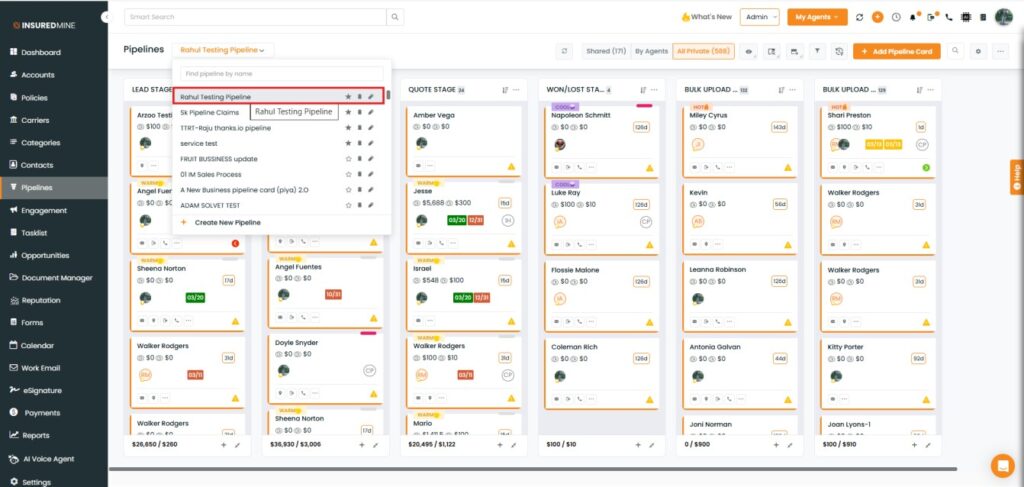
Log in to the Admin account and go to the Pipelines from the navigation bar.
Click on the Pipelinedropdown button and then click on Create New Pipeline mentioned at the top in the drop-down.
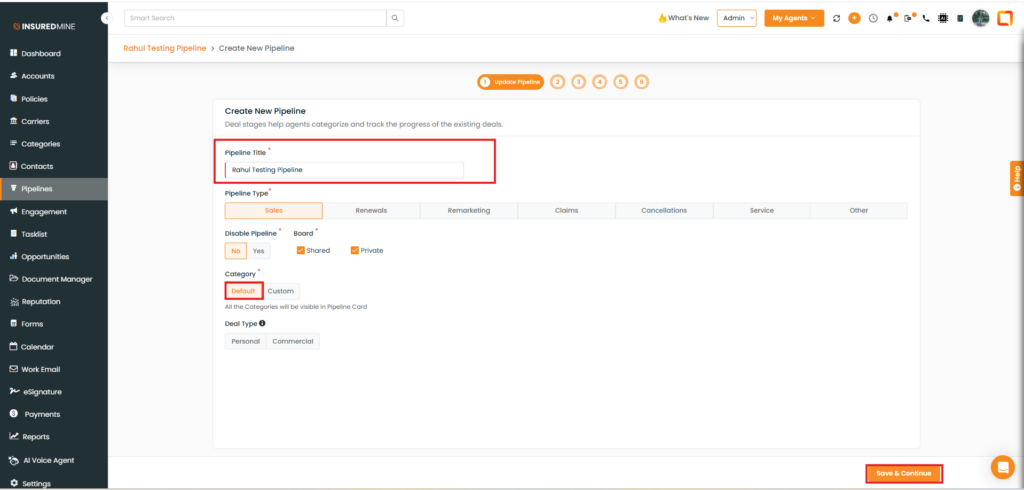
As shown below, enter a preferred Pipeline Title.
Select the preferred Category of the deal board that you would like to create.
Once done, click to save and continue.
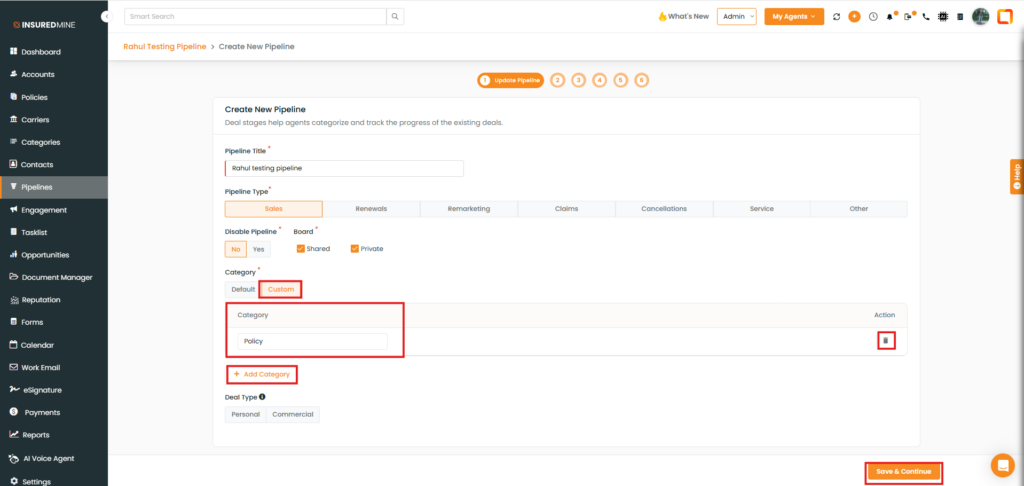
In case of Custom, you need to enter the custom category of your choice. Once done, click to save and continue.
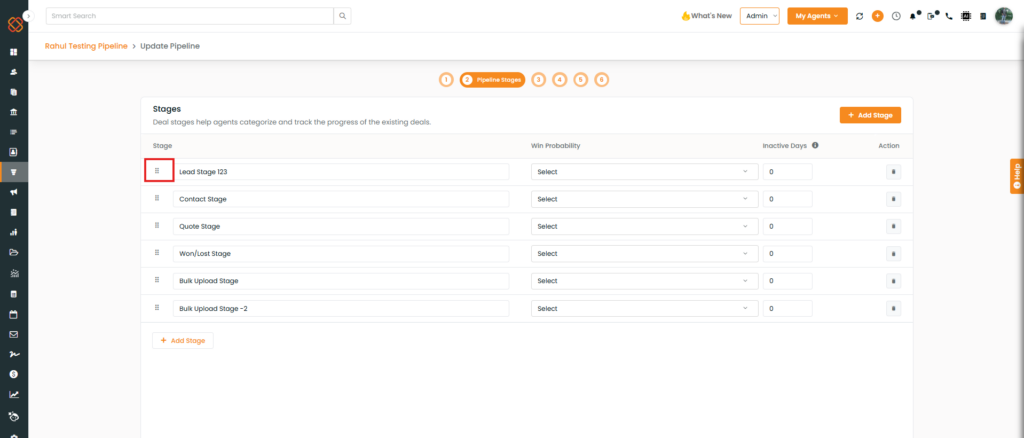
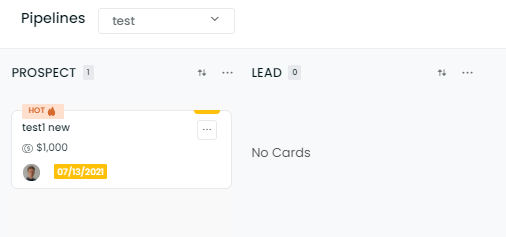
Add stages for the pipeline according to your business requirements.
As shown below, from that icon, you can also drag to reposition the stages.
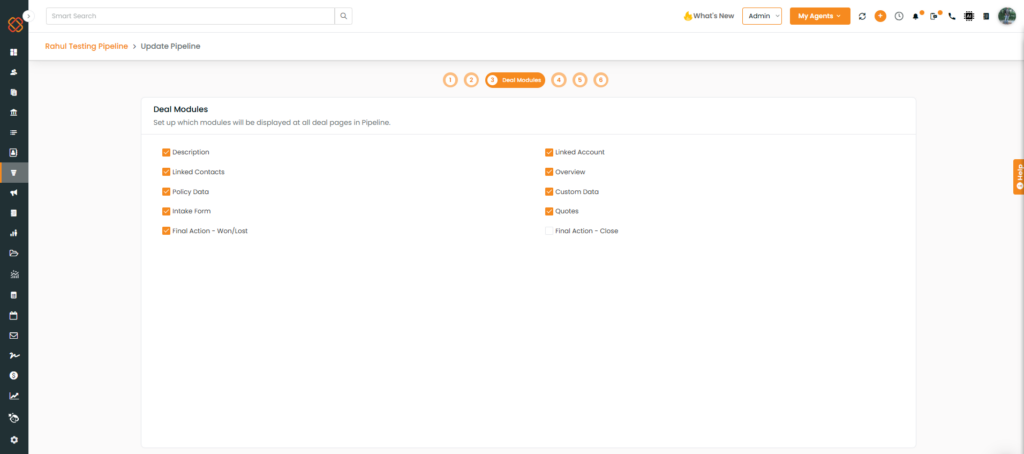
You can manage all the modules on which the agents will work for a specific pipeline.
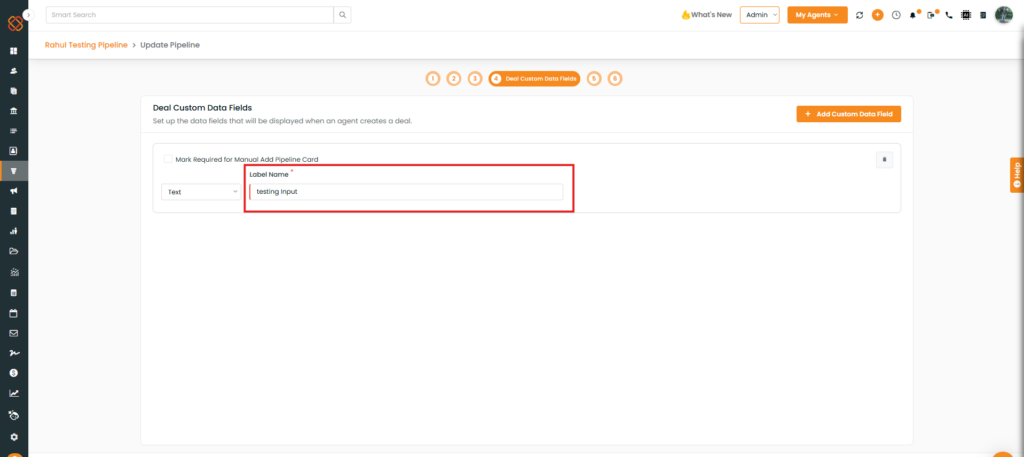
You can add extra custom fields for all deal cards belonging to the same pipeline.
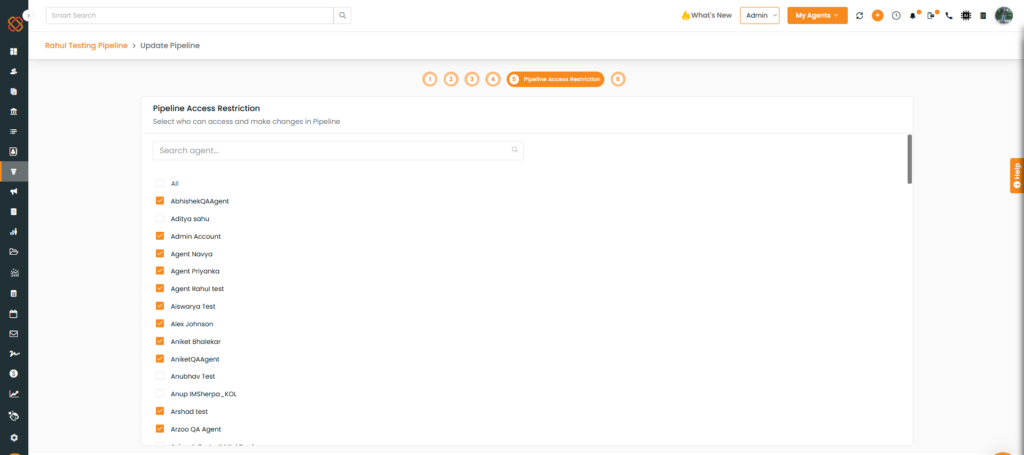
You can restrict agents as per your choice. Select or deselect the agents of your choice.
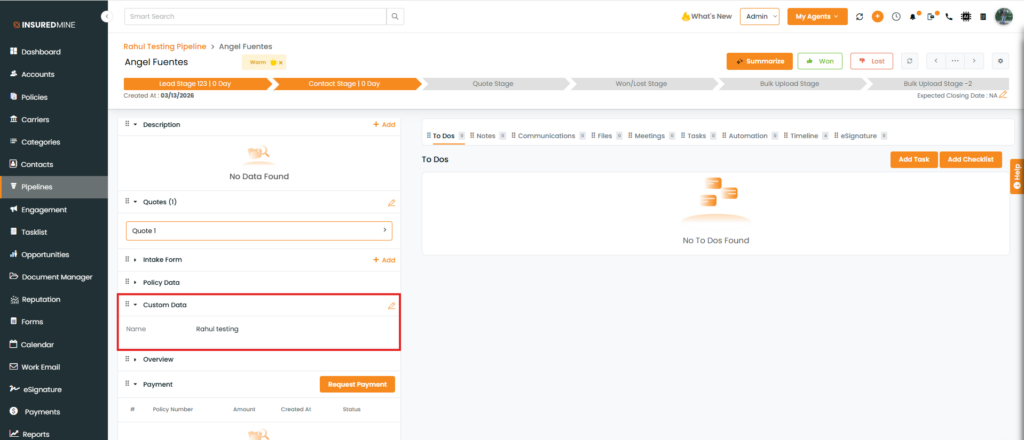
NOTE: Custom added fields will show up in the deal card under the Custom Data section
Once you’ve set the new pipeline, all users can access the new pipeline. You can switch to your required pipeline by clicking on the name of the pipeline from the drop-down menu.